
Ready to learn the basics of candle making? If you want to get started on being self-sufficient, candle-making should be on your list. Stop buying candles and learn how to make them!
RELATED: Stress Relieving Lavender Candles You Can Make At Home
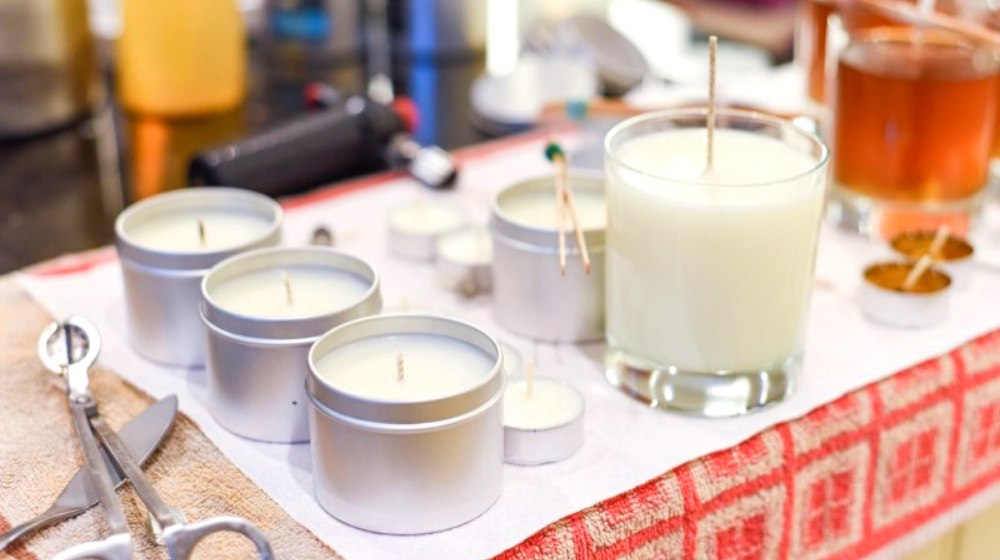
Candle Making | Create a Scented Candle In 8 Easy Steps
The Art of Candle Making
You’ve read a million articles on how to make the best homemade scented candles, and you still don’t understand the process?
Here is a straightforward tutorial filled with tips and tricks to get you a homemade scented soy candle worthy of a gift! You won’t be sorry when you discover the simplicity of candle-making.
It takes a bit of an initial investment, but if you’re looking for a fun hobby to pass the time, this is it! Check out all of our secrets on candle making by following this quick and easy tutorial!
Supplies You’ll Need:
- For Pillar Candles: Aluminum molds are used to make pillar candles as well as wax tarts.
- Molding Clay: Found at Jo-Ann’s Fabric.
- For Container/Jar Candles: You can use recycled wine bottles if you have the knowledge of how to cut them but takes some practice and patience to get them right. I suggest starting with an old container of salsa or a mason jar both can be purchased at any Target or Jo Anne Fabrics for mason jars.
- Wick Bars: You can find these online or you can use pencils and wrap the wick around the pencil and wrap the wick around that.
- Wick Tabs: You can find these at Jo-Ann’s Fabric.
- Hot Glue Gun: You can find these at Jo-Ann’s Fabric.
- Scale: You need a kitchen scale to weigh out your soy wax and fragrance oil.
- Small Pan: This will be used along with the aluminum pour pot for the double boiler method.
- Thermometer: Find this in any Target or Supermarket.
- Aluminum Pour Pot: This is what you melt your wax in. It can be found in any Jo-Ann’s Fabric.
- Soy Wax: You can find fantastic all-natural pillar and soy wax online. The brand I use for my online candles shop is eco soya cb-excell and the eco soya pillar soy wax. You can go to any Jo-Ann’s Fabric, Michaels, etc., and find soy wax there as well.
- Fragrance Oil: There is a big argument over whether or not to use fragrance oil vs. essential oils. In my opinion, fragrance oils are specifically designed to be safe for use in candles while using essential oils takes away from the world’s supply and can cause headaches when burned.
- Duct Tape
- Wick: There are many types of wicks, my recommendation, and the only wick I will use at Farr Out Scents is hemp wick dipped in beeswax. It is sustainable and clean-burning. You can get this on an Etsy shop.
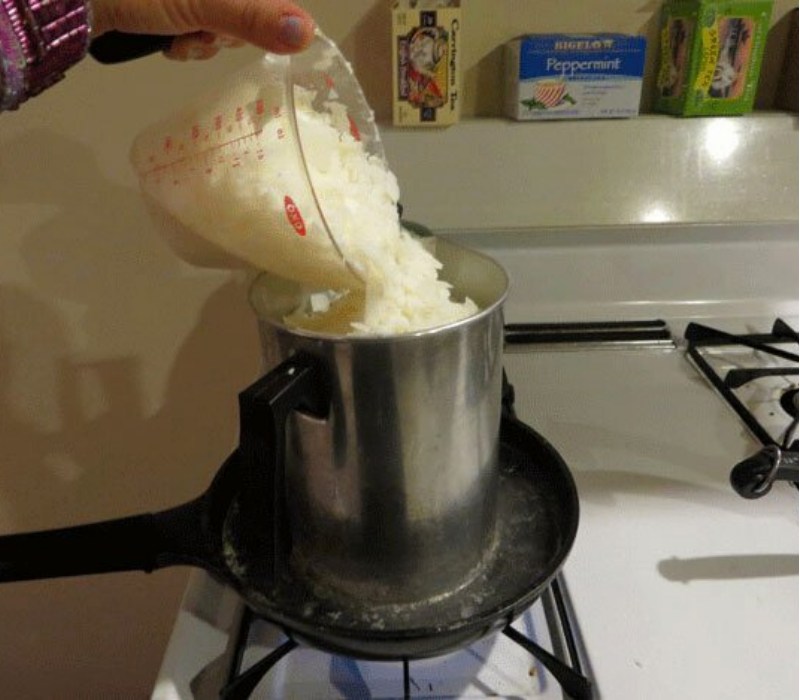
Step 1: Weigh Out Your Soy Wax
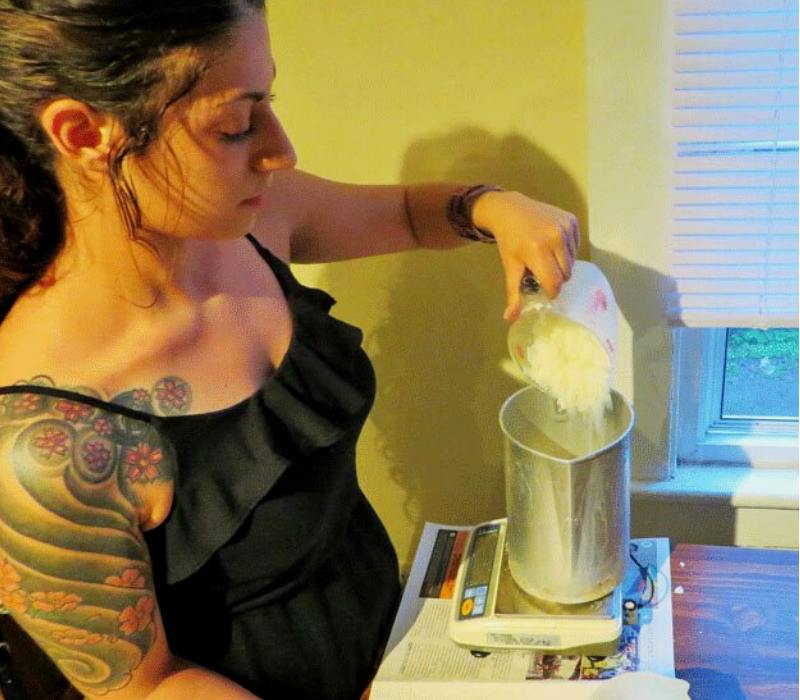
Weigh out your soy wax using your kitchen scale and aluminum pour pot. Make sure you put the pour pot on the scale and zero it before pouring soy wax in. The equation for ounces to grams is 1oz=28g.
Step 2: Weigh Out Your Fragrance Oil
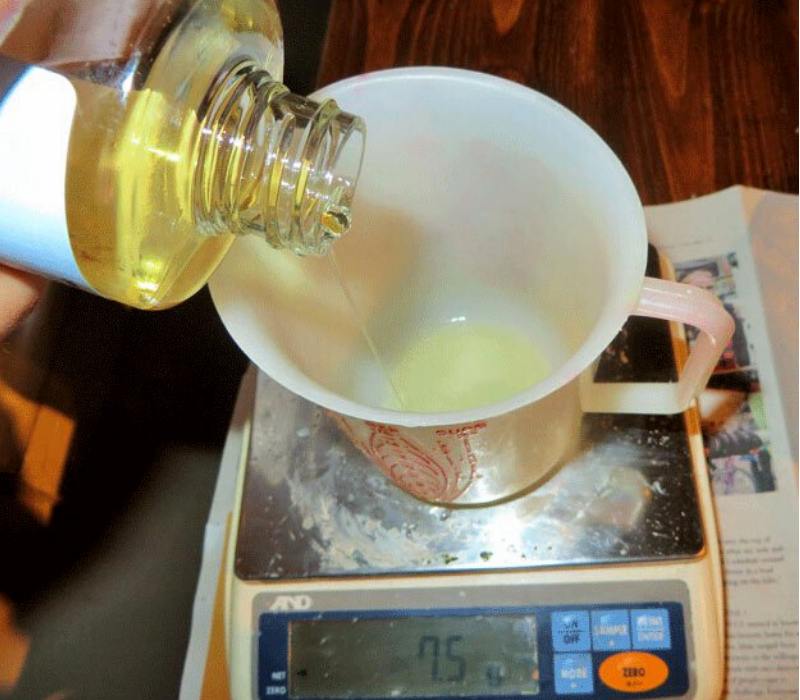
Weigh out your fragrance oil. You will want to do 12% of your total wax amount used for a strong scent throw and 9% for a milder scent throw.
Step 3: Melt Your Wax
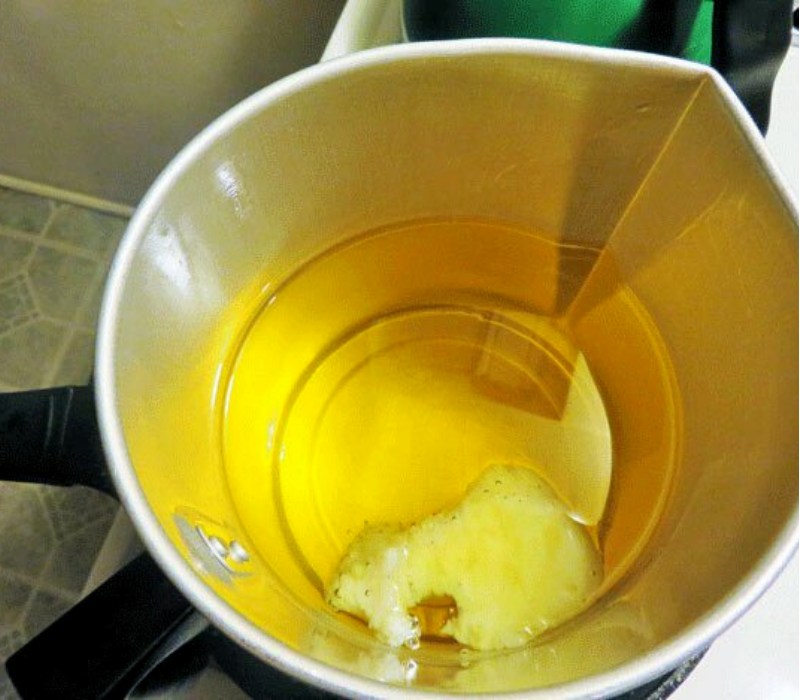
Melt your wax using a double boiler method (this is when you use a small pan). Melt your soy wax to 180 degrees Fahrenheit and then turn off the burner right away to start the cooling process before you add your fragrance oil.
RELATED: DIY Prism Mason Jar Candle
Step 4: Add the Fragrance Oil
Let your soy wax cool slightly for about 60 seconds and then pour in your weighed fragrance oil.
Step 5: Stir in the Fragrance Oil
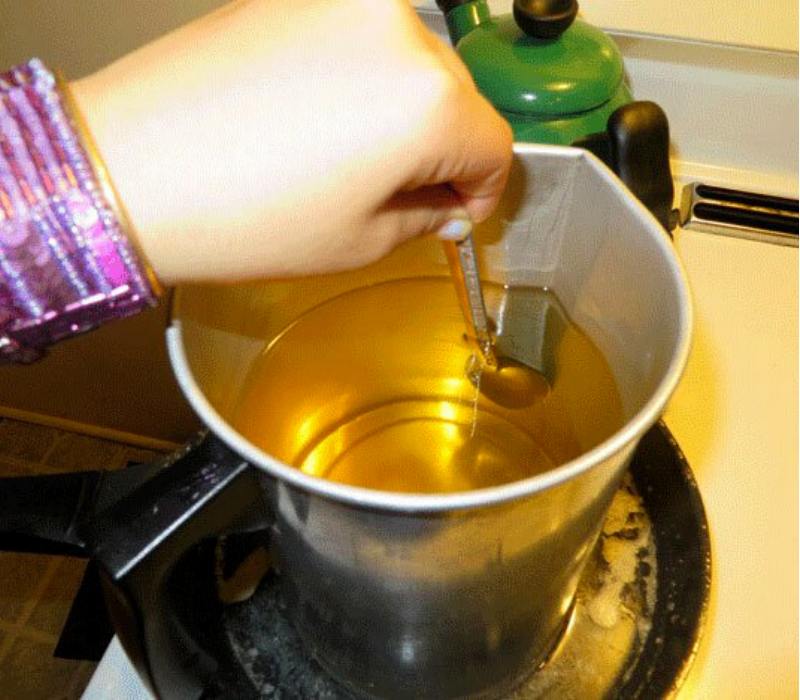
Stir in the fragrance oil using a metal spoon for 2 minutes- this is important because the fragrance oil needs to be evenly displaced in your wax to make sure your oil doesn’t pool at the top of your candle once cooled and poured.
Step 6: Place the Molder in the Oven
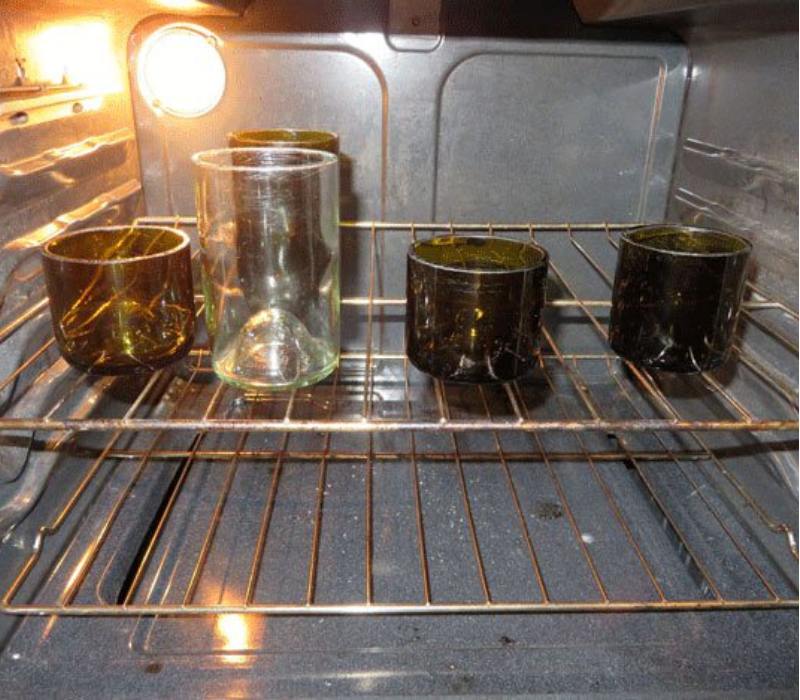
At this point, you want to turn on your oven to 200 degrees Fahrenheit and put your glass containers or metal molds (in the picture shown we used recycled wine bottles that have been cut and sanded) in the oven while your wax cools.
Your container and wax should be as close in temperature as possible to get a smooth candle.
Step 7: Add the Wicks
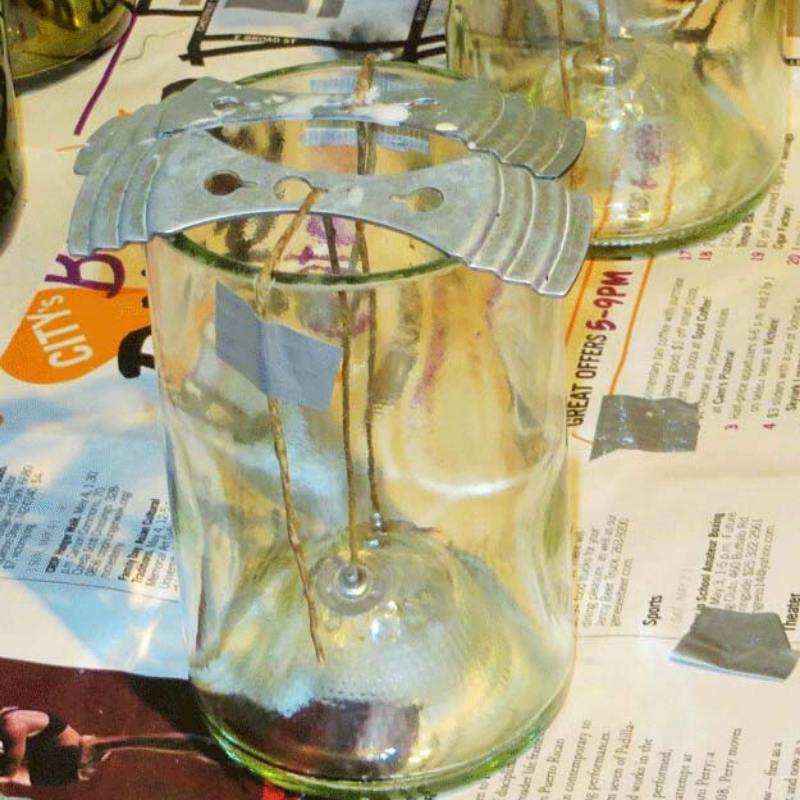
When your wax has cooled to 110-135 degrees Fahrenheit take each container out separately and string the hemp wick through the wick tab and using the hot glue to attach the wick tab to the container.
You can then use your wick bar or pencil/pen hold to secure the wick in place and use duck tape to hold the wick in place. Make sure to center wicks perfectly I use a wooden ruler to make sure that it is perfect.
Step 8: Begin Pouring
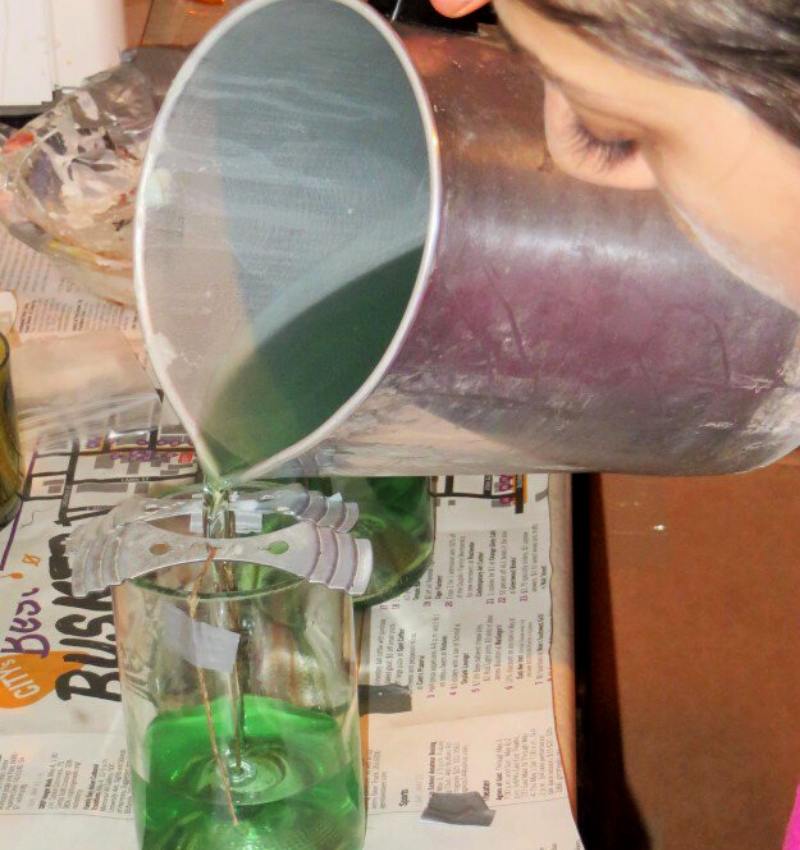
Time to begin pouring! You will want to pour very slowly so that your candle doesn’t have a caved-in “hole” on top which affects the overall look.
Make sure to leave an inch or so at the top of the candle and you need to let it cool for two days before it is ready to be burned. You can also add a personal label using your own printer and sticker paper.
Watch this video by Knife n Fork for another cool DIY candle:
Candle-making is really a fun and therapeutic DIY project anyone should try and make! It’s not really as hard as you think. You can add dried flowers and customize the color and scent. How fun is that?
Fill your house with a homemade candle this summer. Have fun and happy candle-making!
Have you tried candle-making before? Share your experience with us in the comments section below!
Up Next:
- 19 Creative Thanksgiving Decorations You’ll Wish You’d Thought Of First
- Candle Making Supplies Guide
- 10 Terrace Farming Around The World | Types Of Farming
Follow us on Facebook, Instagram, Pinterest, and Twitter!Editor’s Note – This post was originally published on August 21, 2019, and has been updated for quality and relevancy.
