

At a Glance: Summer Pantry Stocking for Homesteaders
- Freeze produce first to stop spoilage, then can and dehydrate based on your own schedule.
- Use only USDA-tested recipes for canning; never modify ratios or swap ingredients.
- Audit your dry goods and containers before a single jar is filled.
It’s mid-July. You hauled home a half-bushel of peak tomatoes. You had plans, but it’s day four now. Fruit flies are circling, and the water-bath canner is still in the box. Every time you look at that basket, a little knot of guilt tightens in your chest.
Most beginner guides skip straight to canning, which means you’re staring down a full day at a boiling stove before you’ve eaten breakfast. This guide fixes that. We’ll walk through summer pantry stocking the right way. Dry goods first, freezer second, canner third. You’ll preserve more and end the summer with a full pantry of goods.
Safety First: What You Need to Know Before You Start
Risk Classification: Tier 2 (Medium)
Water-bath canning involves boiling water, glass jars, and food safety rules that genuinely matter. Done correctly, it’s a straightforward kitchen skill. Done incorrectly, it produces failed seals or, in rare worst-case scenarios, unsafe food.
PPE and Safety Setup:
- Canning mitts or thick oven mitts, not thin kitchen towels
- A jar lifter (not tongs; tongs tip jars and cause burns)
- A canning funnel to keep jar rims clean
- Closed-toe shoes, because a dropped hot jar is a real hazard
- A clean, uncluttered workspace near the canner
Before you fill a single jar: Read your recipe all the way through. Gather required tools and inspect every jar rim for chips. A chipped rim will not seal, and you won’t know it until 24 hours later.
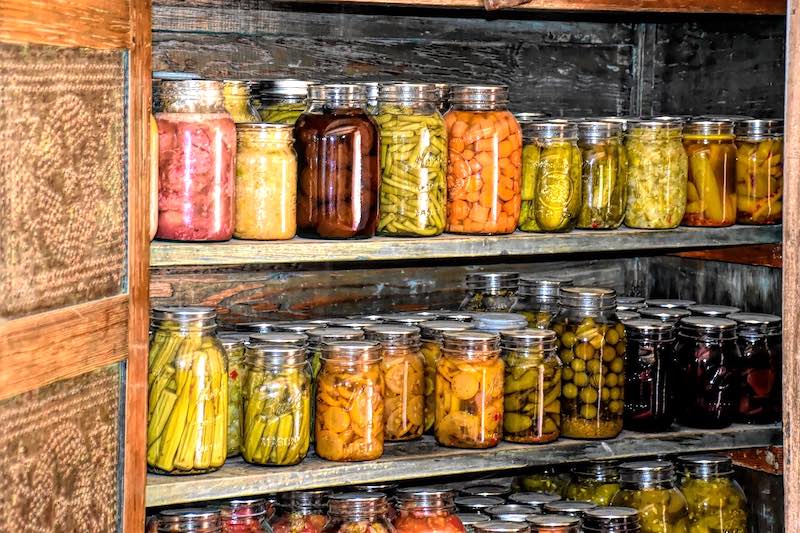
Why You Need a Summer Pantry Stocking Routine
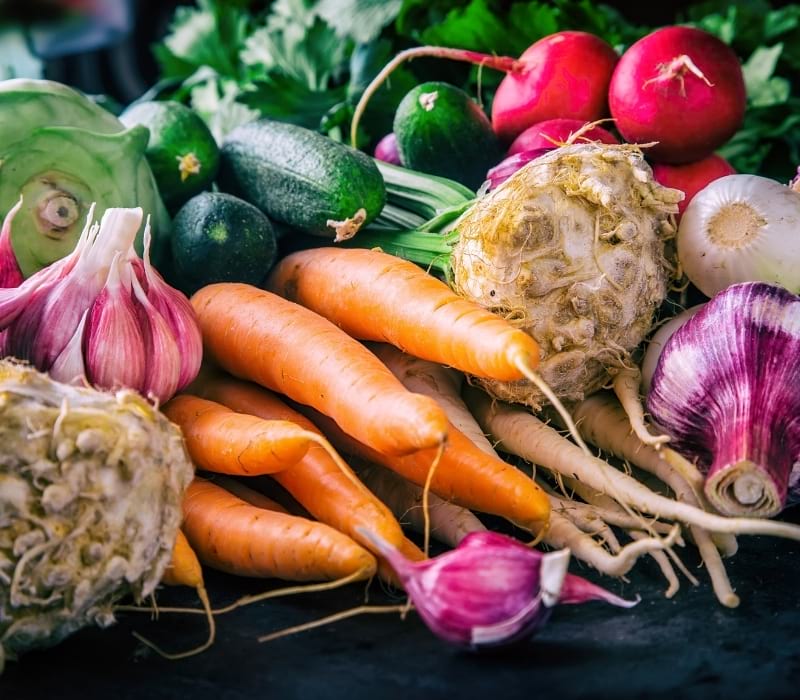
Summer is the single highest-yield preservation window of the year. Tomatoes, green beans, zucchini, peaches, cucumbers all peak within a few weeks of each other and expire fast.
Without a routine, you’ll end up with rotten produce or trying to do everything at once and eventually get burnt out.
A stocking routine gives you a sequence and a pace to end the season with a full shelf and enough energy left to actually cook from it.
Essential Tools for Summer Pantry Stocking
For Freezing (Start Here):
- Freezer-safe quart and gallon bags, or rigid freezer containers
- A large stockpot for blanching
- A colander and a bowl of ice water
- A permanent marker for labeling
For Water-Bath Canning (Add When Ready):
- A water-bath canning pot with a rack (the rack keeps jars off the bottom and is not optional)
- Mason jars, wide-mouth pint and quart (Ball or Kerr)
- New lids every time; bands can be reused, but lids cannot
- A jar lifter
- A canning funnel
- A bubble remover and headspace tool (often sold as a kit for under $15)
- A clean cloth for wiping jar rims
I got my first ever canning equipment from here:

- ❤【Complete Canning Kit for Beginners】: This full canning set includes a 27.5 qt stainless steel canning pot with rack and lid…
- ❤【Multifunctional canner pot】: This professional-grade water bath canning pot is perfect for waterbath canning, featuring a…
- ❤【Rust-Resistant and Food-Safe】: Made of food-grade stainless steel, this water bath canner resists corrosion, discoloration and…
For Dehydrating (Add in Year Two):
- A food dehydrator with an adjustable temperature dial, not just an on/off switch
Minimum Viable Quality Notes:
- A dollar-store pair of tongs is not a jar lifter. Tongs tip jars and cause serious burns. A proper lifter grips the neck of the jar, costs $8 to $12, and lasts decades.
- The canning rack is non-negotiable. Without it, jars contact the pot bottom directly and can crack.
- Use Ball or Kerr lids only, not commercial food jar lids. Commercial lids are single-use and not engineered for water-bath processing.
Building the Dry Goods Foundation for Your Summer Pantry
Before one jar is filled and before one bag of frozen corn hits your freezer, do this step.
Taking a Pre-Summer Pantry Inventory
Pull everything out. Write it down or photograph your shelves. You’re looking for three things:
- What dry goods are running low? (Flour, rice, beans, oats, salt, sugar)
- What containers and jars do you already own?
- What’s expired and needs to go?
Prioritize flour, beans, rice, and oats as these are your grid-independent baseline. A shelf full of jam with no flour means you cannot bake bread when the grocery run gets delated. Start there. The goal is a 3-month rotation of staples you actually use and replace.
Choosing the Right Food Storage Containers
For dry goods in long-term storage (1 to 5 years): mylar bags with oxygen absorbers inside food-grade buckets. For medium-term rotation (6 to 18 months): sealed food-grade buckets or large glass mason jars. For everyday staples on the counter: any airtight container with a proper seal.
For frozen goods, label everything with the contents and the date. First in, first out. Your freezer is not an archive.
✅ STOP POINT: CHECK BEFORE MOVING ON
✔ Pantry inventory complete?
✔ Container supply adequate for this season’s expected harvest?
✔ Expired goods discarded?
✔ All jar rims inspected for chips?
Do not start processing produce until you have somewhere to put it.
Easy Methods for Preserving Your Summer Harvest
Follow the Four Preservation Methods Protocol: freeze first, then can, then dehydrate. Fermentation comes later, once you’re comfortable with the method. This is the sequence that prevents wasted food and burned-out homesteaders.
How to Freeze Summer Vegetables and Fruits
Freezing is your first line of defense. It stops the spoilage clock right away, asks almost nothing of you on Day One, and buys you days (sometimes a whole week) to can or dehydrate at a pace that doesn’t break you.
Blanching Vegetables Before Freezing Is Required. Not Optional.
Blanching halts the enzymes that turn frozen vegetables mushy and gray. Skip it and you’ll open a bag of soft, colorless mush in February.
Step 1: Bring a large pot of water to a full, rolling boil.
Step 2: Fill a large bowl with cold water and plenty of ice. You need enough ice to actually stop the cooking, not just cool it down.
Step 3: Drop clean, cut vegetables into the boiling water for the correct blanch time:
- Green beans: 3 minutes
- Corn, cut from the cob: 4 minutes
- Zucchini slices: 3 minutes
- Broccoli florets: 3 minutes
- Tomatoes: 30 to 60 seconds to loosen skins, then peel for sauce packs
Step 4: Transfer immediately to the ice bath. Leave them until fully cool. Don’t rush this part.
Step 5: Drain and pat dry. Spread in a single layer on a sheet pan and freeze for 1 to 2 hours before bagging. This one step is what keeps your beans from turning into a frozen brick.
Step 6: Bag in freezer-safe bags, remove as much air as possible, label with contents and date, and store.
Fruits: Most fruits skip blanching. Slice, freeze flat on a sheet pan, then transfer to bags. Add a squeeze of lemon juice to peaches and apples to prevent browning.
✅ CHECKPOINT
✔ All vegetables blanched before bagging? ✔ Ice bath cold enough to actually stop the cooking? ✔ Sheet pan freeze step done before bagging? ✔ Every bag labeled with contents and date?
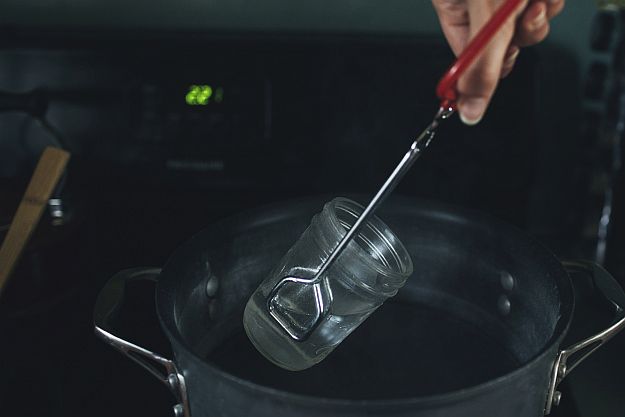
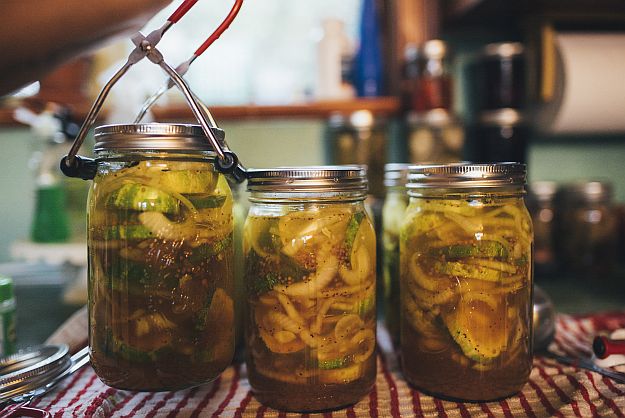
Water-Bath Canning Basics for High-Acid Summer Produce
Water-bath canning is safe for high-acid foods only. This is the line that separates safe home canning from the rare but real botulism risk, and it is not flexible.
High-acid, safe for water-bath: Jams, jellies, fruit preserves, properly acidified pickles, tested salsa recipes, fruit butters, and tomatoes with added acid.
Low-acid, pressure canner required, never water-bath: Plain green beans, corn, beets (unless pickled with a tested recipe), meat, poultry, fish, and mixed vegetable blends without sufficient acid.
⛔ STOP POINT: BOTULISM RISK
Low-acid foods processed in a water-bath canner can produce conditions favorable to botulism, a toxin that is odorless, tasteless, and potentially fatal. If you are unsure whether a food is high-acid or low-acid, do not water-bath can it. Look it up at nchfp.uga.edu or call your local county extension office first. This call is free and takes five minutes.
READ MORE: Water Bath Canning | Easy Step-by-Step Guide
✅ CHECKPOINT
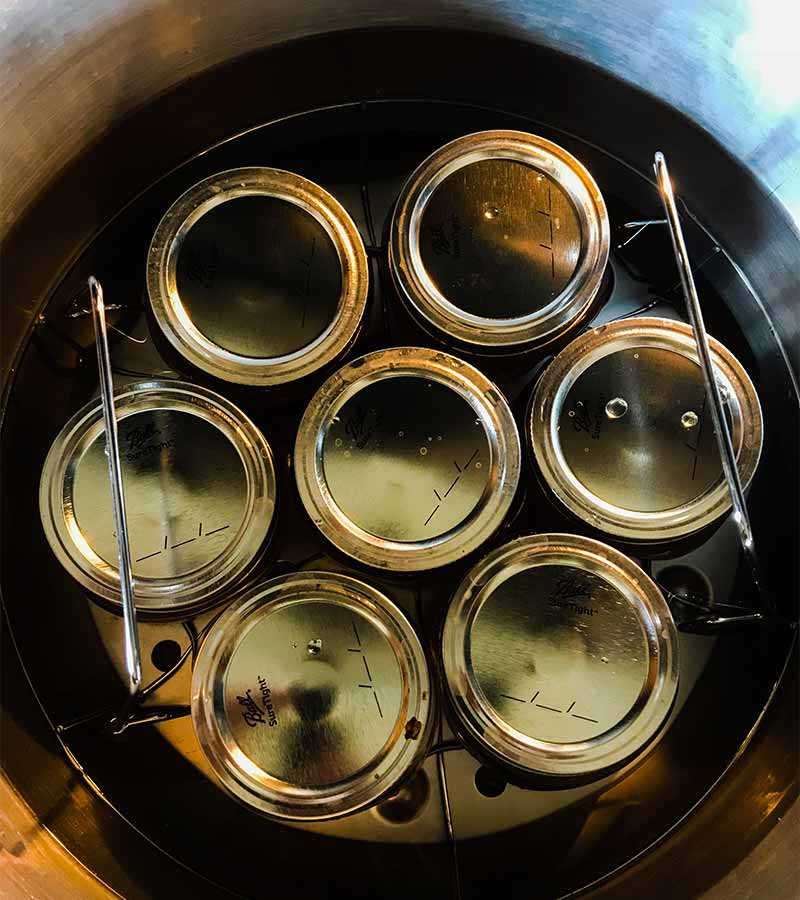
✔ Timer started at full rolling boil, not first steam?
✔ All jars covered by at least 1 inch of water during processing?
✔ 5-minute rest in hot water before removing jars?
✔ Jars at least 1 inch apart on the counter?
✔ Lids undisturbed; no pressing, no covering?
Dehydrating Summer Herbs and Excess Tomatoes
Dehydrating is the lowest-barrier preservation method after freezing. There are no acid adjustments, no seal verification, no pressure gauges. You are simply removing moisture.
Best summer candidates:
- Fresh herbs: basil, oregano, thyme, rosemary
- Tomatoes: 1/4-inch rounds, dried to leather for soups and sauce
- Zucchini chips
- Apple slices
Step 1: Wash and slice evenly. Uneven slices dry unevenly, and thick spots stay moist and mold later.
Step 2: Set dehydrator temperature by food type:
- Herbs: 95 to 115°F (lower heat preserves volatile oils and fragrance)
- Vegetables: 125 to 135°F
- Fruits: 135°F
Step 3: Check at the halfway mark. Rotate trays if your dehydrator doesn’t have a rear-mounted fan.
Step 4: Test for doneness. Herbs crumble between your fingers. Vegetables snap cleanly. Fruits are leathery with no moist spots in the center when you tear them.
Step 5: Cool to room temperature before storing. Sealing warm food traps condensation and causes mold, sometimes within days.
Step 6: Store in airtight glass jars. Label with contents and date.
Cure-Time Gate for Herbs: Place dried herbs in a loosely covered jar for 3 to 5 days before sealing permanently. Shake the jar once daily. If condensation forms on the inside, the herbs are not dry enough. Spread them back out and return to the dehydrator.
READ MORE: How To Dehydrate Food To Preserve Them
Canning Safety Rules for Summer Produce
The high-acid/low-acid distinction is the only rule that truly matters for water-bath canning safety. Everything else is craft. This one is safety.
Tomatoes are a special case. They sit right at the borderline of safe acid levels, and as tomato varieties have been bred sweeter over the decades, their natural pH has shifted. Always add bottled lemon juice (2 tablespoons per quart, 1 tablespoon per pint) or citric acid as directed in your tested recipe. Use bottled lemon juice, not fresh. Fresh lemon juice is inconsistent in pH.
Salsa requires a tested recipe. Full stop. You cannot calculate a safe salsa ratio from intuition. The proportion of tomatoes to low-acid vegetables (onions, peppers, garlic) determines the final pH of the entire batch. Your county cooperative extension office can test your family recipe, but until they do, use a tested recipe from USDA, Ball, or NCHFP.
⛔ STOP POINT
If your canning recipe came from a blog post, a Pinterest pin, a Facebook group, or a handwritten card, do not use it for shelf-stable canning without first cross-referencing it against a USDA, Ball, or NCHFP source. This is not about tradition. Botulism is odorless, tasteless, and produces no visible sign of spoilage. The stakes are your family’s health.
RELATED: Canning 101: Water Bath vs Pressure Canning (Which Do You Need?)
How to Test Seals on Your Summer Pantry Jars
After the 12 to 24 hour undisturbed rest, run all three checks on every jar before it goes on the shelf.
Test 1, The Ping Test: Tap the center of the lid with a metal spoon. A clear, high-pitched ring means the lid is sealed. A dull, flat thud means it is not.
Test 2, The Lift Test: Remove the band entirely. Hold the jar by the lid only and lift it. If the lid holds the full weight of the jar, the seal is solid. If the lid pulls away, the jar is not sealed.
Test 3, Visual Check: Look at the lid from the side. A properly sealed lid curves slightly inward in the center. Any dome, even a small one, means the jar is not sealed.
If a jar didn’t seal: Refrigerate immediately and use within one week. Or reprocess within 24 hours using a new lid. Reprocessing reduces quality slightly but saves the food.
Labeling for Long-Term Storage: Write contents and date directly on the lid with a permanent marker. Remove the band before shelving. Bands left on can corrode and trap moisture underneath, which can give you a false sense that the seal is intact when it isn’t.
Common Summer Pantry Stocking Mistakes and How to Fix Them
Symptom: Frozen vegetables are mushy and grayish after thawing.
Cause: Blanching was skipped, or the ice bath wasn’t cold enough to fully stop the cooking.
Fix: This batch is still edible. Use it in soups or casseroles where texture doesn’t matter. For future batches, blanch the correct time and use enough ice.
Symptom: Jar didn’t seal after 24 hours.
Cause: Chipped rim, food on the rim, improper headspace, lid not seated flat, or bands were over-tightened.
Fix: Refrigerate and use within a week, or reprocess with a brand-new lid within 24 hours.
Symptom: Liquid siphoned out of jars during processing.
Cause: Starchy vegetables or too-rapid temperature change when removing jars from the canner.
Fix: Check the seal. If it sealed, the product is safe. Siphoning doesn’t automatically mean contamination. Next time, let jars rest 5 minutes in the hot water before you lift them out.
Symptom: Jam didn’t set and is still runny after cooling.
Cause: Undercooked, incorrect pectin ratio, or recipe was modified.
Fix: Refrigerate and use as a fruit syrup. For future batches, follow the pectin package directions exactly and don’t reduce the sugar.
Symptom: Dehydrated herbs feel slightly damp after a week in the jar.
Cause: Not fully dry before sealing.
Fix: Empty the jar, spread the herbs back on the dehydrator tray, and dry longer. The cure-time gate (3 to 5 days loosely covered with daily shaking) is designed to catch this before you seal permanently.
Symptom: An opened jar smells metallic, yeasty, or just wrong.
Cause: The seal failed at some point and spoilage occurred.
Fix: Discard without tasting. Do not smell deeply. Do not try to cook it and hope the heat fixes it. When in doubt, throw it out.
FAQs
Q1: What should I preserve first when summer pantry stocking on a tight budget? Start with freezing. It costs almost nothing beyond freezer bags if you already have a freezer. Freeze whatever is peaking and cheapest at the farmer’s market or in your garden. Blanch your vegetables, bag your fruits, and label everything with the date. You can research and budget for canning equipment over the winter when there’s no produce pressure and starter kits often go on sale.
Q2: What’s the easiest summer vegetable for a beginner to start preserving? Green beans. For beginners starting with water-bath canning, dilly beans (pickled green beans using a tested Ball recipe) are forgiving, popular, and pack well. For freezing, green beans blanch in 3 minutes flat and hold beautifully for 10 to 12 months. One pound of beans takes about 20 minutes start to finish. That’s a solid first session.
Q3: Can I modify a summer pantry stocking canning recipe to use what I have on hand? Not for canned goods going on the shelf. Tested canning recipes are calibrated for specific pH, density, and heat penetration. Swapping ingredients or adjusting ratios can shift acid levels in ways you cannot taste or see. Use the recipe exactly as written. For fresh eating, freezing, or dehydrating, modify freely. Those methods don’t rely on acid chemistry for safety.
Q4: Why do so many summer pantry stocking guides say blanching is optional for freezing vegetables? It’s one of the most common online shortcuts, and it leads to genuinely disappointing results. Blanching deactivates the enzymes that cause frozen vegetables to lose color, texture, and flavor over time. Skip it and your green beans will be gray and soft by February. For any vegetable you plan to freeze for more than a month, always blanch. The only exceptions are onions, peppers, herbs, and most fruits.
Q5: How much does a complete summer pantry stocking setup actually cost? A basic freeze-only setup runs $0 to $20 if you already have a freezer. A full water-bath canning setup runs $50 to $100 for a starter kit covering the pot, rack, jars, and basic tools. A quality entry-level dehydrator adds $65 to $150. You do not need all three in Year One. Don’t spend more on equipment than the value of what you’ll preserve this season. Freeze first and add equipment as your skill and harvest volume justify it.
