
At a Glance: Homemade Lye Soap Recipe
- Always measure lye, water, and oils by weight on a digital scale.
- Sprinkle the lye into the water. Never the other way around.
- Your soap needs 4 to 6 weeks to cure before it’s safe to use.
RELATED: How To Make A Homemade Lavender Soap Recipe With Charcoal & Mint
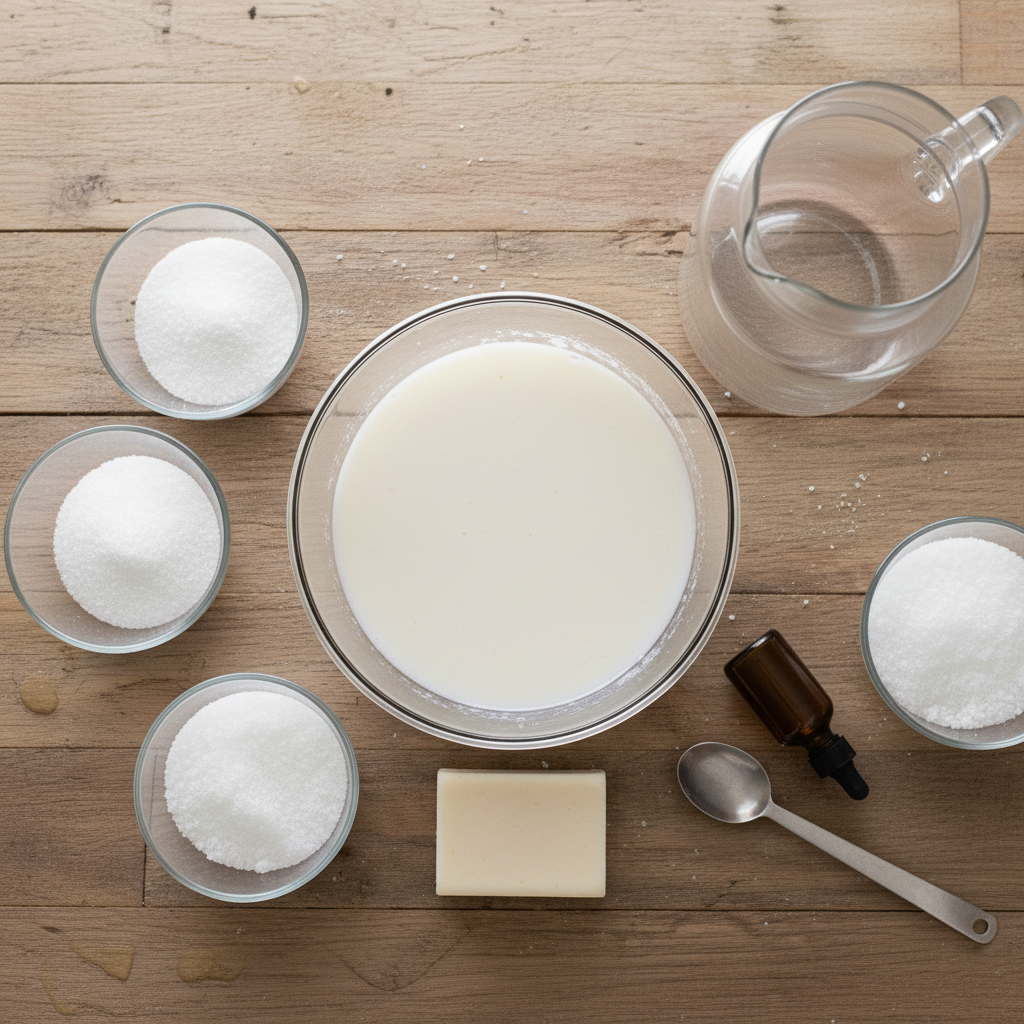
Ingredients and Materials
This is a standard moisturizing beginner recipe. Before you touch anything: every single ingredient gets weighed on a digital scale. Not scooped. Not eyeballed. Weighed.
Oils:
- 16 oz Olive Oil
- 8 oz Coconut Oil
- 8 oz Palm Oil (or rendered tallow if you have it)
Lye solution:
- 4.5 oz Sodium Hydroxide (100% pure lye; check the label)
- 10.5 oz Distilled Water
Tools and Safety Gear:
- Digital kitchen scale
- Safety goggles
- Thick rubber gloves and long sleeves
- Closed-toe shoes
- Immersion (stick) blender
- A heat-safe glass or heavy plastic pitcher for the lye water
- A stainless steel pot (never aluminum)
- Silicone soap mold
How to Make Lye Soap Recipe Step by Step
Step 1: Set Up Your Workspace
Clear the counters. Get the kids and the dog out of the kitchen. Crack a window. Then put on your goggles, gloves, long sleeves, and shoes before you open anything. This is not the step you skip to save two minutes.
Step 2: Weigh Your Oils
Set your stainless steel pot on the scale and zero it out. Weigh your olive oil, coconut oil, and palm oil directly into the pot. Put it on the stove over low heat just until the solid oils melt. Turn off the burner and let everything cool down to around 100°F–120°F.
Step 3: Weigh Your Water and Lye
Weigh 10.5 oz of distilled water into your heat-safe pitcher. In a separate dry cup, weigh out 4.5 oz of lye crystals.
⛔ STOP POINT: Lye Mixing Hazard The second lye hits water, it heats up fast (we’re talking up to 200°F) and it releases fumes you don’t want to breathe. There’s one rule here and it does not have exceptions: lye goes into the water. Water never goes into the lye. Think of it this way: snow falls on the lake. Pour it backwards and you get a caustic eruption out of the container.
Step 4: Mix the Lye Water
Take your water pitcher and your cup of lye crystals outside or right next to an open window. Slowly sprinkle the lye into the water, stirring gently with a silicone spatula as you go. Turn your face slightly away and don’t lean over the pitcher. Set it somewhere safe and let it cool until it matches your oils between 100°F and 120°F.
Step 5: Combine and Get to Trace
When both your lye water and your oils are at roughly the same temperature, pour the lye water into the pot of oils. Submerge your immersion blender fully before you turn it on. Splashing lye solution is exactly what you’re avoiding. Pulse in short bursts, stirring in between. You’re watching for trace when you drizzle a little of the batter over the surface and it leaves a faint raised trail, like thin pudding. That’s your signal.
Step 6: Pour and Tuck In
Pour the soap batter into your silicone mold. Cover the top with a piece of cardboard, then wrap the whole mold in an old towel. That insulation keeps it warm and helps the soap go through the gel phase properly. Now leave it completely alone for 24 to 48 hours.
✅ Checkpoint After 48 Hours
Still wearing your gloves, unmold the soap. It should feel like a block of hard cheese. If it’s still soft or sticky, it needs more time in the mold so give it another 24 hours.
Cut your bars with a sharp knife and set them on a wire rack in a cool, dry spot out of direct sunlight.
The Cure: Why You Have to Wait
Four to six weeks. That’s the cure time. I know. It’s the hardest part.
Here’s why it matters: Two things happen during curing. First, the extra water evaporates, which gives you a harder bar that lasts longer in the shower. Second, the safety part, the saponification process finishes. That’s the chemical reaction where the lye and the oils completely consume each other. By the end of the cure, there is no active lye left in the bar. What you’re left with is soap and naturally occurring glycerin. The cure isn’t optional. It’s how you know the bar is ready.
Is Cured Homemade Lye Soap Safe for Sensitive Skin?
Yes, and here’s the thing most people don’t know. Commercial soap manufacturers strip the glycerin out of their bars and sell it separately to cosmetic companies. That’s why drugstore soap leaves your skin feeling tight. Your homemade bars keep all of that glycerin in, which makes them genuinely gentle and moisturizing, especially for sensitive or dry skin.
Mistakes That Sink a First Batch
Using measuring cups instead of a scale. This is the number one reason first batches fail. Too much lye and the soap burns skin. Too little and you get a greasy, gummy bar that never fully sets. Every oil, every fat, every gram of lye needs to be weighed. There’s no workaround.
Using anything aluminum. Lye reacts with aluminum and produces toxic, flammable hydrogen gas. Use stainless steel, heat-safe glass, or heavy plastic. Check every bowl, every spoon, every pot before it touches your lye.
Swapping oils without recalculating. Every fat has a different saponification value which means it requires a different exact amount of lye to turn into soap. If you swap olive oil for almond oil, you can’t just use the same lye amount. Run the updated recipe through a soap calculator first. (SoapCalc and Brambleberry both have free ones.)
Trying to get fancy on the first batch. Learn the basic recipe clean. Make it twice. Then start adding herbs, clay, or fragrance oils. Trying to do everything at once on batch one is how people get discouraged and quit.
Troubleshooting: When Something Looks Off
| What You See | What It Probably Means | What to Do |
| White powdery film on top (soda ash) | Surface lye reacted with air | Cosmetic issue only. Plane it off with a vegetable peeler or leave it |
| Soft, greasy, won’t harden after 72 hours | Too much oil, not enough lye, or oils were too warm | Try a hot process rescue. Look up “soap rescue” |
| Crumbly or cracked texture | Too much lye or soaps seized too fast | Usually still safe to use after full cure. Do the zap test |
| Visible oil pools in the mold | Separation before trace was reached | Stir back in and rebatch if needed |
| Still zapping after 6 weeks | Active lye remains | Give it more cure time. Test again at week 8 |
Check out this video from @LivingOnADime :
FAQs Homemade Lye Soap Recipe
Can you make soap without lye? No, because it’s not going to be real soap. All true soap, by definition, requires lye. Sodium hydroxide makes hard bars. Potassium hydroxide makes liquid soap. “Melt and pour” bases have already been through the lye process before you buy them, so you skip the hazardous step, but someone upstream did it.
What’s the best homemade lye soap recipe for a beginner? A simple three-oil recipe measured by weight is your best starting point. A large base of olive oil gives you a gentle, conditioning bar. Coconut oil adds lather and hardness. Palm oil or tallow rounds it out and helps it unmold cleanly. Keep it plain until you’ve got two or three batches under your belt.
How do I know my homemade lye soap is safe to use? Wait the full 4 to 6 week cure time. Then do the zap test: lightly touch the corner of the bar to the tip of your tongue. If it zaps you like a 9-volt battery, there’s still active lye and it needs more curing time. No zap means it’s ready.
What actually happens if you pour water into the lye? It can boil and erupt out of the container in seconds, sending caustic solution onto your hands, arms, and face. That causes serious chemical burns. This is not a maybe. Always add lye to water, never the reverse.
Can I substitute oils in a homemade lye soap recipe without recalculating? No. Every fat has its own saponification value. The precise amount of lye it takes to turn that specific fat into soap. Swap one oil for another without recalculating and you’ll end up with soap that’s either caustic or a greasy mess. Run any change through a free soap calculator before you make it.
