

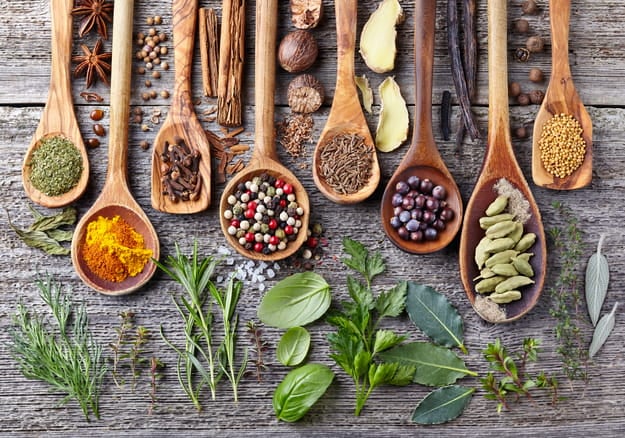
At a Glance: Drying Herbs
- Harvest in the morning after the dew dries completely.
- Air-dry your woody herbs but freeze your delicate soft herbs.
- Snap the stems to test for hidden moisture before putting them in jars.
Tired of spending five dollars on a tiny plastic clam-shell of basil only to watch it turn to black slime three days later? Or don’t want to watch your overflowing harvest go to waste? Drying herbs is the simplest way to stop wasting food and start building a self-reliant pantry. We’re going to walk you through the old-fashioned, foolproof ways to save your harvest so you can enjoy it all year long.
RELATED: How to Freeze and Preserve Summer Vegetables
What are the benefits of drying herbs?
- No need to throw away expensive store-bought greens that are about to go bad. You can dry them instead.
- You get to enjoy the bright flavors of your garden in the middle of winter.
- You know exactly what is in your food because they’re not contaminated with chemicals.
- Save money by never having to buy those tiny glass jars from the grocery store spice aisle again.
What supplies do I need to dry herbs?
- A good pair of pruning snips or sharp kitchen scissors
- Natural cotton twine or string
- Clean glass mason jars with airtight lids
- A standard ice cube tray
- Good quality olive oil or melted butter
- An electric food dehydrator (only necessary if you choose the dehydrating method)
The 3 Best Methods for Drying Herbs
Here are the three most reliable ways to process your harvest based on exactly what they need.
Method 1: The Traditional Hang-Dry
The traditional hang-dry method is perfect for woody plants like rosemary, thyme, and oregano because they have very little moisture in their leaves. You simply bundle a few stems together and hang them upside down in a dark, dry closet or pantry until all the natural moisture evaporates, leaving you with perfectly preserved leaves that will last all winter without molding.
Materials needed: Fresh woody herbs, pruning snips, natural cotton twine, clean glass jars with airtight lids.
- Cut your herbs in the mid-morning after the outdoor dew has dried completely.
- Gather four to six stems together and tie the base tightly with cotton twine.
- Hang the bundle upside down in a dark, well-ventilated spot like a pantry or unused closet.
- Wait one to three weeks for the home’s air to completely dry them out.
Here’s where I got my drying rack:

- Contents of the Package:1 Herb Drying Racks, with 25PCS brown gift tags AND 32ft Natural Jute Twine, individual plant drying rack total…
- Herb Drying Rack Hanging: Our herb drying rack is practical and decorative, with gold drying hooks hung from large and small wood beads…
- Herb Drying Rack. First hang the herb drying rack in a suitable place in the room, and then attach the hook to the metal ring at the…
Method 2: The Dehydrator
Using a food dehydrator is the safest way to dry soft, leafy plants like basil or mint if you live in a very humid area where hung plants might easily mold. You just pull the leaves off the stems, spread them out on the appliance trays, and run the machine on its absolute lowest heat setting to safely pull the moisture out without cooking or burning the delicate plant.
Materials needed: Fresh soft herbs, a food dehydrator, clean glass jars with airtight lids.
- Strip the fresh leaves off their thick main stems to speed up the process.
- Spread the leaves in a single, even layer across your dehydrator trays.
- Set the machine to its absolute lowest setting, usually between 95°F and 115°F.
- Check the leaves every hour until they feel incredibly brittle and dry.
Method 3: The Oil Freeze
Freezing in oil is the best approach for delicate plants that lose all their flavor or turn black when you try to dry them in the air. You chop the fresh leaves up, pack them into a regular tray, pour oil over the top to protect the greens from freezer burn, and freeze them into solid blocks that you can drop directly into hot winter soups or pasta sauces later.
Materials needed: Fresh delicate herbs, a sharp kitchen knife, a cutting board, standard ice cube trays, olive oil, freezer-safe storage bags.
- Finely chop your fresh soft herbs on a clean cutting board.
- Pack the chopped herbs tightly into an empty ice cube tray, filling each section two-thirds full.
- Pour olive oil over the packed herbs until they are completely covered.
- Freeze the tray solid, then pop the frozen cubes out and store them long-term in a freezer bag.
This is the freezer bag that I use:

- Includes 120 freezer food bags, each holding 1 quart
- Reclosable top has a double zipper closure
- Stand and Fill base with same quart capacity
🛑 STOP POINT: The Verification Gate Never put dried herbs into a sealed jar until they pass the Snap Test. Bend the thickest stem. Does it bend like a green twig? It is not done. Does it snap cleanly in half? Rub a leaf between your fingers. Does it crumble into dust instantly? If yes, they are completely dry and safe to store.
Common Mistakes When Drying Herbs
- Mistake 1: Hanging fresh herbs directly in a sunny kitchen window because it looks beautiful. Sunlight actually destroys the essential oils inside the leaves, leaving you with bleached, flavorless dust, so always dry your plants in the darkest room possible.
- Mistake 2: Putting dried leaves into a glass jar while there is still a tiny bit of moisture left inside the stems. This trapped moisture quickly breeds mold and ruins the entire jar, so you must always bend the stem to see if it snaps cleanly in half before putting anything away.
- Mistake 3: Trying to dry large, thick bundles of stems all tied together to save time and space. The center of a thick bundle will not get any airflow and will start to rot before it ever dries, so you should only tie four to six stems together at one time.
- Mistake 4: Washing the garden harvest under the sink and immediately hanging it up to dry while the leaves are still dripping wet. Extra water is the enemy of preservation, so if you absolutely must wash off garden dirt, you have to pat the leaves completely dry with a clean towel before you tie them up.
- Mistake 5: Cranking the dehydrator up to a high temperature because you are in a hurry to finish the project. High heat actually cooks the delicate leaves and ruins the garden-fresh flavor, so you must always use the lowest possible heat setting and just be patient.
When to Throw It Out
If you open a jar of dried herbs and see any white fuzz, or if you smell a musty, damp basement odor instead of a bright herbal scent, throw it in the compost. Never try to salvage moldy preserved food.
Which herb preservation method is best?
There is no single “best” overall method, only the right method for the plant you are working with. If you are preserving woody plants like rosemary or thyme, the traditional hang-dry method is the absolute best choice because it is completely free and practically foolproof. If you live in a very humid environment or want to dry leafy greens like mint, the dehydrator is your safest bet for avoiding mold. However, if you are trying to save delicate basil or cilantro, freezing them in oil is the ultimate winner for locking in that fresh garden flavor for winter cooking.
FAQs Drying Herbs
What is the best way for drying herbs? The best method depends on the plant. Woody herbs like rosemary are best tied with string and hung upside down in a dark, dry place. Soft herbs like cilantro are best dried quickly in a dehydrator on a very low heat setting to prevent mold.
Do I need a dehydrator for drying herbs? No. While a dehydrator speeds up the process and is very helpful in highly humid climates, traditional air-drying works perfectly for most woody herbs. Simply hang them in a dark, well-ventilated area.
Why shouldn’t I dry my herbs in the sun? Generic advice often shows herbs hanging in sunny kitchen windows, but UV light degrades the plant’s essential oils. This bleaches the color and destroys the flavor you are working so hard to preserve. Always dry and store your harvest in the dark.
How long do dried herbs actually last? When dried completely and stored in an airtight glass jar in a dark pantry, they will retain their peak flavor for 6 to 12 months. After a year, they are still safe to eat, but they will lose their culinary punch and taste a bit dusty.
Is it cheaper to grow and dry my own herbs? Absolutely. A single organic rosemary plant costs about $4 at a nursery and will provide pounds of fresh and dried herbs for years. Store-bought dried herbs often cost $5 or more for a tiny, stale jar that has been sitting on a truck for months.
