
At a Glance: Your First Canning Recipe
- Start with jams and pickles before canning anything more complex.
- A tested canning recipe is your safety net. Follow it exactly to avoid health risks.
- One afternoon of work puts months of homemade food on your shelf.
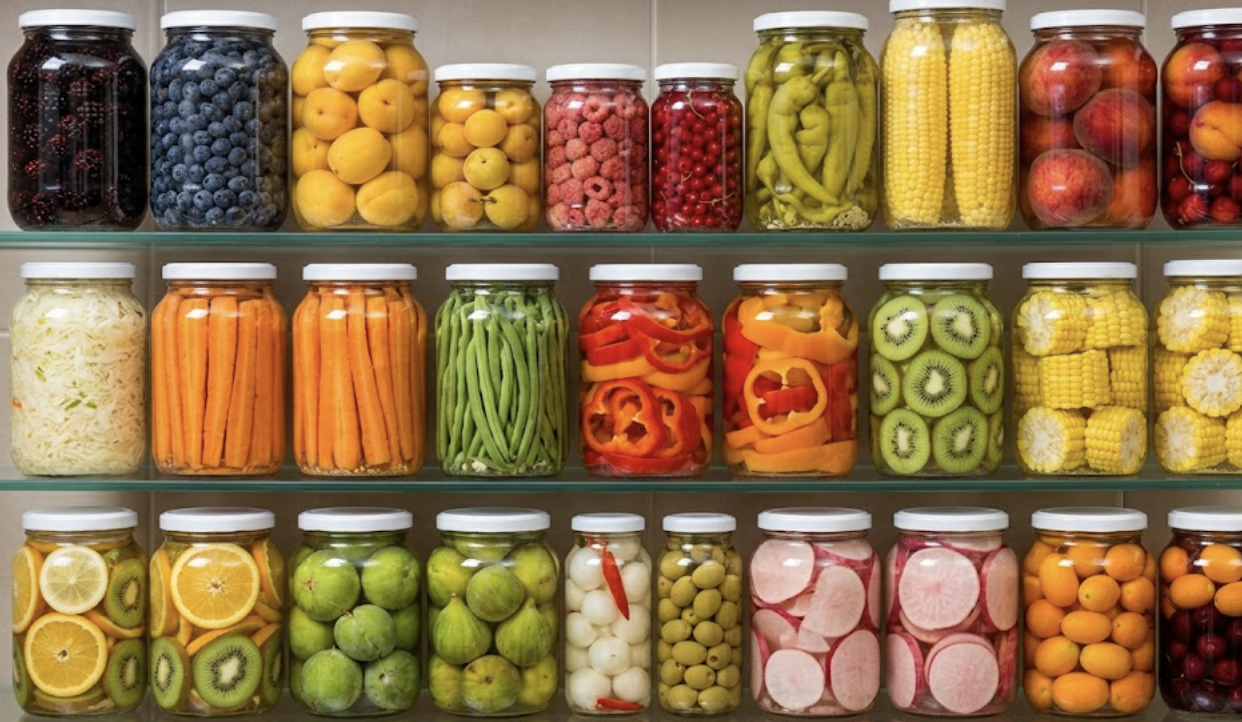
You want to fill your pantry yourself with row of jars on the shelf.
But every time you search for a canning recipe, you find either a pretty blog post with no safety details or one contains a technical manual that seems to require a chemistry degree.
That ends today. We’ve compiled 7 tested, beginner-friendly canning projects with clear steps, plain language, and the safety information you need to preserve food safely.
Before You Start: Safety Basics for Every Canning Recipe
Risk Level: Tier 2, Water-Bath Canning (Exception: Plain canned zucchini, Tier 3. See Recipe 7.)
Water-bath canning is one of the safest preservation methods there is, when you follow a few non-negotiable rules. The heat kills harmful bacteria and the seal locks out new ones.
What you’ll need:
- Jar lifter with rubber grips (not kitchen tongs; they drop jars)
- Canning funnel
- Bubble remover or thin spatula
- Clean kitchen cloths (not paper; they lint up jar rims)
- Timer
Before processing any jar, always verify:
- ✅ Jar rim is clean and chip-free
- ✅ New lid on every jar (sealing compound is single-use, not reusable)
- ✅ Correct headspace measured, not eyeballed
- ✅ Water is at a full rolling boil before the timer starts
The 7 Canning Recipes for Beginners
Recipe 1: DIY Fig Jam
Figs are naturally high in sugar. Add a little bottled lemon juice and the acid balance lands in the safe zone easily. This is the most confidence-building first canning recipe on this list.
Ingredients (makes about 5 half-pint jars):
- 4 cups fresh figs, stems removed and mashed
- 3 cups granulated sugar
- 3 tablespoons bottled lemon juice (bottled only; fresh lemon juice varies in acidity)
- 1/2 teaspoon butter, optional (reduces foam)
Steps:
- Wash your canning jars. Keep them warm in hot (not boiling) water until you’re ready to fill them. Avoid using cold jars as they crack in hot water.
- Combine figs, sugar, and lemon juice in a large, heavy-bottomed pot over medium heat.
- Stir constantly as the mixture heats. When it reaches a full rolling boil, cook for 10 to 15 minutes and stir often.
- Test for set: place a small spoonful on a cold plate and push it with your finger. If it wrinkles, that means it’s ready. If it runs, cook 5 more minutes and test again.
- Ladle into warm jars, leaving 1/4 inch headspace. Run a bubble remover along the inside edges. Wipe jar rims with a clean, damp cloth.
- Center new lids on jars. Apply bands fingertip-tight, firm but not cranked down hard.
- Lower jars into boiling water bath. Water must cover jars by at least 1 inch. Process for 10 minutes, adjusting for altitude using the chart in your Ball Blue Book.
- Turn off heat. Remove canner lid. Let jars sit in the hot water for 5 minutes before lifting.
- Set jars on a towel-covered counter. Don’t move them for 24 hours.
✅ CHECKPOINT, 12 to 24 hours later: Press the center of each lid. If it does not flex up and down, it is sealed. If it pops back, refrigerate that jar and use it within 3 weeks.
Recipe 2: Homemade Apple Butter
Making apple butter is a long and slow process, but almost impossible to ruin. It fills your kitchen with the best smell imaginable, and it teaches you that good preservation always rewards.
Ingredients (makes about 6 half-pint jars):
- 5 lbs apples, peeled, cored, and chopped (a mix of tart and sweet works best)
- 1 cup apple cider vinegar
- 2 cups granulated sugar, adjusted to taste after cooking down
- 1 teaspoon cinnamon
- 1/4 teaspoon cloves
- 1/4 teaspoon allspice
Steps:
- Combine apples and cider vinegar in a large pot. Cover and cook on medium-low until completely soft, about 30 minutes. Stir occasionally.
- Run cooked apples through a food mill or blender until completely smooth.
- Return puree to pot. Stir in sugar and spices.
- Cook uncovered on medium-low heat, stirring every 10 to 15 minutes, until the mixture darkens, thickens, and mounds on a spoon without spreading. This takes 1 to 2 hours. Do not rush it.
⛔ STOP POINT: Apple butter burns easily once it gets thick. Lower your heat and stir more frequently in the final 30 minutes. Scorched apple butter cannot be fixed.
- Ladle into hot jars, leaving 1/4 inch headspace. Remove air bubbles. Wipe rims.
- Process in a boiling water bath: 10 minutes for half-pints, 15 minutes for pints. Adjust for altitude.
- Rest undisturbed for 24 hours. Check seals before storing.
Recipe 3: DIY Lemon Sage Mustard
Homemade mustard is an elevated pantry staple. The kind of jar you can give as a gift. It’s also one of the simplest recipes on this list.
Ingredients (makes about 4 half-pint jars):
- 1 cup yellow mustard seeds
- 1 cup brown mustard seeds
- 1 1/2 cups apple cider vinegar
- 1/2 cup white wine vinegar
- Zest of 2 lemons plus 3 tablespoons bottled lemon juice
- 2 tablespoons honey
- 1 tablespoon fresh sage, finely chopped
- 1 teaspoon salt
Steps:
- Combine mustard seeds and both vinegars in a bowl. Let soak overnight, at least 12 hours. The seeds absorb most of the liquid and soften considerably.
- Transfer soaked mixture to a blender. Add lemon juice, honey, sage, and salt.
- Blend to your preferred texture. For smooth mustard: blend 2 to 3 minutes. For grainy: pulse 10 to 15 times.
- Taste and adjust salt or honey. This mustard will taste sharp right after blending. It mellows beautifully in the jar.
- Transfer to a saucepan and bring just to a simmer, stirring. Don’t boil hard.
- Ladle into hot jars, leaving 1/4 inch headspace. Wipe rims. Apply lids and bands.
- Process in a boiling water bath for 10 minutes. Rest 24 hours. Check seals.
✅ CHECKPOINT: Write a “ready after” date on each jar: two weeks from processing. The flavor develops dramatically. Do not open one early and wonder why it tastes sharp.
Recipe 4: Homemade Jalapeño Salsa
A jar of your own salsa pulled off a shelf you filled yourself is one of the most satisfying moments in beginner canning. It is also where new canners make their first unsafe change, and this is the place to stop that before it happens.
Ingredients (makes about 6 pint jars; use a tested recipe exactly):
Use the Ball Jalapeño Salsa recipe from the Ball Blue Book or the NCHFP tested version. Standard tested proportions:
- 6 cups tomatoes, peeled, seeded, chopped (about 3 lbs)
- 1 1/2 cups jalapeños, seeded and finely chopped
- 1 cup onion, finely chopped
- 1/2 cup green bell pepper, finely chopped
- 6 garlic cloves, minced
- 2 teaspoons cumin
- 1 1/2 teaspoons salt
- 1/2 cup cider vinegar
- 2 tablespoons bottled lemon juice
⛔ STOP POINT, Read This Before You Change Anything:
Do not increase the jalapeños, onion, or garlic. Do not reduce the vinegar. The acid-to-vegetable balance in this recipe is what makes it safe for water-bath canning. Adding more low-acid vegetables without adding more acid drops the pH into unsafe territory. This is exactly how homemade salsa becomes a problem.
If you want more heat, use hotter jalapeños or add a pinch of cayenne. Do not add more chopped peppers.
Steps:
- Peel tomatoes: score an X on the bottom, blanch in boiling water for 30 seconds, transfer to ice water. Skins slip right off.
- Combine all vegetables, garlic, cumin, and salt in a large pot. Stir in vinegar and lemon juice.
- Bring to a boil. Reduce heat and simmer for 10 minutes, stirring often.
- Ladle into hot jars, leaving 1/2 inch headspace. Remove air bubbles. Wipe rims.
- Process in a boiling water bath: 15 minutes for pints. Adjust for altitude.
- Rest 24 hours. Check seals.
Recipe 5: Canned Dill Pickles
Crunchy homemade dill pickles are the gold standard of beginner canning. Done right, yours will beat anything from the grocery store. Done wrong, they’ll go soft and disappoint. The difference comes down to two things: fresh cucumbers and one step most recipes gloss over.
Ingredients (makes about 7 quart jars):
- 8 lbs small pickling cucumbers, 3 to 4 inches, fresh-picked within 24 hours if possible
- 12 cups water
- 4 cups white vinegar at 5% acidity (check the label)
- 2/3 cup pickling salt, not table salt (iodized salt clouds the brine)
Per jar:
- 2 heads fresh dill, or 1 teaspoon dill seed
- 2 garlic cloves
- 1/4 teaspoon red pepper flakes, optional
Steps:
- Wash cucumbers thoroughly. Cut 1/16 inch off the blossom end, the end opposite the stem. This is not optional. The blossom end contains enzymes that soften pickles during processing. Skip this step and you get mushy pickles.
- Combine water, vinegar, and pickling salt in a pot. Bring to a boil. Keep it hot.
- Pack cucumbers tightly into hot quart jars, tighter than feels right. They shrink slightly during processing. Add dill, garlic, and pepper flakes.
- Pour hot brine over cucumbers, leaving 1/2 inch headspace. Run a thin spatula around the inside edges to release air bubbles.
- Wipe rims. Apply new lids and bands fingertip-tight.
- Process in a boiling water bath: 10 minutes for quarts. Adjust for altitude.
- Rest 24 hours. Check seals.
✅ CHECKPOINT: Do not open these for at least 4 weeks. Pickles opened in week one taste like vinegar-soaked vegetables. By week four, they taste like pickles. Mark the jars with a “ready after” date and walk away. This is the step most people skip, and it is the reason most people think their first batch did not turn out.
Recipe 6: Canned Pizza Sauce
Homemade pizza sauce is one of the most practical jars you can add in your pantry. It’s also a delicious, satisfying way of use of using your tomato harvest.
Why the lemon juice is not optional:
Tomatoes sit right on the edge of safe water-bath acidity. Modern tomato varieties are often less acidic than older ones. Adding bottled lemon juice to each jar, not to the pot but to each individual jar, guarantees safe acidity every time.
Use bottled version, not fresh-squeezed. Bottled lemon juice has a regulated, consistent acid level. Fresh juice varies batch to batch. Consistent acid equals consistent safety.
Ingredients (makes about 6 pint jars):
- 30 lbs ripe Roma or paste tomatoes
- 1 cup onion, finely chopped
- 4 garlic cloves, minced
- 2 tablespoons olive oil
- 2 tablespoons fresh basil, or 2 teaspoons dried
- 1 tablespoon fresh oregano, or 1 teaspoon dried
- 1 teaspoon salt
- 1/4 teaspoon black pepper
- 1 tablespoon bottled lemon juice per pint jar, added directly to each jar before filling
Steps:
- Wash and core tomatoes. Quarter them into a large pot. Do not peel yet.
- Bring to a boil, crush with a potato masher, then simmer for 20 minutes.
- Run cooked tomatoes through a food mill to remove skins and seeds. Return puree to pot.
- In a separate pan, sauté onion and garlic in olive oil until soft. Add to tomato puree.
- Add basil, oregano, salt, and pepper. Simmer uncovered for 45 to 60 minutes until sauce reduces by about one-third and thickens. Stir often.
⛔ STOP POINT: Do not add more olive oil or butter beyond what the tested recipe specifies. Extra fat can interfere with heat penetration inside the jar.
- Add 1 tablespoon bottled lemon juice directly into each hot jar before filling.
- Ladle hot sauce into jars, leaving 1/2 inch headspace. Remove air bubbles. Wipe rims.
- Process in a boiling water bath: 35 minutes for pints, 40 minutes for quarts. Adjust for altitude.
- Rest 24 hours. Check seals.
Recipe 7: DIY Canned Zucchini
⛔ STOP POINT, Read Before You Start:
Plain canned zucchini cannot be safely processed in a water-bath canner. Water-bath temperatures do not get high enough to destroy Clostridium botulinum spores in low-acid foods. This is the bacteria responsible for botulism. You cannot see it, smell it, or taste it in a jar that looks perfectly fine and sealed.
The only safe options for canning plain zucchini are:
- Zucchini in a tested vinegar-based brine, which makes it high-acid and water-bath safe
- Pressure canned plain zucchini using a USDA or NCHFP recipe.
If you own a pressure canner, tested plain zucchini recipes are available through nchfp.uga.edu. If you do not own one yet, the pickled version below is your safe water-bath alternative, and it is genuinely delicious.
The Beginner-Safe Version: Zucchini Relish
Ingredients (makes about 5 pint jars):
- 10 cups zucchini, shredded (about 3 lbs)
- 4 cups onion, finely chopped
- 2 red bell peppers, finely chopped
- 5 tablespoons pickling salt
- 2 1/2 cups cider vinegar at 5% acidity
- 4 cups sugar
- 1 teaspoon turmeric
- 1 teaspoon celery seed
- 1/2 teaspoon black pepper
Steps:
- Combine shredded zucchini, onion, and peppers in a large bowl. Add pickling salt and toss to coat. Cover and refrigerate overnight, 8 to 12 hours. The salt draws out the extra moisture that would otherwise water down your brine.
- Drain and rinse the vegetable mixture thoroughly under cold water. Drain again well.
- Combine vinegar, sugar, and spices in a large pot. Bring to a boil.
- Add drained vegetables to the pot. Return to a boil and simmer 10 minutes.
- Ladle into hot pint jars, leaving 1/2 inch headspace. Remove air bubbles. Wipe rims.
- Process in a boiling water bath: 10 minutes for pints. Adjust for altitude.
- Rest 24 hours. Check seals.
Troubleshooting
Lid did not seal, still flexes after 24 hours Cause: Rim was not wiped clean, lid was nicked or defective, headspace was off, or jar was not fully submerged. Fix: Refrigerate and use within 2 to 3 weeks. Or reprocess within 24 hours with a fresh lid, though texture may suffer.
Jam is runny, never set Cause: Undercooked, batch was too large, or insufficient natural pectin in the fruit. Fix: Sealed runny jam makes excellent ice cream topping. For the next batch, cook longer and test the set before filling jars.
Pickles are soft, not crunchy Cause: Cucumbers were too mature, blossom end was not removed, or cucumbers sat more than 24 hours before canning. Fix: For the next batch, buy or pick the freshest cucumbers possible, cut the blossom end, and can same day. A clean grape leaf in each jar adds natural tannins that help firming.
Brine is cloudy in the pickle jars Cause: Table salt was used instead of pickling salt, or hard water was used. Fix: Cloudiness in a sealed jar that smells normal when opened is not a safety issue on its own. But when in doubt, throw it out.
Fruit is floating to the top of the jar Cause: Fruit was not fully softened before processing, or jars were disturbed during the 24-hour rest. Fix: Cosmetic only, if sealed and smells normal. Tip jars gently once a day for the first few days to redistribute.
Jar cracked in the canner Cause: Cold jar went directly into boiling water, or lid band was over-tightened. Fix: Discard contents and jar. Next time, keep jars warm before filling and use fingertip-tight bands only.
Pantry-Building Starts Today
Every person who has ever filled a shelf with their own canned food started exactly where you are right now, reading the instructions, second-guessing themselves, and wondering if trying these recipes will get them somewhere.
It will. You just need a pot deep enough to hold your jars, a tested recipe, and the willingness to follow the steps.
Start with one jar. Then add another shelf. The rest will follow.
Ready to get your basics down before you boil water? Check out our complete guide to Canning 101 for Beginners.
FAQs About Canning Recipes
FAQ 1: What is the easiest canning recipe for absolute beginners?
Fig jam and apple butter are the most forgiving first projects. Both use high-acid fruit with simple water-bath processing and no specialized equipment beyond a basic canning kit. Fig jam also has enough natural sugar to set reliably without added pectin. Start with a half-batch your first time so you are not managing 10 hot jars at once while you are still learning the rhythm.
FAQ 2: Can you alter a canning recipe safely, or do you have to follow it exactly?
For any water-bath canning recipe, you follow the ratio components exactly. Acid levels, vegetable amounts, and vinegar quantities are not adjustable. You can safely tweak dried herbs and spices for flavor without affecting safety. But you cannot add more low-acid vegetables, reduce the vinegar, or swap out acid sources without invalidating the tested formula. The acid balance is what makes the recipe safe, and there is no way to verify pH at home.
FAQ 3: What basic equipment do I need to try my first canning recipe?
At minimum: a stockpot at least 12 quarts deep with a rack to keep jars off the bottom, Mason jars with new lids, a jar lifter, a canning funnel, and a bubble remover or thin spatula. A timer you will actually use. The Ball Canning Kit runs around $30 and covers most of this in one purchase. You do not need expensive equipment to start water-bath canning well.
FAQ 4: How do I know if a canning recipe is safe for a water-bath canner?
A recipe is safe for water-bath canning only when it has been specifically tested and approved for that method by the USDA, Ball, or the National Center for Home Food Preservation. High-acid foods like jams, jellies, pickles, vinegar-based sauces, and tomato products with added acid qualify. Low-acid vegetables, meats, and most soups do not. If a recipe does not name a tested source, do not use it for canning.
FAQ 5: Can I double a jam canning recipe to make a bigger batch?
No, and this is one of the most common mistakes that produces jam that never sets. Large batches do not cook down at the same rate as the tested batch size. The sugar concentration, pectin activation, and evaporation timing are all calculated for the exact quantity in the recipe. If you want more jam, run two separate batches back to back. It takes longer, but it actually sets. One oversized double batch almost always turns into syrupy, runny frustration.
