

Water bath canning is a skill every homesteader like us should have up our sleeves if we’re looking for ways to enjoy a year-round supply of juicy homemade jams.
Learn with us in this easy-to-follow guide.
RELATED: Canning vs. Freezing: What’s The Better Preservation Method
Water Bath Canning Process to Store Your Acidic Produce Long After Harvest
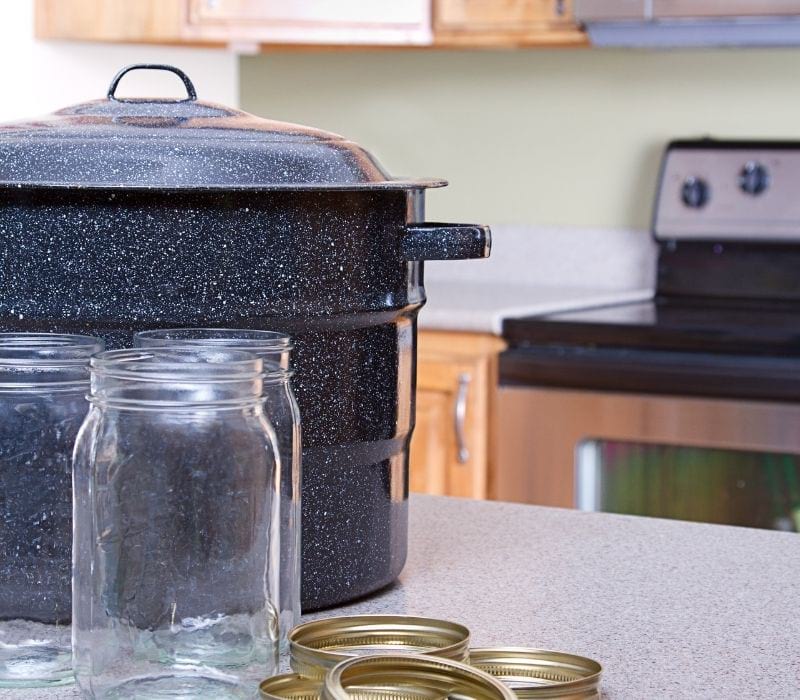
Things You’ll Need
- Stove
- A large deep saucepot
- A rack (should fit inside the saucepot)
- Canning jars with lids and rings
- A canning funnel
- A ladle
- Jar lifter
- A small rubber spatula or bubble freer
- A magnetic lid wand (Optional)
- Timer
- Canning rack with handles
For a kit that has everything you need:
No products found.Step 1. Prepare the Canning Jars
To start, place a rack upside down in a saucepot and add enough water to cover your canning jars at least two inches above the lids when fully submerged and boiled to 180°F.
The rack creates a space between the bottom of the saucepan and the canning jars bases, allowing water vapor to escape. Not to mention, it prevents breakage that may result from jars rattling against the saucepot during the water bath canning process.
Next, check your canning jars, lids, and rings for functionality as well as imperfections.
- The jars should not have cracks, nicks, or uneven and sharp edges, as this may alter sealing.
- The rings should fit the jars, and the lids should be even.
Once set, clean in hot soapy water even if the jars are new, and dry well.
Finally, preheat the jars in the 180°F simmering water. Doing this will prevent the jars from breaking when filled with hot food content. If you are, however, raw-packing, preheating the jars in a 140°F simmer will do.
Depending on your jar manufacturer’s instructions, you can also preheat the lids in a separate container.
Tips
- While you can reuse the jar rings, you have to use new lids every time you are water bath canning.
Step 2. Fill the Jars With Your Prepared Condiment
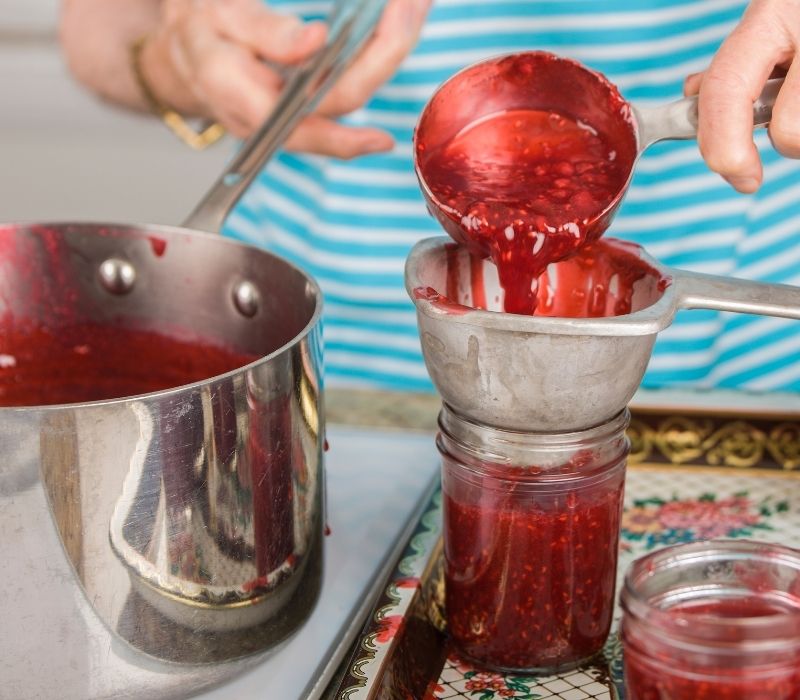
Using a jar lifter, remove your preheated jars from the saucepot and place them on a kitchen towel. Placing them directly on your kitchen counter may cause cracks due to the sudden temperature difference.
Fit the hot jars with the canning funnel each at a time and use a ladle to fill the jars with the food product you have prepared. Make sure to leave enough headspace between the top of the food and the jar rims.
Run a rubber spatula or bubble freer around the filled jars’ interior to release any trapped air. Do this at least two times per jar, so you do not miss any air bubbles.
Lastly, use a damp kitchen towel to wipe off any food residue on the jar threads and rims. It will allow better contact between the lids and the jars for better sealing.
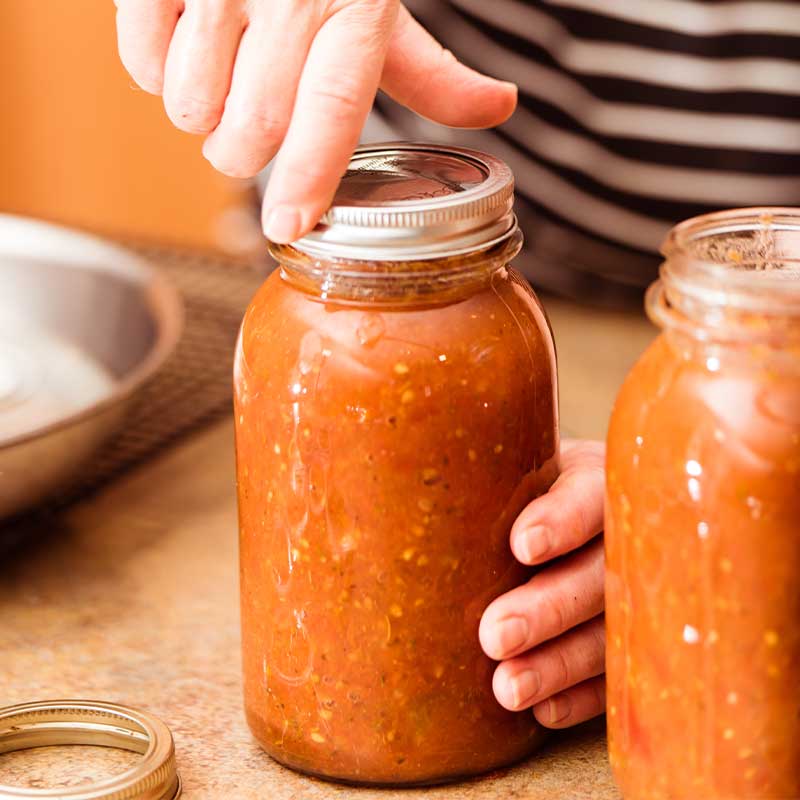
Step 3. Place the Lids and Rings on the Filled Jars
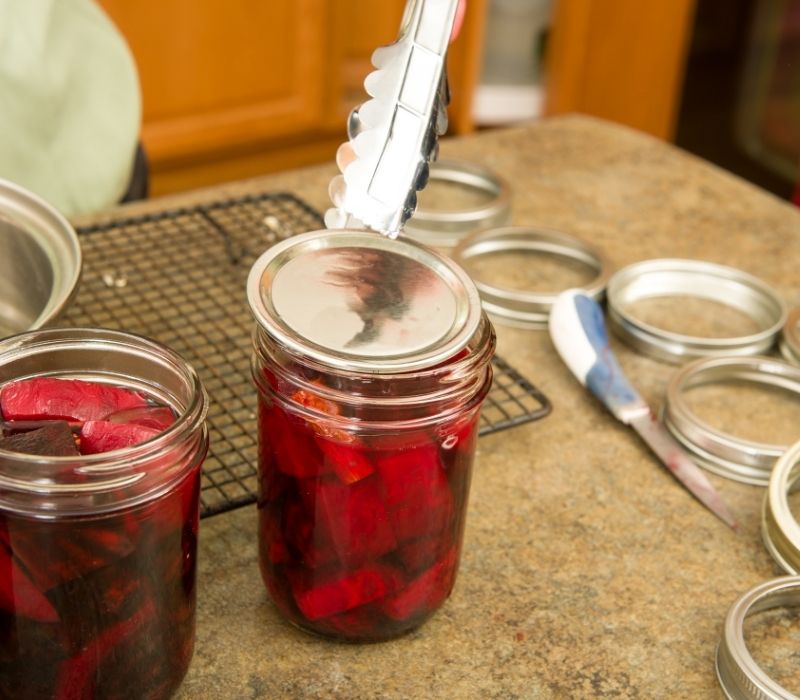
Start by placing the new lids on the filled jars. It will be easier if you have a magnetic wand since you can catch the lids one at a time. Once perfectly centered on the jar rims, apply the jar rings and screw on until just fingertip tight.
The point is for the rings to be secured enough onto the jars but not too tight that the hot air produced during the canning process can’t escape.
RELATED: How To Open A Can Without A Can Opener
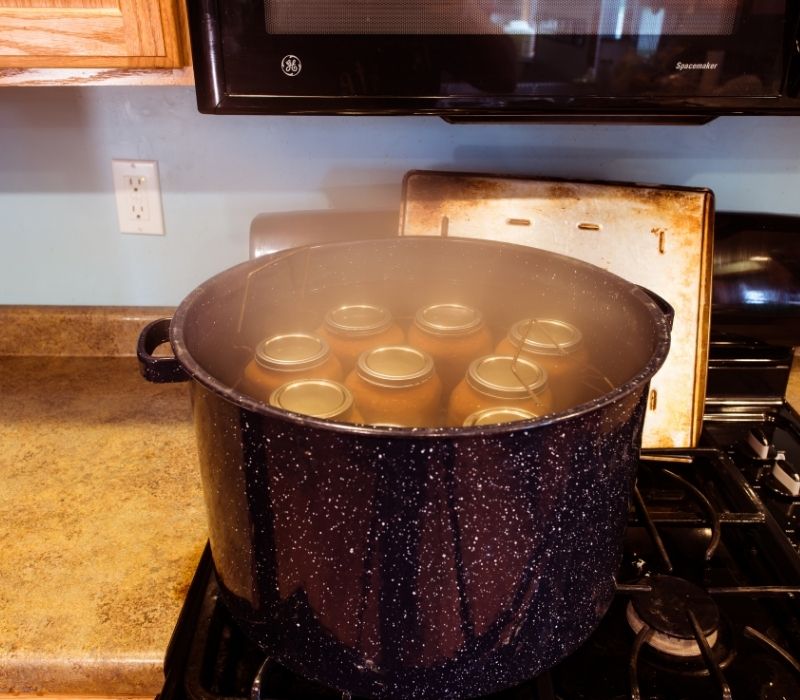
Step 4. Begin the Water Bath Canning Process
Carefully lower the filled jars into the saucepot canner. Avoid tipping these over to prevent contact between the food and jar rims. The simmering water should cover the jars by at least two inches. It helps to have some hot water in a kettle to add to the saucepot should you need to.
Next, cover the saucepot and bring the water to a full rolling boil, after which you should start your timer. Follow the instructions provided in your recipe on the required processing time.
Remember to start the timer when the jars are in the saucepot canner, and the water has attained a full boil.
Tips
- A rack with handles will make this easier since you will only have to load it and lower several jars into the canner at a go.
- To avoid rattling, leave at least a half-inch space between the jars.
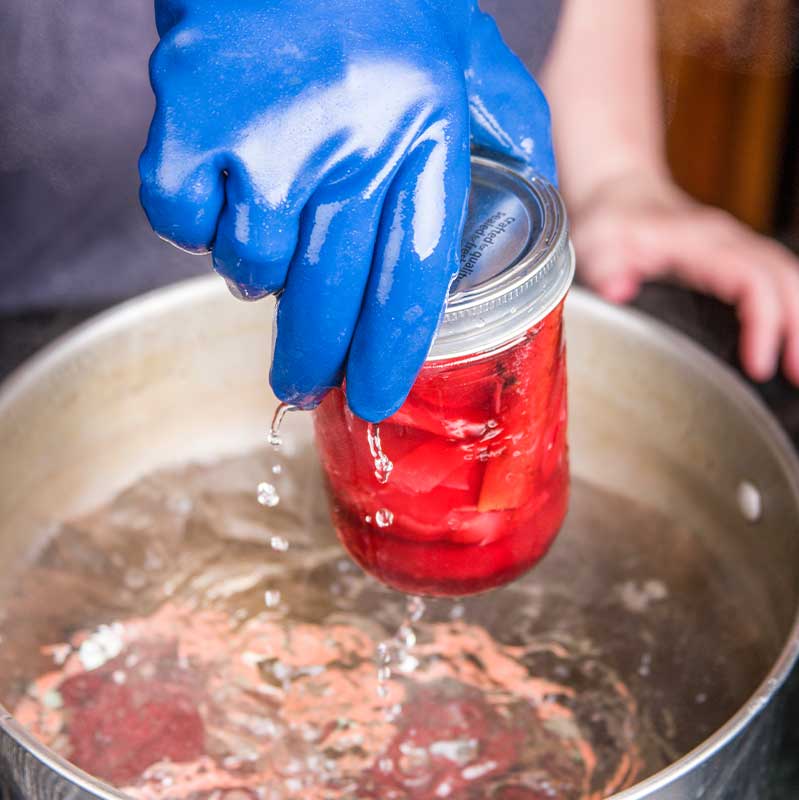
Step 5. Allow the Processed Jars to Cool
Once the directed processing time is over, turn off the heat and remove the saucepot lid and allow the processed jars to sit in the water bath undisturbed for about five minutes to adjust to the external temperature.
If your rack does not have handles, use a jar lifter to lift and transfer the jars onto a towel-lined kitchen counter or another rack for cooling. Let the jars cool completely and undisturbed for 12 to 24 hours.
Reminder: Avoid tipping the jars over when lifting them from the water bath since the food content can interfere with how the lids seal.
Tips
- It will help to set the jars in an unused corner on the counter to ensure they are not disturbed, especially if you have children.
- Line the inside of your cooling rack with a towel to reduce the risk of temperature shock.
- Space out the jars as they cool to allow air circulation.
If you need some quality canning jars, No products found.
Step 6. Inspect the Jar Lids
After several hours of cooling, it is time to inspect the seal on all the jars physically. Press down on the lids, and if there is no flex or wiggle, then the jars have sealed correctly.
To test this further, remove the jar rings and lift off the lids with the finger tips. Properly sealed lids will not fall off or become loose. If they do, immediately refrigerate the food content and consume it promptly.
However, you can still reprocess the food content if it is still under 24 hours since you finished processing. Be sure to use a new lid for this.
Otherwise, clean the processed jars with a damp towel to remove any food residue from the process, label with stickers, and store away in a cool, dark, and dry place for several months.


Watch this video from GrowVeg on water bath canning step-by-step:
There you go, homesteaders! While the water bath canning process requires paying keen attention to details, it is something you can easily pull off in the comfort of your kitchen.
Have fun making gooey homemade jam, marmalade, and fillings!
What acidic food are you planning on canning this season? Let us know in the comment section below!
Up Next:
- Homemade Raspberry Jam Recipe Your Family Will Enjoy
- How To Can Tomatoes In Your Homestead
- What To Do With Fall Leaves | 11 Smart Ways
Fellow homesteaders, do you want to help others learn from your journey by becoming one of our original contributors? Write for us!
