

Whether you love your peaches raw or cooked, mastering how to can peaches is a sure way to ensure a quality supply long after summer.
Here’s a guide to making canned peaches at home.
RELATED: A Step By Step Guide To Canning Jalapenos
How to Can Peaches Through Water Bath Canning
Ingredients
- Peaches
- Ice water
- Lime juice or Fresh-fruit produce protector
- Water
- Sugar
Equipment You’ll Need
- Sharp Knife
- Saucepot
- Slotted spoon
- Glass bowl
- Chopping board
- Canning jars with lids and rings
- Ladle
- Plastic spatula
- Kitchen towel
- Water-bath Canner
- Jar lifter
- Cooling rack
Step 1. Prepare the Canning Jars, Lids, and Rings

Canned peaches require clean and sterilized jars. After washing the canning jars in soapy water or taking them through a dishwasher cycle, submerge the jars in the canner with boiling water. Carefully remove using your jar lifter after 10 minutes, and drain.
To sterilize the lids, put boiling water in a bowl and submerge the jar lids for 10 minutes.
Step 2. Blanch the Peaches

As your canning jars are sterilizing, have another saucepot of water boiling on standby. Next, thoroughly wash your peaches, make small “X” cuts at the bottom, place them in the boiling water, and blanch for one to three minutes.
Once perfectly blanched, use a slotted spoon to transfer the peaches to a bowl with ice-cold water and let them cool.
Step 3. Peel and Slice the Peaches

Next, when cool enough to handle, use a sharp knife to peel the peaches. The peels should come off easily at this point. To make peeling easier, start from the “X” cuts you made and peel downwards.
Since peaches oxidize easily when exposed to air, sprinkle lime juice or fresh-fruit produce protector and toss or stir the peeled peaches to ensure all sides are well coated.
Once you have peeled all your peaches, pit them and slice them to your liking. You can choose to cut them into halves or quarters. The size of your canning jars should dictate the best way to slice the peach fruits.
Tip: If any peach is hard to peel, blanch it for another minute or two and then allow it to sit in the ice water.
RELATED: A Homesteader’s Guide To Canning Pineapples
Step 4. Prepare the Syrup

You can choose to go for a light, medium, or heavy syrup for this step, depending on how much sugar content you want.
Add your desired amount of sugar and water to a medium saucepan and bring it to a boil until all the sugar dissolves. Consider the number of canning jars you have while making the syrup to ensure you have enough.
If you choose to use juice, go for an equal amount of water and juice to control the sugar content.
Step 5. Fill the Canning Jars
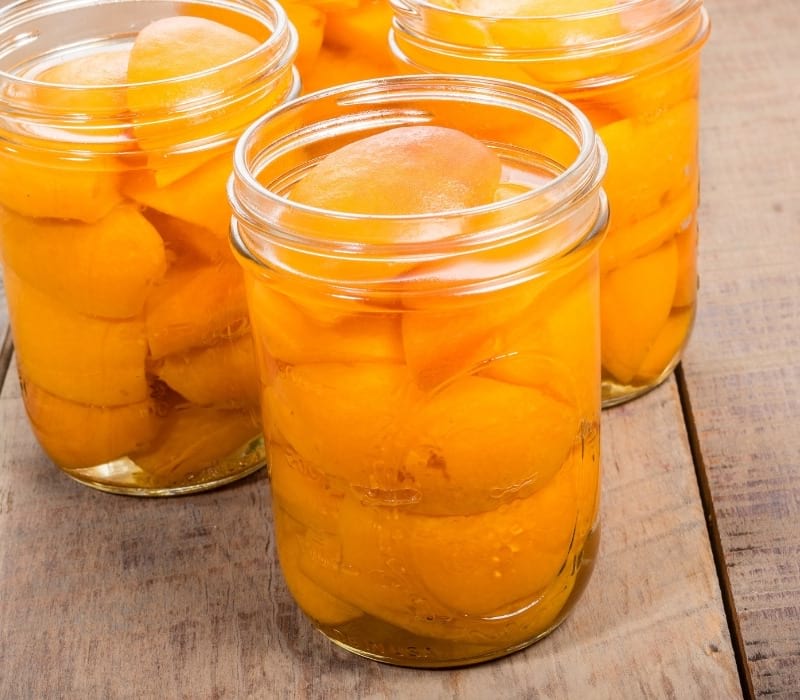
Using a jar lifter, remove the hot jars from the water-bath canner and carefully place them on a towel on top of your kitchen counter. Use another towel to hold them as you drain back the hot water into the canner.
Next, fill the jars with peach slices until just below the jar rims. Pack them tightly without squishing them. Now, using a ladle, fill the jars with the syrup until the peaches are entirely submerged.
Once all the jars are filled, run a plastic spatula in the jars’ interiors to free any trapped air. Now wipe the jar rims with a damp kitchen towel, place the lids on the clean jars, and loosely screw on the jar rings.
Tip: The syrup should be at the same level as the peaches to leave enough headspace needed for processing the peaches.
Step 6. Process the Peach- filled Jars
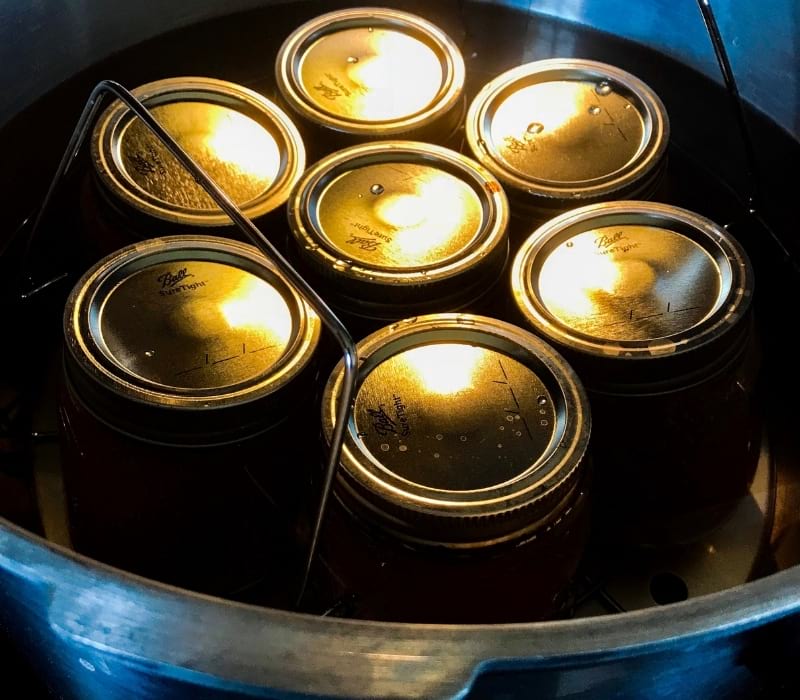
Lastly, lower your filled jars into the racked water-bath canner using a jar lifter, being cautious not to bend the jars and process them for 20 minutes. Be keen to factor in any altitude-time adjustments you might need to make.
Remember, the processing time starts when the water attains a full roaring boil. After 20 minutes, carefully lift the jars from the canner and place them on a towel-lined cooling rack and let them cool for 12 to 24 hours.
To check whether the jars are properly sealed, gently press the lids, and if any pops up and down or makes a popping sound, it is not sealed.
Store the sealed jars in a cool, dry, and dark place for up to two years.
Pro Tips
- Besides sugar, you can make your syrup with honey or maple syrup.
- If you choose to use juice, go for apple or grape juice.
- Ensure you choose the perfectly ripe peaches for easier peeling. Overripe peaches will end up mashed in the jars.
- Consume the contents of any unsealed jars within 24 hours.
Watch this video from Preppy Kitchen on how to make a peach cobbler:
This detailed guide to making canned peaches will give you a readily available jar of this fruit anytime your taste buds crave some peach goodness. Taste summer in fall and winter in a jar of canned peaches.
What other methods do you use in making homemade canned peaches? Let us know in the comment section below!
Up Next:
- Canning vs. Freezing: What’s The Better Preservation Method
- A Homesteader’s Guide To Canning Blueberries Without Added Sugar
- How To Make Homemade Pasta Without A Pasta Machine
Fellow homesteaders, do you want to help others learn from your journey by becoming one of our original contributors? Write for us!
