
TL;DR: Canning Jalapeños
- The article teaches you how to preserve fresh jalapeños by canning them using either a water bath method for pickled jalapeños or a pressure canning method for plain peppers.
- For water bath canning, sliced jalapeños are combined with a vinegar-based brine, packed into sterilized jars, and processed to create long-lasting pickled peppers.
- The pressure canning method involves blanching or prepping plain peppers, packing them into jars, and processing at high pressure to safely preserve them without pickling.
- Proper preparation includes washing peppers, using clean jars and lids, leaving appropriate headspace, and following safe canning times and techniques.
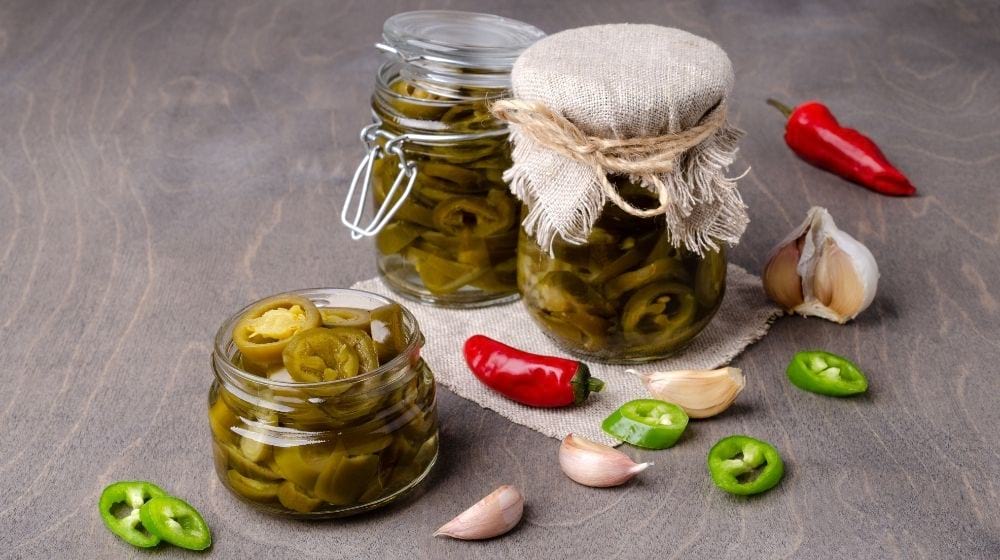
- Canned jalapeños can be stored long-term and enjoyed on sandwiches, tacos, pizzas, and other foods, extending your harvest well beyond the growing season.
RELATED: Water Bath Canning | Easy Step-by-Step Guide
A Step-by-Step Guide to Canning Jalapeños | Two Ways
Canning jalapeños is a simple and effective way to preserve fresh peppers so they can be enjoyed year-round. Whether you prefer pickled jalapeños or plain canned peppers, proper canning methods allow you to safely store your harvest while maintaining flavor and heat. With the right preparation and processing technique, home-canned jalapeños are shelf-stable, versatile, and perfect for adding spice to everyday meals.
Canning Pickled Jalapeños Through Water Bath Canning
Things You’ll Need for the Pickled Jalapeños Recipe
- 2 3/4 lbs Jalapeno peppers
- 2 cups of filtered water
- 6 cups of white vinegar
- 3 cloves of crushed garlic
- 1 tbsp. sugar
- 3 tbsp. kosher salt
For Water Bath Canning
- Stove
- A large, deep saucepot
- Canning rack with handles
- Canning jars with rings
- New jar lids
- A canning funnel
- A ladle
- Jar lifter or tongs
- A small plastic spatula or bubble freer
- A magnetic lid wand (Optional)
- Timer
Instructions
- Prepare the canning jars, lids, and rings you will be using by washing them in soapy water and rinsing them. You can take the jars through a cycle in your dishwasher but not the lids or the rings.
- Fill your rack-fitted saucepot canner with enough water to cover the jars by at least one inch when submerged and bring to a simmer.
- Using a jar lifter or tongs, gently submerge the cleaned canning jars in the simmering water. Place the jars at least one inch apart on the rack to prevent them from rattling against each other or the sides of the saucepot. Ensure all the jars are filled with hot water.
- Next, place a medium saucepan over medium heat and combine the water, vinegar, sugar, garlic, and salt to make a brine. Bring the mixture to a boil and then turn down the heat for the brine to simmer.
- Thoroughly wash the fresh jalapenos and slice them into quarter-inch rings. Add these to the brine and turn up the heat to bring it to a boil.
- Using your jar lifter, carefully remove the preheated jars from the canning pot. Remove water from the jars.
- Fit the hot jars with a canning funnel and use a ladle to pour the pickled pepper mixture one jar at a time, leaving a headspace of 1 to 1 1/2 inches.
- Run a plastic spatula or bubble freer several times inside the filled jars to dislodge any trapped air bubbles.
- Using a damp kitchen towel, wipe off any food residue on the jar rims. Once clean, fit the lids using a magnetic lid wand or your hands and screw on the rings until just fingertip tight.
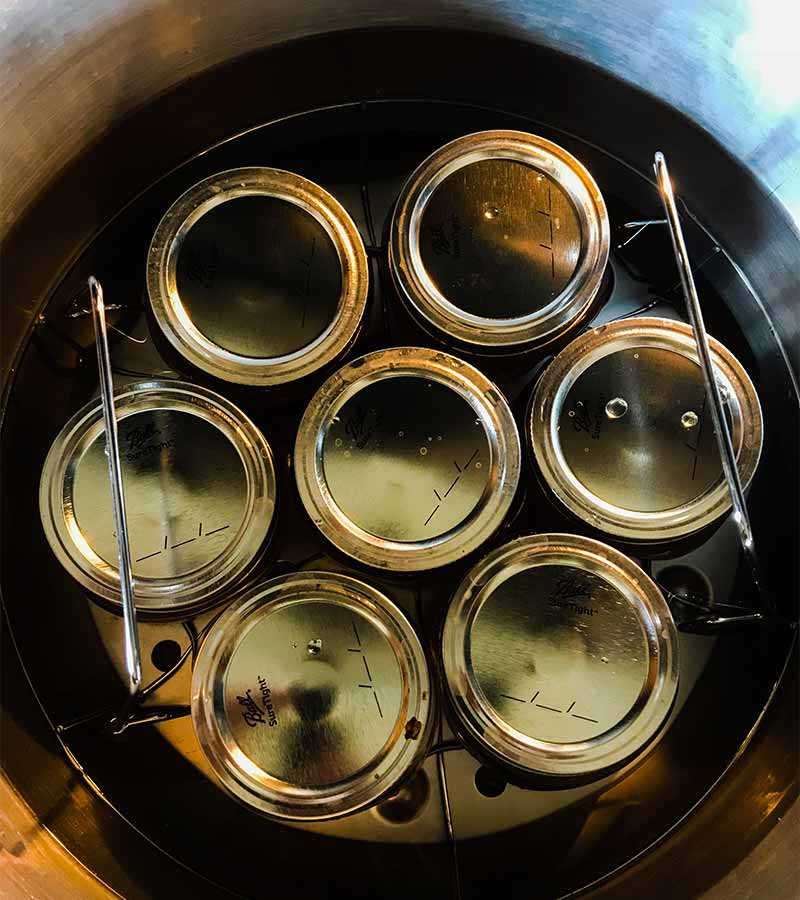
- Gently lower the lidded jars into the water bath canner using the jar lifter. Be steady to avoid tipping the jars over as this may affect the sealing process. Once inside the canner, ensure the jars are covered by at least two inches of water when submerged.
- Cover the canner and bring the water to a full rolling boil and process for seven minutes. Only start the timer when the water has achieved a full boil.
- When the processing is completed, remove the jars using your tongs and place them on a towel on your kitchen counter. If you choose to place them on a cooling rack, be sure to line that too with a towel.
- Once in place, leave the hot jars to cool undisturbed for 12 hours.
- Remove the rings and check for unsealed cans by trying to lift the lids with your fingertips. If any cans are unsealed, reprocess them using new lids. However, if 24 hours have passed since processing, refrigerate the pickled jalapenos and consume promptly.
- Lastly, label the canned jalapenos and store in a cool and dark place for up to 18 months.
Pro tips
- Go for enamel canners since they are non-reactive.
- Always have a kettle of boiling water on the side to top up the canner without lowering the water’s temperature.
- Place the preheated jars on a kitchen towel to prevent temperature shock that may cause the hot jars to break.
RELATED: Best Vegetables For Canning
Canning Jalapeños Through Pressure Canning
Things You’ll Need
- Stove
- Large pot
- Sharp knife
- Chopping board
- Fresh jalapenos
- Slotted spoon
- Quarter or half-liter canning jars with lids and rings
- Kettle
- Bubble-freer
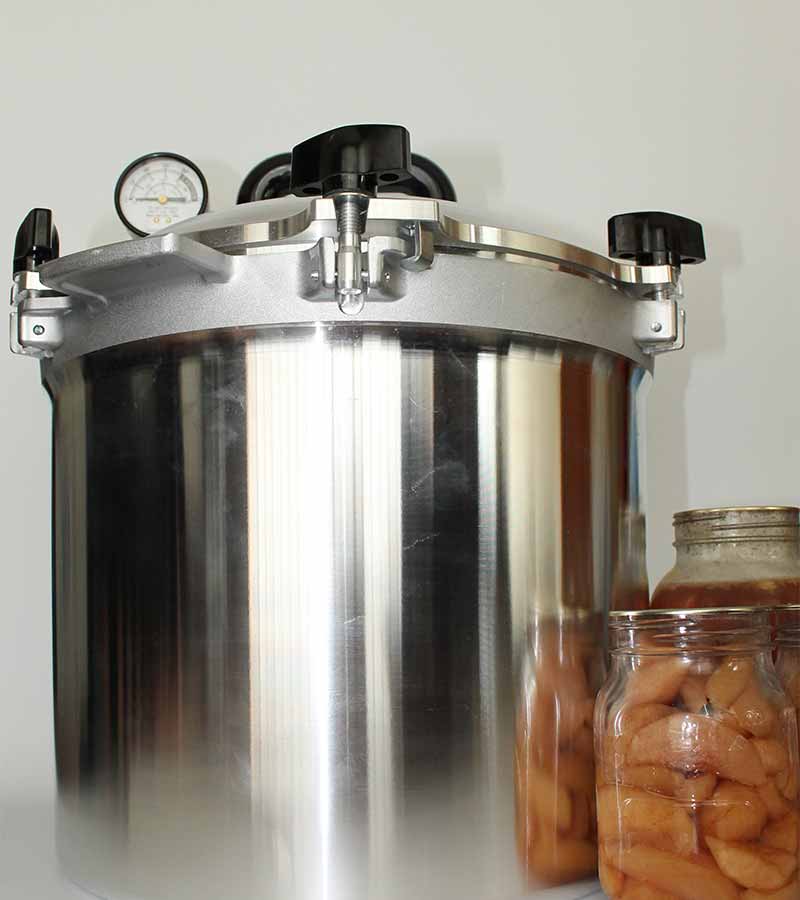
- Pressure canner
Instructions
- Clean your jars, lids, and rings in soapy water, rinse, and dry them.
- Add water to the large pot and bring it to a slow boil.
- Thoroughly wash the jalapeno peppers and slice them into quarters. Be sure to remove the seeds and the stems.
- Next, add the jalapeno slices to the simmering water and allow them to boil steadily for about three minutes.
- Fit your canning jars with a canning funnel and, using a slotted spoon, remove the blanched jalapenos from the boiling water and fill your canning jars. Leave a one-inch headspace in all the jars.
- Add one and a half teaspoons of vinegar to the blanched peppers if you are using quarter-liter canning jars. Or one tablespoon to each jar if you are using half-liter jars.
- Next, top up the jars with clean boiling water while maintaining a one-inch headspace. Having a kettle of boiling water will make this easier.
- Using a bubble freer, free any air trapped in the jar contents. The bubble-freer is also a great tool to put the jalapeno slices in place to ensure they don’t protrude into the headspace.
- Use a clean, damp kitchen towel to wipe any food residue off the jar rims, center the lids on the jars, and screw the jar rings just until fingertip tight.
- Lower the screwed jars into a pressure canner with a few inches of water. Place the pressure canner lid on and secure it tightly with the notches.
- Lastly, turn on the heat until a pressure of 11lbs dial gauge or 10lbs for a weighted gauge is achieved, and process the jalapenos for 35 minutes.
- When done, remove the jars from the canner and rest them on a towel on your kitchen counter. Clean, label, and store them in your pantry.
Pro tips
- Wear gloves when cutting the jalapenos.
- Adjust the canning pressure if you live at an altitude above 1000ft.
- You can leave some seeds on the slices to keep the heat.
- If you will be using the exact quantities in this guide, ensure you do not use larger jars.
- Allow half a kilogram of raw whole pepper per half-liter canning jar.
- The pressure and the processing time will work for either jar size.
- Consume the contents of the jars that do not seal after resting.
Preserving and Canning Jalapeños for Year-Round Use
Canning jalapeños is a practical way to reduce waste and enjoy your pepper harvest long after the growing season ends. Whether you choose pickled or plain peppers, following tested canning methods ensures safe, flavorful results. Home-canned jalapeños offer convenience, versatility, and the satisfaction of preserving your own food.
Start Canning Jalapeños Today
If you have fresh jalapeños on hand, now is the perfect time to try canning them. Choose the method that fits your taste, gather your supplies, and start preserving peppers you can enjoy all year. With a little preparation, you’ll always have jalapeños ready whenever you need them.
Watch this video from Teach a Man to Fish on sugar-free pickled jalapeños:
There you have it, homesteaders. With these two canning methods, you bet you will enjoy a fresh supply of jalapeños to last you until the ground is ready for you to grow more.
Which method will you use for canning jalapeños? Let us know in the comment section below!
Up Next:
- Water Bath Canning | Easy Step-by-Step Guide
- A Homesteader’s Guide To Canning Blueberries Without Added Sugar
- What Do Worms Eat? | Worm Farming 101
Frequently Asked Questions About Canning Jalapeños
Can jalapeños be safely canned at home?
Yes, jalapeños can be safely canned at home when proper methods are followed. Pickled jalapeños can be water bath canned, while plain jalapeños must be pressure canned to ensure safety.
Do jalapeños need to be pickled before canning?
No. Jalapeños can be canned either pickled or plain. Pickled jalapeños use a vinegar-based brine and water bath canning, while plain peppers require pressure canning.
Do you have to remove the seeds before canning jalapeños?
Removing the seeds is optional. Seeds increase heat but do not affect canning safety. Jalapeños can be sliced with or without seeds based on personal preference.
How long do home-canned jalapeños last?
When properly processed and stored in a cool, dark place, canned jalapeños can last up to one year while maintaining quality and flavor.
Are canned jalapeños as spicy as fresh ones?
Canned jalapeños are often slightly milder than fresh peppers. Pickling and heat processing can reduce some of the peppers’ natural heat.
Can canned jalapeños be used in any recipe?
Yes. Canned jalapeños work well in sandwiches, tacos, nachos, pizzas, soups, and cooked dishes where fresh jalapeños would normally be used.
