
Dehydrating apples sounds like a tough job, but it’s surprisingly easy to do, even your kids can help you out. Follow this guide to dehydrating apples and make the process a bonding for the whole family.
RELATED: Top 17 Healthy Dehydrated Fruit Recipes You Can Make This Winter
Dehydrating Apples in 3 Ways | a Step-by-Step Guide
Dehydrating Apples Using a Food Dehydrator
 You’ll Need:
- Large bowl
- 2 cups of water
- 1/2 tsp powdered citric acid or lemon juice
- dehydrator
Instructions:
- In a large bowl, mix two cups of water with a half teaspoon of powdered citric acid and stir thoroughly. You can also combine a cup of water and a cup of lemon juice.
- Slice your fruit crossways, approximately 1/3-inch thick, then get rid of the seeds.
- Soak your apples f0r 10 minutes into the solution you’ve made earlier. This is to lessen the browning since they are already sliced.
- Before drying, you have to drain your apples of any liquid. Spread them on a towel and slightly press the towel on top of your sliced fruit.
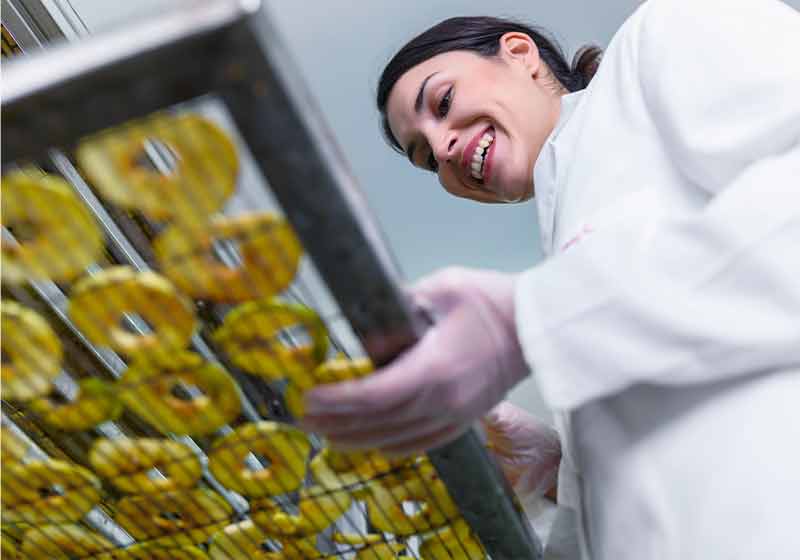
- Place your apples on dehydrator trays. Provide some space in between each slice for proper air circulation and even drying.
- Put the trays inside the food dehydrator. Then, set the temperature at 130°F. Start your dehydrator and wait for around 12 hours to dry the apples until they have reached your desired texture.
- Fold the sliced apples in half. You’ll know that the drying process is complete if they won’t stick together. You can also tear them in half to check if there’s still a presence of moisture.
- Once the slices are completely dry, shut off the dehydrator and pull out the trays. Condition the apples by letting them cool for 10 minutes at room temperature.
- Transfer the apples to a glass jar or container. You can put labels on it so you would be sure of the content inside and the date you dried them. Don’t forget to secure the cover tightly.
Tips:
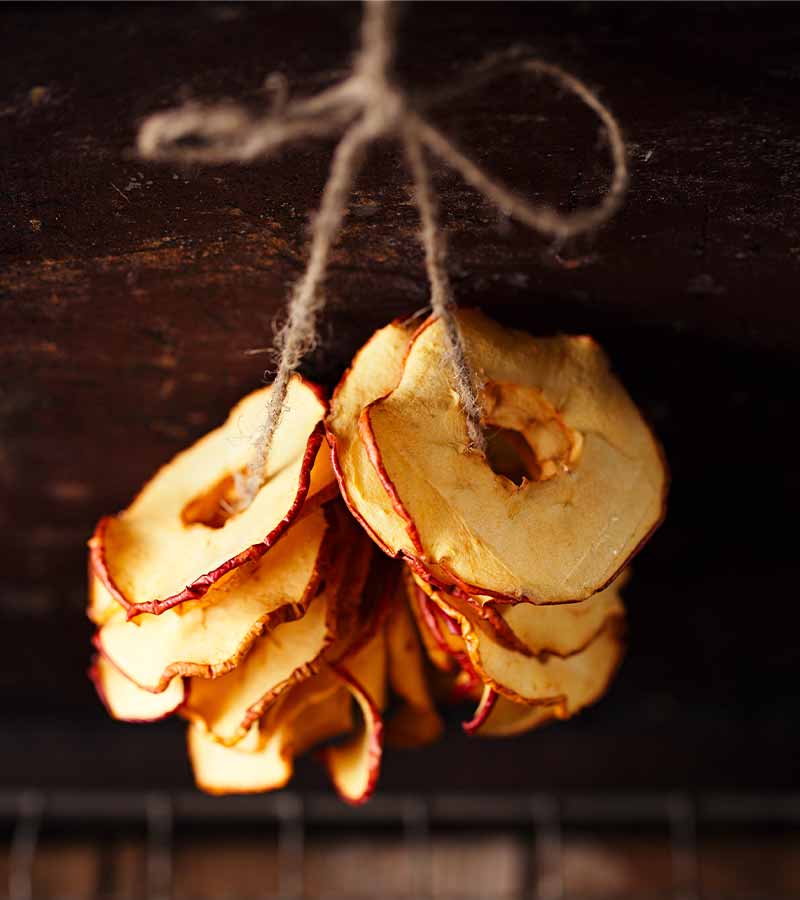
- Place your jar far from heat or direct light. Your home-dried fruit can last for six months to one year if it’s stored in a cool, dark, and dry place.
- Observe your dehydrated apples for around a week. Once you notice condensation, put back the apples in the dehydrator and dry them longer.

- 5 STACKABLE, BPA-FREE TRAYS: The food dehydrator machine trays provide up to 4.2 square feet of drying space for making plenty of...
- ADJUSTABLE TEMPERATURE CONTROL, DIGITAL TIME & AUTO SHUTOFF: Easily adjust the temperature from 100-160ºF to dry a variety of foods...
- CONSISTENT, EVEN DRYING WITHOUT HAVING TO ROTATE TRAYS: The powerful 500 watt base-mounted heater and quiet fan on this 5-tray food...
RELATED: Dehydrating 101 Series: Eggs
Dehydrating Apples Using a Wood Stove
 You’ll Need:
- 4 tin cups
- drying rack or wire strands
- wood stove
Instructions:
- ]If you want to achieve that crispy texture and whiter color on your apples, you can dry them naturally over a wood stove.
- Start by putting four tin cups on the corners of your stove. If you don’t have one, you can use other items that can withstand heat.
- Lay the drying rack on top of your tin cups. You can also hang wire strands and attach them to your rack.
- Place your sliced apples on the drying rack or thread them through the strands. Remember to leave spaces in between slices. Also, make sure that the rack and strands are near your wood stove.
- Occasionally rotate the strands or rack so that your apples would dry evenly.
Tip:
Completely dehydrating your apples using this method might take several days depending on the environment.
Dehydrating Apples Using an Oven
 You’ll Need:
- oven, preheated at 145°F
- cooling racks
- baking sheets
Instructions:
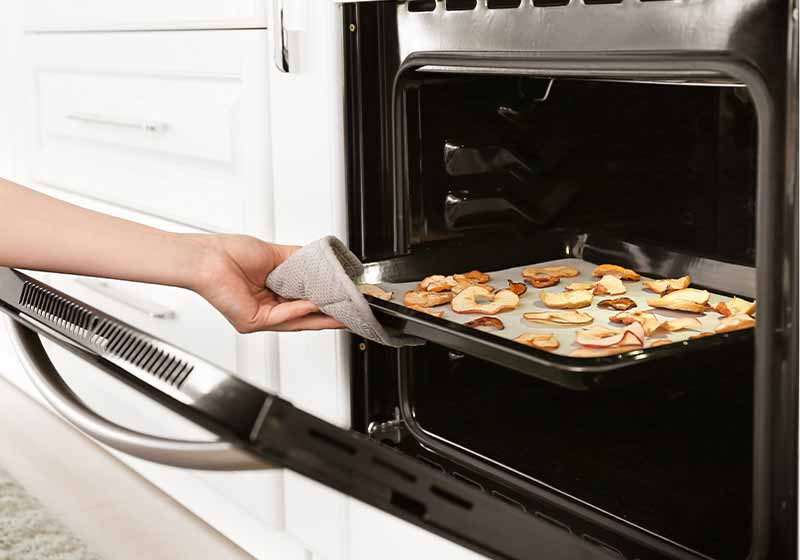
- Start by preheating your oven to the lowest setting or at 145°F.
- Place your sliced fruit on cooling racks. These racks should be on top of your baking sheets to allow air to circulate.
- Put your sliced apples inside your oven. Keep the door slightly open, around two inches, to let the moisture escape. You can also position a fan near the door to help in air circulation.
- Depending on the thickness of the slices, drying your apples will be finished in two to three hours. You can start looking into them after an hour by flipping over each slice.
- Remove those which are already dried.

- 𝗕𝗜𝗚𝗚𝗘𝗥 𝗧𝗛𝗔𝗡 𝟳 𝗧𝗥𝗔𝗬𝗦: With 6 stainless steel trays providing 6.5 ft² of drying space...
- 𝗠𝗢𝗥𝗘 𝗣𝗢𝗪𝗘𝗥𝗙𝗨𝗟 & 𝗘𝗙𝗙𝗜𝗖𝗜𝗘𝗡𝗧: Equipped with a 600 W motor, rear-mounted...
- 𝗦𝗨𝗣𝗘𝗥 𝗤𝗨𝗜𝗘𝗧 𝗢𝗣𝗘𝗥𝗔𝗧𝗜𝗢𝗡: Features an advanced brushless motor with noise levels...
Aside from dehydrating apples, you can also use an oven to make your own dried lemon slices. Watch the techniques that you can use in citrus fruits in this video by familyspice:
There you go, homesteaders! These are easy and straightforward ways of dehydrating apples and make your snack time healthy and tasty. Preserve the flavor of your harvest or save any leftover with this guide to dehydrating apples.
What other methods do you use in dehydrating apples? Let us know in the comment section below!
Up Next:
- How To Dehydrate Food To Preserve Them
- Apple Varieties | 16 Heirloom Apples & What They Taste Like
- Beer Growler: The Hip New (Old) Trend For Fresh Delicious Beer
Fellow homesteaders, do you want to help others learn from your journey by becoming one of our original contributors? Write for us!
