
Learning how to make butter is fun and easy! It’s one of those must-try homestead kitchen activities for you and your kids!
How To Make Butter In 3 Easy Steps
Making butter in a jar is one the most fulfilling kitchen activities there is. It’s also so easy, it’s a great project to teach your kids a little independence–you can just guide them through the process and enjoy watching them figure it out. And as for the taste, well, you don’t have to worry about it because it is undeniably as delicious as what you can buy in the store. Have fun, learn a new skill, and save a little money–you simply must try this at home!
What You’ll Need:
- cow’s milk cream or heavy cream (some leftovers from a previous recipe will do)
- a pinch of salt
- water
- mason jar
How To Make Butter:
Step 1: Half Fill The Mason Jar

Pour the cream into the mason jar, no more than half of the way full. Make sure it has been left at room temperature for at least 12 hours and not more than 24 hours. Add a pinch of salt to taste.
Cover the jar with its lid and secure it tightly.
#MothersKnowBest so let Mother Nature’s natural #antibiotics heal you today! 🌼🌼🌼 https://t.co/bWjSiYtGwz pic.twitter.com/sRB6z4Gm5k
— Homesteading (@HomesteadingUSA) March 20, 2017
Step 2: Shake The Jar

Shake the jar as hard as you can for a couple of minutes. First, you’ll see the cream becoming thicker and denser. You may also notice the jar feeling a little heavier as you shake it. Once the cream no longer sticks to the sides of the jar, you can stop shaking and check your butter. If you see a chunk of butter, you are ready to move onto the next phase.

If not, cover the jar again and continue shaking. Once you’ve shaken the jar for another couple of minutes, you’ll have a bright yellow solid and a pale white liquid. The liquid is your buttermilk that is ready to be used for cooking. So, carefully separate the liquid from your butter and pour into another jar.
Step 3: Wash The Butter

Pour some cold water into the jar and gently spin it around to “wash” the butter. Separate the water and repeat this process. The goal of washing it is to remove any buttermilk trapped in your butter to prevent spoilage.
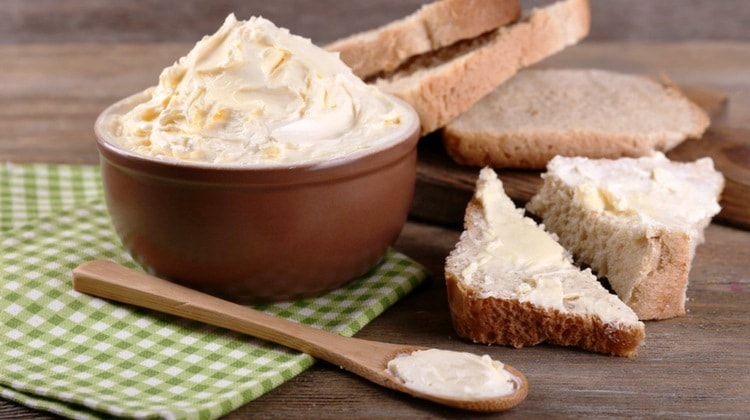
Now you have some butter ready to eat. Enjoy it with your favorite bread or whatever else you choose.
If you want to store the butter, transfer it to another jar and press it down using the back of the spoon. Pour out any liquid that comes from pressing it down.
Want to see how to do it? Check out this video from Kidcasts:
It’s so easy, any kid will love to take on this challenge! So, my fellow homesteaders, go ahead and let your young ones enjoy discovering a new skill. You’ll love watching them work, this project is one of the best you can allow them to make. You’ll never regret it!
Will you let your kids learn how to make butter? Let us know how it went in the comments sections below.
Want to try your hand at another dairy recipe? Check out Homemade Nut Milk Recipes | The Healthy Dairy Substitute. It’s another must-try recipe for your homestead kitchen!
![]()
