
Want to know how to compost in your apartment? This DIY Kitchen Compost Bin is easy to make, and this tutorial is easy to follow! If you don’t have the luxury of doing your compost outdoors, no worries, I’ll show you how!
How To Make a Kitchen Compost Bin | Homesteading Tips
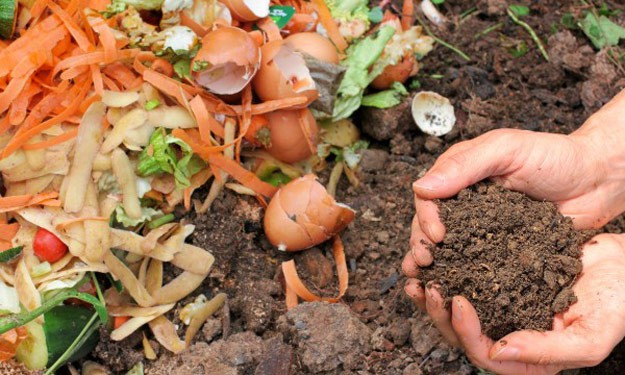
What do you envision when you think about composting? I’m sure the picture that you see in your mind is a pile in the garden or backyard right? But what if you’re in an apartment and would like to do composting? Should space stop you? Definitely not! Composting doesn’t always require a big space and the outdoors. If you really want to start DIY composting, all you’ll need is a container and you compost materials. If you’re curious as to how you can pull this off, just follow the steps below!
Click to Enlarge

Image via Daily Infographic
Apartment Composting
No smells and no pests!
What You Will Need to Compost Indoors:
- Container (with 2 lids)
- Food scraps
- Paper (non-coated)
- Water
- Worms (Red Wiggler)
Step 1: Purchase or prepare a container
Create holes along the bottom and top of your container for ventilation and drainage. Container should be plastic or ceramic. You will use the other lid under the container for water drainage. Or you can purchase a pre-made worm bin.
Step 2: Shred paper
Shred into 1-inch strips. Use newspaper, old bills—anything that is uncoated will do.
Step 3: Soak paper in water
Soak in water and wring out so that paper is moist but not dripping.
Step 4: Line container with paper
Put half of your shredded and soaked paper into your container. It doesn’t need to be exact but fill your container about 1/3 of the way with paper.
Step 5: Add your worms
Add your worms and a little bit of soil. Let them sit in the sunlight. They will soon burrow into the paper.
Step 6: Add food scraps
Add food scraps and bury them under your remaining damp paper strips. (Always bury/mix food when you add it.)
Step 7: Find it a home
Make sure you find a cool place without a lot of sunshine for your worm bin.
Step 8: Keep it going and going
Continue to add scraps until you have more soil than scraps. Then let the mixture sit until all scraps have fully composted. Scoop out the compost (not the worms!) and start again!
Step 9: Use your compost!
There are a lot of ways to use your compost even if you don’t have a garden! You can use it as fertilizer for potted houseplants, give it as a gift, or even just sprinkle it across your lawn. Whatever you choose to do with it, you can be proud that your food waste is being upcycled and not going to the landfill!
How To Make A Compost Bin

It’s easiest if you build two containers and stack them, then rotate them over time.
Your Compost Bin Will Need:
- Ventilation holes
- Drainage holes – Worms will travel up these when there is no longer any food in the bottom container.
- Drainage Holes (bottom) – Fill this bin with food first, when it’s full, fill the top bin.
The worms will start by eating in the bottom bin. Once they’ve made it all compost, they’ll travel up to the top bin. That is when you harvest your compost from the bottom and put the newly empty bin on the top to start the process over again!
What To Compost:
- Paper
- Tea bags
- Egg shells
- Food scraps
- Coffee filters and grounds
- Peels
- Vegetables
- Dried leaves
- Paper towels & tissue
What Not To Compost:
- Meat
- Bones
- Dairy
- Pet feces
- Chemicals
- Plastic
- Citrus
Composting Tips and Solutions

- Make sure you have 1 square foot of space per pound of worms.
- Worms can eat about half their weight in food per day! So fill accordingly.
- If your bin gets too wet, add paper. If it’s too dry, add a little water. You’ll know if it’s too wet because your worms will be ‘swimming’ to the top to escape drowning.
- Your compost is ready when you have a rich, black hummus that you can scoop out.
- You’ll have to buy your first round of worms, but if you treat them right they will last for years and years!
- It takes about 12 weeks for worms to completely break down a full bin of compost. Smaller bins may go faster!
- The smaller the food and paper scraps, the faster the worms can eat them!
- Worm compost and brown ‘tea’ that drains out of your bin is super rich in minerals that plants love!
- Make your holes the diameter of a pencil. As long as your bin is not too wet, the worms will not try to escape.
- Be sure to get ‘red wiggler’ worms. Not all worms are created equal when it comes to compost!
Must Read: Why Worms Are Worth More Per Pound Than Lobster
Does this give you a new hope on composting? Share your thoughts below in the comments!

Want more composting ideas? Get more here:
- Vermicomposting | Fertilize With Worm Castings
- 13 Best Compost Tumblers
- A Homesteader’s Guide to Composting

