
Want to know make homemade fruit rollups? Check out our DIY apple fruit leather tutorial for delicious healthy snacks you can grab and enjoy any time of day. If you have some canned applesauce somewhere, this is something you have to try!

Homemade Fruit Roll Ups | DIY Apple Fruit Leather
Applesauce is easy to make and can. So easy, in fact, that I sometimes get carried away. When apple season rolls around and there are still a few jars of last year’s applesauce left in the larder, I like to use it up by getting creative.
The recommended shelf life for home-canned goods is one year. That is not to say that you need to open and dump all the fruits of your labor on Day 366. It is meant to be a general rule of thumb, and is as much about quality as it is about safety. My experience with using outdated products is that taste and texture really do begin diminishing at about a year, so I try to use them up in a timely fashion.
One way I do that is to upcycle canned applesauce into roll-ups. It’s a great kitchen project for fall that will result in perfectly rotated canned goods and a healthy homemade snack.
Follow my simple step-by-step directions to create your own delicious fruit roll ups that your whole family will love.
You’ll also like My Dehydrator Recipes & More Healthy Fruit Leather Ideas!
Need a Dehydrator? This one works great!
Step 1: Homemade Fruit Roll Ups | DIY Apple Fruit Leather
You will need to own or borrow a dehydrator for this project. In addition to the regular drying racks, you will need fruit leather trays, which are solid plastic trays with a slight lip around the edges, designed to contain liquids. There are many different styles of dehydrators on the market, and are available from both local and online retailers. Just choose the one you like best and you’re set to go!


Step 2:
Homemade Fruit Roll Ups
| DIY Apple Fruit Leather
First, assemble your applesauce. Of course, you can just as easily make this recipe using frozen or freshly made applesauce or even a jar of store-bought, if that works better for you.

My dehydrator has eight trays, and each one holds about two cups of liquid. For this tutorial, I decided to use seven pints—remember, two cups equals a pint—of canned applesauce. That gave me some wiggle room in case it went a little over after I added sweetener.
I checked the seals of the jars before I opened them. I always do that, whether I canned them last week or well over a year ago.

Check if the jar is still sealed by checking the top. If the lid is concave and does not slide off it is still sealed. Showing here:

Step 3: Homemade Fruit Roll Ups | DIY Apple Fruit Leather
I happened to have jars of applesauce from different batches made last year. Most were unsweetened, but a few contained added maple syrup. I poured mine all into a big pot to mix them up and add sweetener, but you don’t need to. If your pints of applesauce are just like you want them already, you can just skip this step and pour the jarful right out onto the tray.


You can add anything you want for sweetener. Any kind of sugar or sugar substitute will work, as well as honey or maple syrup. There is no right amount to add—whatever suits your taste. You don’t have to add any at all. One of the wonderful things about making your own fruit leather is that you can control additives. For this batch, I chose some canned peach butter to add. It has been on my shelf for a while—it’s great, but we just don’t eat it much. Fruit butters are heavily sugared, so about a half cup of it sweetened up my whole pot of applesauce nicely.
Another terrific thing about fruit leathers is just you can add any kind of fruit to the mix that you like. I could have thrown in other produce I had on hand—bananas, pears, or anything. And unlike using fruit or jam or canning, it works just fine when it’s slightly overripe.
Step 4: Homemade Fruit Roll Ups | DIY Apple Fruit Leather
While the mixture heated, I prepared my trays. It is super important to apply a light coat of oil to your trays before filling them. Most fruit leathers really stick on if you don’t. Use about a half teaspoon of oil per large tray, and just spread it with your hands. Be sure to oil the lips around the inner and outer edges, too.


If you added any solid fruits to your mixture, or if your applesauce was very chunky to start with, be sure to puree it before going on to the next step. You can use a food mill, food processor, or stick blender. If you’re using already-smooth applesauce, you should be good to go.
Step 5: Homemade Fruit Roll Ups | DIY Apple Fruit Leather
Next, pour the pureed fruit onto the trays. You will want the liquid at least an eighth of an inch thick, but no more than a quarter inch.


Step 6: Homemade Fruit Rollups | DIY Apple Fruit Leather
Smooth it out with a rubber spatula. Or even better, if you happen to have one of those all-purpose plastic scrapers, use that to level the puree out evenly. I try to heap it up a little higher on the outer edges, because it tends to migrate towards the middle in my dehydrator.
Step 7: Homemade Fruit Roll Ups | DIY Apple Fruit Leather
Set up the trays on or in your dehydrator, depending upon how your model works, and turn it to about 135 degrees. If your controls don’t have degree delineations, choose a medium setting.

Here’s where dehydrating gets a little tricky. While flexibility is part of the beauty of dehydrating, it is also a part of the challenge. Most food-drying books give times of something like “4 to 13 hours”. That’s pretty vague. And to make matters worse, determining when it’s done can be a little subjective, too. Descriptions like “dry but not brittle,” or “flexible but no longer tacky” come into play.
I encourage you to just try it. If you are a person who likes precise times and measurements, like I am, this part can be a little frustrating. But give yourself permission to make mistakes and keep trying if you do. I promise, it will be worth it in the end.
Step 8: Homemade Fruit Roll Ups | DIY Apple Fruit Leather
For fruit leather, you’ll want to dry it until—I’m sorry, but I’m going to throw some of those nebulous terms at you—until it’s only very slightly sticky to the touch. The reason the drying times are so wildly varied is because there are so many factors to take into account. How watery the puree was, and how thick it was on the tray, and how many trays you did at once, and how far from the heat source they were, can all affect your drying time. It will help to check it regularly—every hour or two at first, and more often later—and rearrange the trays so they all spend some time near the heat source of the unit.


If they look close to done and it’s time for bed or work, no problem. Just shut them off and leave them, and resume when you are available again. You won’t want to do this for days on end, but one overnight or work shift if the leather is already nearly dry will not hurt it.
Step 9: Homemade Fruit Roll Ups | DIY Apple Fruit Leather
When the fruit leather is done, remove it from the dehydrator and very carefully pull it off the trays. This is the time when you will be glad you oiled them first!


Step 10: Homemade Fruit Roll Ups | DIY Apple Fruit Leather
Next, use clean kitchen scissors to cut them up. I cut mine into eight pieces per tray. In half first, then half again, and one more time. You can make them whatever size you want.


Step 11: Homemade Fruit Roll Ups | DIY Apple Fruit Leather
You’re almost finished! All you need to do now is roll up the fruit leather pieces, wrap them, and store them. First, cut up waxed paper. Make your paper pieces a little larger than the leather pieces.

Step 12: Homemade Fruit Rollups | DIY Apple Fruit Leather
Then just place and roll.

Step 13: Homemade Fruit Roll Ups | DIY Apple Fruit Leather
Stick on a little piece of tape to hold it shut.

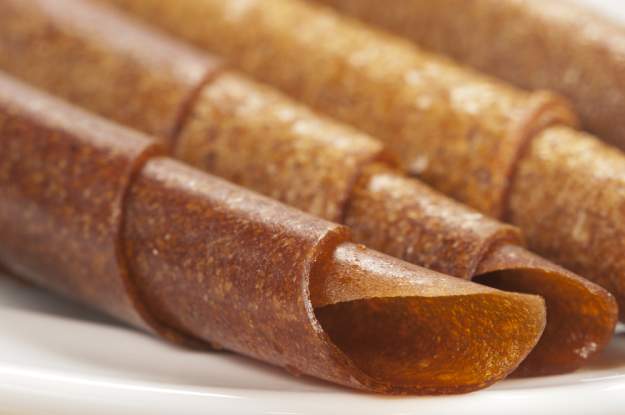
Boom. Done. We always save out a few to eat right away, and tuck the rest into zip-top bags for long-term storage in the freezer. It’s easy to grab them out as I need them, for lunchboxes, snacks on the go, or for when children visit. I love to have healthy and locally-sourced treats available all through the winter, and they are almost always gone by the time the next season for making applesauce comes around.
Watch this fruit leather tutorial video:
So are you going to give these apple roll-ups a try? Let us know below in the comments!
Want more homesteading tricks, tips, and tidbits. Subscribe to our Newsletter! You’ll also be given access to exclusive offers on the latest homesteading essentials.
LIKE this? I’m sure you’ll LOVE:
