

At a Glance: Canning Summer Produce
- Start with high-acid fruits and tomatoes using a basic water-bath method.
- Never try to can summer squash; it is strictly unsafe.
- Test all lids after 24 hours to verify a safe seal.
Are your kitchen counters currently disappearing under a mountain of July tomatoes and berries that are about to rot in the heat? If you desperately want to save that bounty but find yourself paralyzed by the fear of making a mistake, you’re in the right place.
We’re going to focus on safe, simple, high-acid water-bath canning. By following tested rules, you can put up your first jars of summer harvest safely and confidently.
RELATED: 7 Canning Recipes for Beginners
Inside:
- What Makes Summer Produce Different From Other Seasonal Crops?
- Is Canning Summer Produce Without a Pressure Canner Possible?
- Summer Canning Prep Checklist for Beginners
- Canning Summer Produce Safely: Step-by-Step
- Summer Canning Prep Checklist
Safety First: The Golden Rule of Canning
Before you begin, understand that canning is a science, not a creative cooking experiment. Altering recipes, changing vinegar ratios, or rushing the process can lead to botulism—a deadly toxin.
- STOP POINT: Never use your grandmother’s old recipe, and never use viral internet shortcuts like “oven canning” or “dishwasher canning.” You must only use recipes tested by the USDA, the National Center for Home Food Preservation (NCHFP), or Ball.
What Makes Canning Summer Produce Different From Other Seasonal Crops?
Summer harvest is unique because the heat forces crops to ripen all at once, giving you a very short window before food spoils, unlike fall root crops. To beat the clock, we will look at how to manage this seasonal rush and why high-acid crops give beginners a major advantage.
The “Summer Glut” and the Spoilage Clock
Unlike autumn potatoes or carrots that can sit quietly in a cool cellar for weeks, July and August heat accelerates ripening. You often have hours, not days, to process crops like berries and tomatoes before they turn to mush. Harvesting early in the morning and processing the same day is the best way to trap peak summer flavor.
The High-Acid Advantage
Summer is incredibly forgiving for beginners because its biggest yields berries, peaches, and tomatoes are naturally high in acid (tomatoes just need a little bottled lemon juice added). High acid means these foods can be safely processed in a simple boiling water bath, allowing you to learn the ropes without buying complex pressure gear.
The Best Summer Crops for Canning (By US Region)
Depending on where you live, your summer glut will look a little different.
The South & Southeast
Here, the intense heat means you will see early gluts of okra, cucumbers for pickling, and early-season peaches. Because southern heat degrades produce rapidly once picked, harvest early in the day and plunge straight into preservation mode.
The Midwest & Northeast
August brings massive hauls of sweet corn, green beans, and heavy-yielding paste tomatoes. While the tomatoes can be acidified and water-bathed, remember that corn and green beans are strictly pressure-canner territory.
The West & Pacific Northwest
Expect abundant berries, stone fruits, and mild peppers. Berries and jams are the perfect low-stress entry point for beginner canners.
Is Canning Summer Produce Without A Pressure Canner Possible?
Yes, but only if you are strictly canning high-acid foods like fruits, jams, and properly acidified tomatoes. For everything else, we will cover the strict rules of acidity and the major warning about summer squash.
The High-Acid vs. Low-Acid Rule
Botulism spores cannot survive in high-acid environments. That is why summer fruits, jams, and acidified tomatoes are perfectly safe for a boiling water bath. However, low-acid summer vegetables, like green beans, carrots, and sweet corn, must reach 240°F to be safe. Boiling water only reaches 212°F. Therefore, low-acid foods strictly require a pressure canner.
The Summer Squash Warning
You cannot safely can plain summer squash or zucchini even if you own a pressure canner. The USDA withdrew instructions for it because squash turns to a thick mush in the jar, blocking heat from reaching the center and killing botulism spores. You must pickle it or freeze it instead. Never attempt to can plain zucchini.
What Equipment Do I Need To Start Canning Summer Produce At Home?
You only need a deep stock pot, a jar lifter, a wide-mouth funnel, glass mason jars, and brand-new metal lids to start water-bath canning. Let’s build your minimum viable kit and discuss when it’s actually time to upgrade.
The Minimum Viable Water-Bath Kit You do not need to buy a branded “water-bath canner.” Any deep stock pot works, as long as it is tall enough to cover your jars with one to two inches of rolling water, plus extra room so it doesn’t boil over. Add a jar lifter, a plastic wide-mouth funnel, standard mason jars, and brand-new sealing lids.
When to Upgrade to a Pressure Canner Do not buy a pressure canner on day one. Master the basic skills of filling jars, managing headspace, and getting a safe seal with high-acid summer fruits first. Once you are confident and want to preserve low-acid crops like green beans or meats, you can invest in a quality pressure canner.
Canning Summer Produce Safely: Step-by-Step
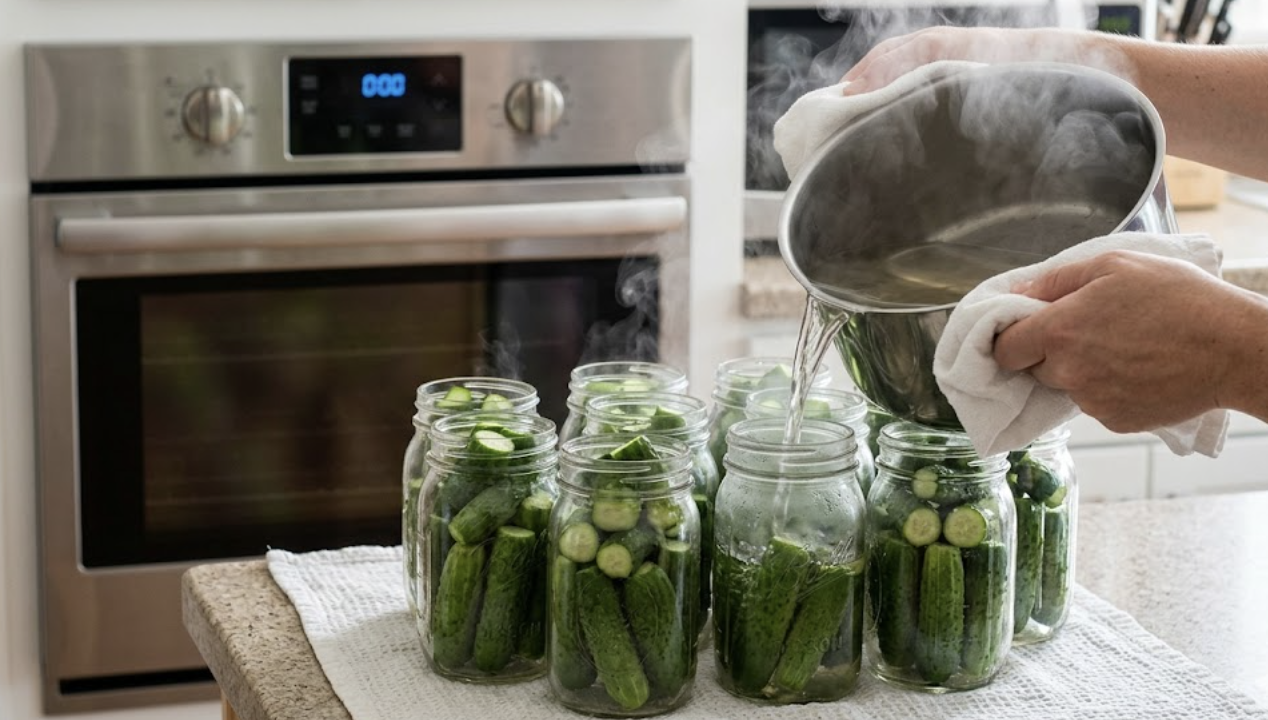
Step 1: Prepping Jars to Prevent Thermal Shock Wash your jars in hot, soapy water. Keep them warm in a sink of hot water or a simmering pot until you are ready to fill them. Putting hot summer jam into a cold glass jar, or a cold jar into boiling water, causes thermal shock. The bottom of the jar will simply break off.
Step 2: The Processing Phase Use your funnel to fill the warm jars with your prepared, approved recipe. Check the “headspace” (the empty room at the top of the jar) exactly as the recipe states. Use a plastic wand to poke down the sides to release trapped air bubbles. Wipe the rim of the jar with a clean, damp cloth, apply the new lid, and twist the band on just until it is “fingertip tight.” Lower them into the boiling water for the exact time listed in your recipe.
- STOP POINT: Start your timer only after the water returns to a full, rolling boil.
Step 3: The 24-Hour Wait and Seal Verification When the time is up, turn off the heat. Let the jars sit in the water for 5 minutes (this prevents liquid from escaping). Use your jar lifter to pull them straight up, without tilting, and place them on a towel on the counter. Leave them completely untouched for 12 to 24 hours. After 24 hours, remove the metal bands and press the center of the flat lid. If it is concave and does not flex or pop, you have a safe seal.
How Long Do Canned Summer Vegetables Last?
Canned summer produce is at its peak quality and nutrition for 12 to 18 months when stored in a cool, dark pantry. Read on to learn about this ideal lifespan and how to safely inspect a jar before you eat it.
The Ideal Pantry Lifespan While properly sealed jars remain safe to eat for years, the color, texture, and nutritional value begin to degrade after about 12 to 18 months. Label your lids with the date and contents, and aim to eat this year’s summer harvest before next summer’s garden comes in.
The “When in Doubt, Throw It Out” Rule When opening a jar in the middle of winter, always inspect it first. If the lid is bulging, if it is no longer sealed tight, if liquid spurts out when you open it, or if it smells off, throw it away immediately. Never taste-test a suspect jar.
Troubleshooting Common Issues
- Symptom: Liquid boiled out of the jar into the pot (Siphoning).
- Cause: Fluctuating boil temperatures or removing jars too quickly.
- Fix: Maintain a steady boil, and always let jars rest in the turned-off pot for 5 minutes before removing.
- Symptom: The lid didn’t seal (it pops when pressed after 24 hours).
- Cause: Food on the jar rim, or the band was screwed on too tight/too loose.
- Fix: Put the unsealed jar in the refrigerator and eat it within a week.
- Symptom: Jar broke in the pot.
- Cause: Thermal shock.
- Fix: Always keep jars warm before filling, and never set hot jars directly on cold granite countertops (use a towel).
Summer Canning Prep Checklist for Beginners
Check every box before heating your water
FAQs Canning Summer Produce
What is the safest food for canning summer produce as a beginner? High-acid fruits are the safest entry point. Berries, jams, jellies, and peaches process easily in a boiling water bath. Tomatoes are also great, provided you follow a tested recipe that includes adding bottled lemon juice or citric acid to ensure they are acidic enough.
Do I have to sterilize my jars before canning summer harvest? If your tested recipe calls for a processing time of 10 minutes or more in the water bath, you do not need to pre-sterilize the jars. Simply washing them in hot, soapy water and keeping them warm is sufficient. The 10-minute boil handles the sterilization.
Why does my tested recipe require bottled lemon juice instead of fresh? Fresh lemons vary wildly in their acidity levels depending on the variety and growing conditions. Bottled lemon juice has a standardized, guaranteed acidity level, ensuring your tomatoes are acidic enough to prevent botulism.
Can I reuse the metal lids next year? No. The flat metal sealing lid has a rubber compound designed for a one-time use. Once it has been crimped and sealed, it will not reliably seal again. You can, however, reuse the glass jars and the outer metal screw bands.
What should I do if I accidentally water-bathed green beans? If you water-bathed low-acid vegetables like green beans or corn, the food is not safe for pantry storage, as it did not reach the 240°F required to kill botulism. If it has been less than 24 hours, move the jars to the refrigerator immediately and consume them quickly, or freeze the contents.
