
You don’t have to go to the far countryside just to get a batch of smoked fish because you can make your own at home! Keep reading for a complete, easy-to-follow guide on how to smoke fish like a pro.
RELATED: How to Master Smoking Meat | Homesteader’s Guide
How to Smoke Fish Like a Pro From Your Own Backyard
Step 1: Gut and Debone the Fish
The first thing you need to do is to gut and debone the fish. Take a sharp knife, slice the fish open, then remove all the guts and bones.
Basically, the goal is to leave only the fish meat. Remember that these excess parts will only ruin the meat’s taste and shorten its overall lifespan.
Step 2: Prepare the Smoke Fish Brine
Making a proper brine mixture is important as this will heavily affect the way your food tastes after the smoking process.
First, take a large mixing bowl. Make sure it’s wide and deep enough to fit all the fish you want to smoke. If one bowl is not enough, feel free to use another.
Next, mix 1/2 cup of salt, 1/2 cup of sugar, and half a bowl of water. Stir until the ingredients combine to make a clear, runny mixture. Feel free to do a quick taste test of the brine.
Afterward, submerge the fish in the brine, cover the bowl with plastic wrap, then leave in the refrigerator for at least two hours.
Note: How long to brine fish? For maximum brine absorption, leave the fish submerged in the mixture overnight.
RELATED: 31 Easy Foil-Wrapped Camping Recipes For Outdoor Meals
Step 3: Set up the Charcoal Grill
Once the brine is ready, it’s time to set up the grill. Readers are free to use whatever is available, but if you want to give your fish that charred, natural, earthy flavor, we suggest using a charcoal grill.
Bring the charcoal grill heat up to medium. Then, begin piling the charcoal to form a three-zone split fire. The idea is to create three different piles of charcoal that vary in height and density.
Leave the area on the furthest left empty. This is where you’ll leave the fish to cool off when you’re not grilling them.
The one in the middle should have a mid-sized pile. You’ll be spending most of your time grilling the fish in this portion, so make sure it’s the closest to you.
Then, create a large pile of charcoal on the furthest right side of the grill. This will serve as the high-heat zone.
Set up a drip pan underneath the grill to avoid damaging the unit with fish oil.
Step 4: Add the Spare Wood Trimmings
Grab a tub of water and submerge the spare wood trimmings in it. After 30 minutes, drain the water out then add the wet trimmings to the coals on the grill. This helps you get better control over the heat.
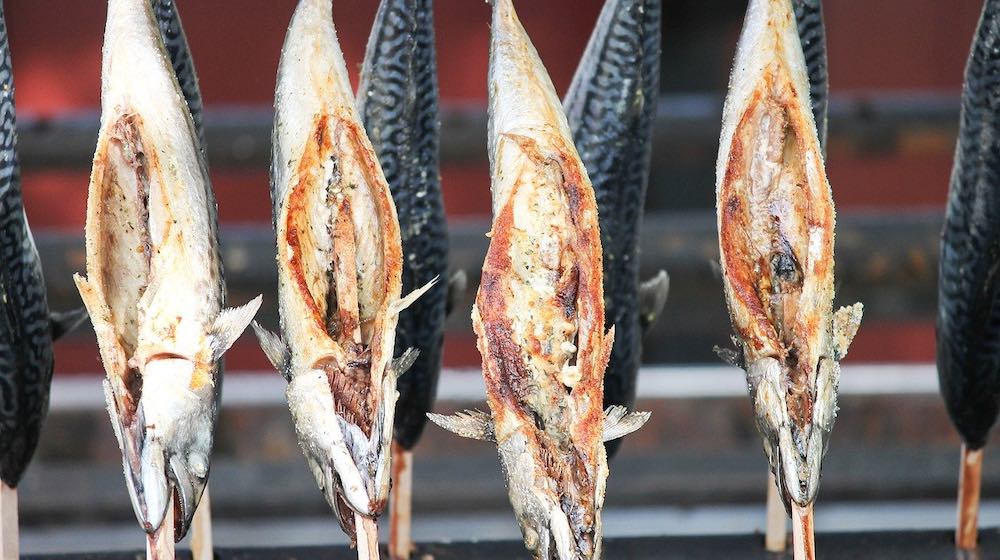
Step 5: Smoke the Fish
Finally, it’s time to smoke the fish. The duration of the grilling depends on the size of your trout, but most of the time, it spans for around 10 to 15 minutes. Basically, the goal is to dehydrate and dry the fish meat completely.
Check out this video by Backwoods Gourmet Channel as they explain how to smoke fish on a gas grill:
Learning how to smoke fish not only gives the meat a charred, smokey, savory flavor, but it also helps extend its lifespan. In fact, a sealed bag of smoked fish will stay fresh for up to three weeks!
To avoid wasting any fish, we advise beginners to start with just two to three pieces. You’re bound to make mistakes, so only cook what you’re ready to eat. Also, make sure to invest in a high-quality griller if you plan to smoke fish regularly.
Do you have any more questions on how to smoke fish? Feel free to post them in the comments section below!
Fellow homesteaders, do you want to help others learn from your journey by becoming one of our original contributors? Write for us!
UP NEXT:
