

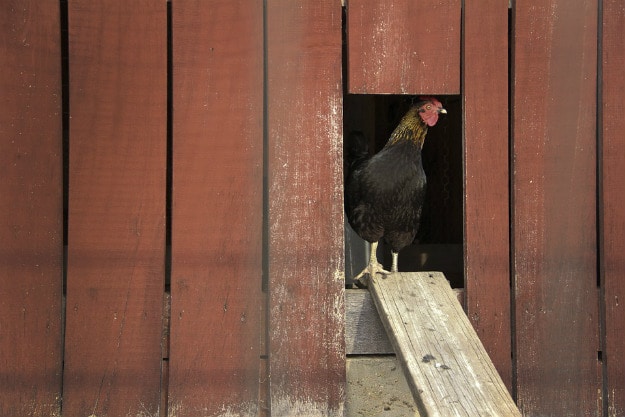
Start raising chickens for meat, and enjoy eating fresh poultry on your homestead. Raising backyard chickens has many benefits, chicken eggs and chicken meat are just some of them.
At a Glance: Raising Chickens For Meat
- Process them yourself: Outsourcing the butchering immediately destroys your cost-per-pound profit margin.
- Pick the right breed: Match the bird’s grow-out time to your actual budget and schedule.
- Master one skill: Do not scale your flock until your basic infrastructure is verified.
Now this guide is for my meat eaters. I think we all (or most of us) can appreciate a well-made chicken. Who would have thought meat could taste so much more incredible when they are made at home? The result of your meat depends on how well you took care of your chicken and kept it clean. No joke, as little as a few weeks you can be putting plenty of chicken in your freezer and be satisfied that all the work you put in was worth it.
Maintaining Your Meat Breeds
For people who are keen on raising chickens for meat, there are two avenues you can choose. You can go with the choice of producing a commercially made breed, the Cornish Cross, or if you are an old fashioned kind of person you can raise a heavy or dual purpose bird. Raising a Cornish cross is beneficial in itself because they already love to do what you are raising them for – to eat. It is a nice advantage that they already have such a hearty appetite so that they can grow fast and tender. However, their greatest advantage is also their greatest downfall; they are the worst couch potatoes you’ll ever see. If they aren’t busy stuffing themselves, it seems that all they want to do is sit around and wait until they get sick. There will be rare occasions they realize how boring this is and start practicing bad habits, like picking at one another.
Meanwhile, the old fashioned heavy or dual purpose breeds are sturdier compared to commercially grown breeds like the Cornish cross, but their growth rate is slower. Compared to the 6 weeks it takes for hybrid breeds to reach five pounds, this purebred needs about another month to get there. Utility breeds take even longer and take around two months. The utility and heavy birds however have something the hybrids don’t possess. They mature and grow uniformly which gives more flexibility when determining with you will use them while the hybrids don’t. The hybrids also should be butchered once they hit boiler size. If they grow more than that they can contract bone pain and heart failure. A purebred chicken is lower in fat, tastier and has firmer texture over a hybrid bird. They also have more dark meat and more of a ‘chicken flavor’ because of the longer time it took to grow. This doesn’t mean that non-hybrids lack in taste, they are mighty delicious. I find any meat good as long as someone knows how to cook and spice it right.
Here are a few basic classes of hybrid/non-hybrid meat you can consider:
- Rock-Cornish hen: A mix of Plymouth Rock and Cornish chicken. They weigh about 1-2 pounds when they reach maturity. They consist of more white than dark meat and are usually cooking as for single serving.
- Fryer/Broiler: These are young chicken (male or female) about seven weeks old. They have soft, pliable skin and is tender enough for any meal. They weigh between 2-5 pounds and many cook it at BBQ’s
- Roaster: A male or female bird that is around 3-5 months old and weighs about 6 pounds. They also have soft, pliable and smooth skin but their breasts are not as flexible as the broiler.
- Capon: Male chicken that are around 4-8 months and weigh anywhere from 5-9 pounds. They are said to have the highest percentage of white meat compare to any chick and is dubbed most flavorful.
- Poussin: These are baby chicken at 3-4 weeks of age and weight about a pound. They have a mild taste and contain a small percentage of fat. People cook them to make a single serving.
- Stewing (baking) chicken: A female chicken. They are around ten months of age, around a year old and weigh between 4-7 pounds. As the name states, they are the best in stews or for baking for moist cooking as they have less flexible breasts and are less tender.
Here’s a budget-focused breakdown of several chicken classes to help you determine which bird is actually worth raising for meat.
| Class | Age / Time | Weight / Yield | Meat Characteristics | ROI & Does it Pencil Out? |
| Poussin | 3-4 weeks | ~1 lb | Mild taste, low fat. | No. High processing cost for minimal yield. Gourmet only. |
| Rock-Cornish Hen | Maturity | 1-2 lbs | Mostly white meat. | No. Feed-to-yield ratio is poor for standard budget hedging. |
| Fryer / Broiler | ~7 weeks | 2-5 lbs | Soft skin, highly tender. | Yes. Lowest cost/lb (~$3.50 DIY). Best overall budget hedge. |
| Roaster | 3-5 months | ~6 lbs | Soft skin, firmer breast. | Borderline. Longer feed time lowers ROI, but yields massive meals. |
| Capon (Male) | 4-8 months | 5-9 lbs | Most flavorful, highest white meat %. | No. Massive feed consumption makes this a luxury project, not a hedge. |
| Stewing Chicken (Female) | ~10 months+ | 4-7 lbs | Less tender; requires stews/baking. | Yes (Bonus). Culled egg layers cost nothing extra to process. Pure profit. |
The breed you decide you want to raise may determine how you will choose to manage them. The three types of management are indoor confinement, pasture confinement, and range feeding.
Indoor confinement is a preference for chicken breeders but it is liked by small chicken owners as well if they have little land to raise bird meet. With this method chicken often use a litter and owners feed them everything they eat – the scraps I mean. Less land and time to care for your birds is needed. If you have little land and plan to raise your meet chicken indoors, you should make sure their housing temperature stays between 65-85 degrees Fahrenheit. You can achieve this by using a heater or keeping your birds huddled together, so they provide each other warmth. You could also keep them warm by keeping them near controlled lighting. It is beneficial compared to artificial light because they tend to be more active. By giving them access to a nice window or doorway to see the natural light and activity going on, they will enjoy it. As they are in confinement, and there isn’t much to do, they easily get bored, so artificial light is secondary to me. Make sure you remember their light hours (at least ten each day). When it is nighttime, provide them with dim light so that they can see their feeders. If you raise your meat birds as chicks (0-2 weeks), the minimum space requirement is half a square foot). The space requirement goes up as they age; one square foot at 2-8 weeks of age and about 3 square feet eight weeks and beyond. A rapid growth rate can cause your chicken to develop weak legs so provide roosts for them. The birds may get injuries or blisters due to wet litters or housing made of wood, wire, or complete concrete. You can prevent these complications by giving them a soft area or bed and maintaining the litter by keeping it dry.
Pasture confinement also involves keeping your chicken within a building, a portable one and can be moved daily without issue. These are often seen in on ranges but can be done on just about any sized land. One positive thing about pasture confinement is that there is a noticeable decrease in food expenses. As its mobile, you can send your birds out to scavenger in a good area. However, you will need to have great pasture to move it every day. When you are moving your shelter the first few times with the chicken in it, they may be unwilling to move along with the shelter. They’ll possibly pile up and get injured in the process until they learn to walk as you move. You may be tempted to add a floor wire to help them out, but it they are better off without it and may get harmed more in the process.
Free ranging is like pasture confinement, but chicken are allowed to go back and forth between the shelters anytime they please. The increase in exercise makes the meat firmer, flavorful and darker. However, because they move out and about often, it does take longer for them to meet your ideal goal weight. Less labor is needed here as the shelters are not moved as often compared to pasture confinement. It is still more legwork compared to in indoor confinement as you still need to move it.
If you plan to start raising them as chicks, understand that they require more protein in their diet. As they age the protein requirements lessen, but the carbohydrate intake is increased. It is more money to buy protein or carbohydrates so progressively changing the ratio to less protein will save you money. Depending on your method of management, the food requirements your bird needs varies. A confined hybrid, for example, can eat about two pounds of food for every pound they put on. Purebreds can potentially eat twice that.
Space Requirements:
| Age | Space required |
| 0-2 weeks | 1 inch |
| 3-6 weeks | 2 inches |
| 7-12 weeks | 3 inches |
| 12+ | 4 inches |
Butchering, Cleaning and Storing Your Chicken
Your management style can determine the time it takes to grow your. Of course, rates also depend on the breed of chicken you choose. You can access several factors that will mark a chickens quality and readiness for butchering.
Feathering is important for those who plan to pluck a bird over skinning it. The best time to butcher the bird would be when you see the feathers have matured, and you see no broken feathers or pinfeathers that are visible.
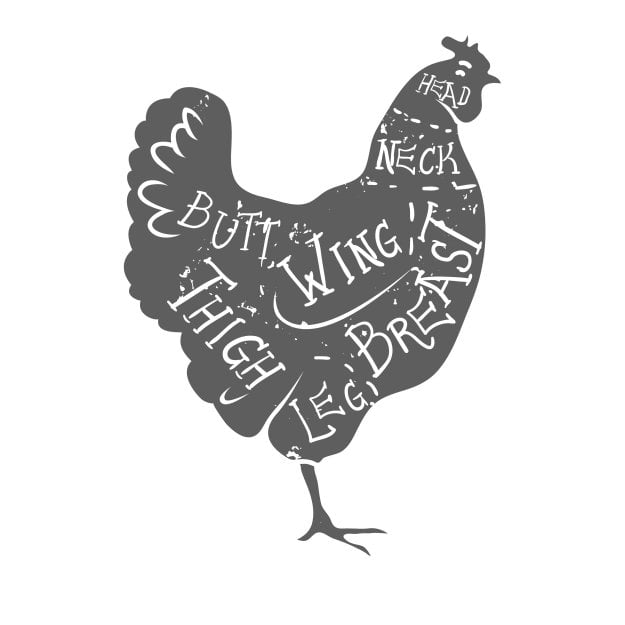
Fleshing is when you examine their flesh, namely the legs, breasts, and thighs.
The finish is the best type of flavor you can get from your chicken with a layer of fat under the skin. To look for the finish, you need to open the chickens breast feather and skin. If you see a yellow or cream like color, it is good. If you see a blue or red color instead, there is not enough fat. You can also visually access their readiness by looking at the shape of your bird. A rectangular shape shows it’s ready for butchering. A triangular shape means that the chicken still needs to grow.
When it is time to butcher the birds, you need to confine them the night before and give them good water supply, but no feed. The reason you do not want to provide them with food because you want their intestines to empty which reduce contamination when you butcher them. The water is needed, so they do not get dehydrated. When you are ready to move them to a waiting area, it is best to do it at night while they are not as active and to reduce the amount of struggling. Place either a metal or slat floored coop. Killing them is the hardest and most gruesome part of the job because of the involuntary reflex that goes on. They continue to flap and twitch their body for a few minutes even when they are already dead. While this happens, blood is also very likely to be splattering around. You should set up a killing place away from your other chicken. Somewhere that will also be an easy cleanup place and will not easily attract insects and predators. Keep a trashcan next to you or something similar beside you so, you do not lazily drop parts on the floor. You want to kill your chicken as swiftly and humanely possible by using one of the three methods.
- You can use an ax – Most people who think about the process of killing a bird is to lay it down on a flat surface and dismember the head. Using an ax to kill a bird is not one of the best methods because the spinal cord, windpipe, and jugular vein gets severed which tenses its feathers. Blood will end up traveling to the lung that will contaminate your meat.
- Using your hand (foot) – This is a good method in regards to the time it takes to kill them. Once you properly dislocate their neck, they are gone instantly. You should have the chicken upside down for this with one of your hands grasping their legs. With your free hand, you firmly grab their head while your thumb is on their comb, and your pinky is beneath their beak. You should move the head backward and pull it slowly until you hear a snap. It is ideal to remain holding them until their jerking is over. If you experience any complications doing it with your hand, you can do it using your feet. You still want to hold their legs and place its neck towards the floor. Find a broom, rake or a stick and place the center of it at the birds’ neck. Position your feet on either side of your material and pull them upward.
- Using a knife – If you are killing several chickens at a time, using a sharp blade will allow you to work swiftly. Hold its beak with one hand and with your knife in your other hand, cut two inches behind the chickens jaw to sever the jugular vein.
Once you have killed the bird, you can move on to several picking methods that one can accomplish in four ways. Hand-picking involves pulling the feathers by hand. You want to use rubber finger tips or a rubberized knit to do the job quicker. Wax picking follows after hand picking and cleans up the bird more by using hot wax, allowing it to cool and then peeling it off. Machine picking is a time saver and pretty much does the job for you and you simply hold the bird. They don’t come cheap of course but for those still interested in it know that plucking can be done in as little as 30 seconds. Custom picking is no longer common but if you can’t imagine killing your chicken you can go to a local butcher who can do it for you and clean it up.
After you plucked its feathers, the next job is to remove the tendons that you can do with a knife for a pair of shears. When you complete that, turn the bird over and cut the oil gland on the tail off. If you didn’t remove the head yet, now would be a good time. You should cut open the abdomen to remove the guts and the organs. You can choose to eat the organs and clean them for storage of you’d like or dispose of them. In most local areas, it is not allowed to dump waste in dumpsters or landfills. You should bury it in a spot away from water sources or compost it. On average a chicken will yield 20-30% waste.
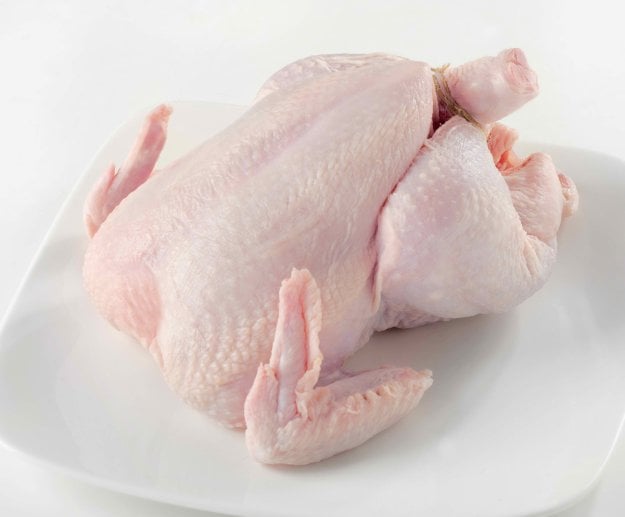
er you have cut and cleaned your chicken, you are ready to store it. If you decide to put your meat in the fridge, it will stay for up to five days while the temperature is at 29-34 degrees Fahrenheit. If you want it to last longer, you could can or freeze your meat within 72 hours. Freezing is the best option as it preserves your meat the longest and stunts growth of bacteria. However, it does not completely stop its growth, so clean practice is always good to have.
When you are storing your meat in the freezer you want pack it properly:
- Using a vacuum pump along with plastic bags that provide airtight sealing
- Placing your chicken in Cyrovac bags (this bag shrinks when exposed to boiling liquids
- Do a double wrap method by wrapping your meat in plastic then following up with either aluminum foil or watch butcher paper
Label each chicken with dates so you use the oldest first. Alternatively you can freeze cooked chicken for quick meals, these still will last you months in the freezer. When you do want to use your chicken after you froze it, you can thaw it out in the fridge where it takes about a day. You could also thaw it out in cold water where the chicken thaws in 2-3 hours or in a microwave oven where the chicken thaws in minutes. You never want to leave your meat out to thaw on the counter at room temperature because the outer layer of the chicken may begin to spoil while the inside is still cold.
I thought the hard part would be raising the birds, but the real difference came down to the simple stuff: keeping feed off the ground, having processing
day set up before I started, and packing the birds so the freezer work did not go to waste. That’s why I invested on the gear that helps me with the process from butchering to storing with less mess and less waste.
| Name | Little Giant Plastic Hanging Poultry Feeder | Little Giant Galvanized Poultry Restraining Cone | Poultry Shrink Bags (13×18 Inch) | FoodSaver Vacuum Sealer Rolls |
| Product Image |  |
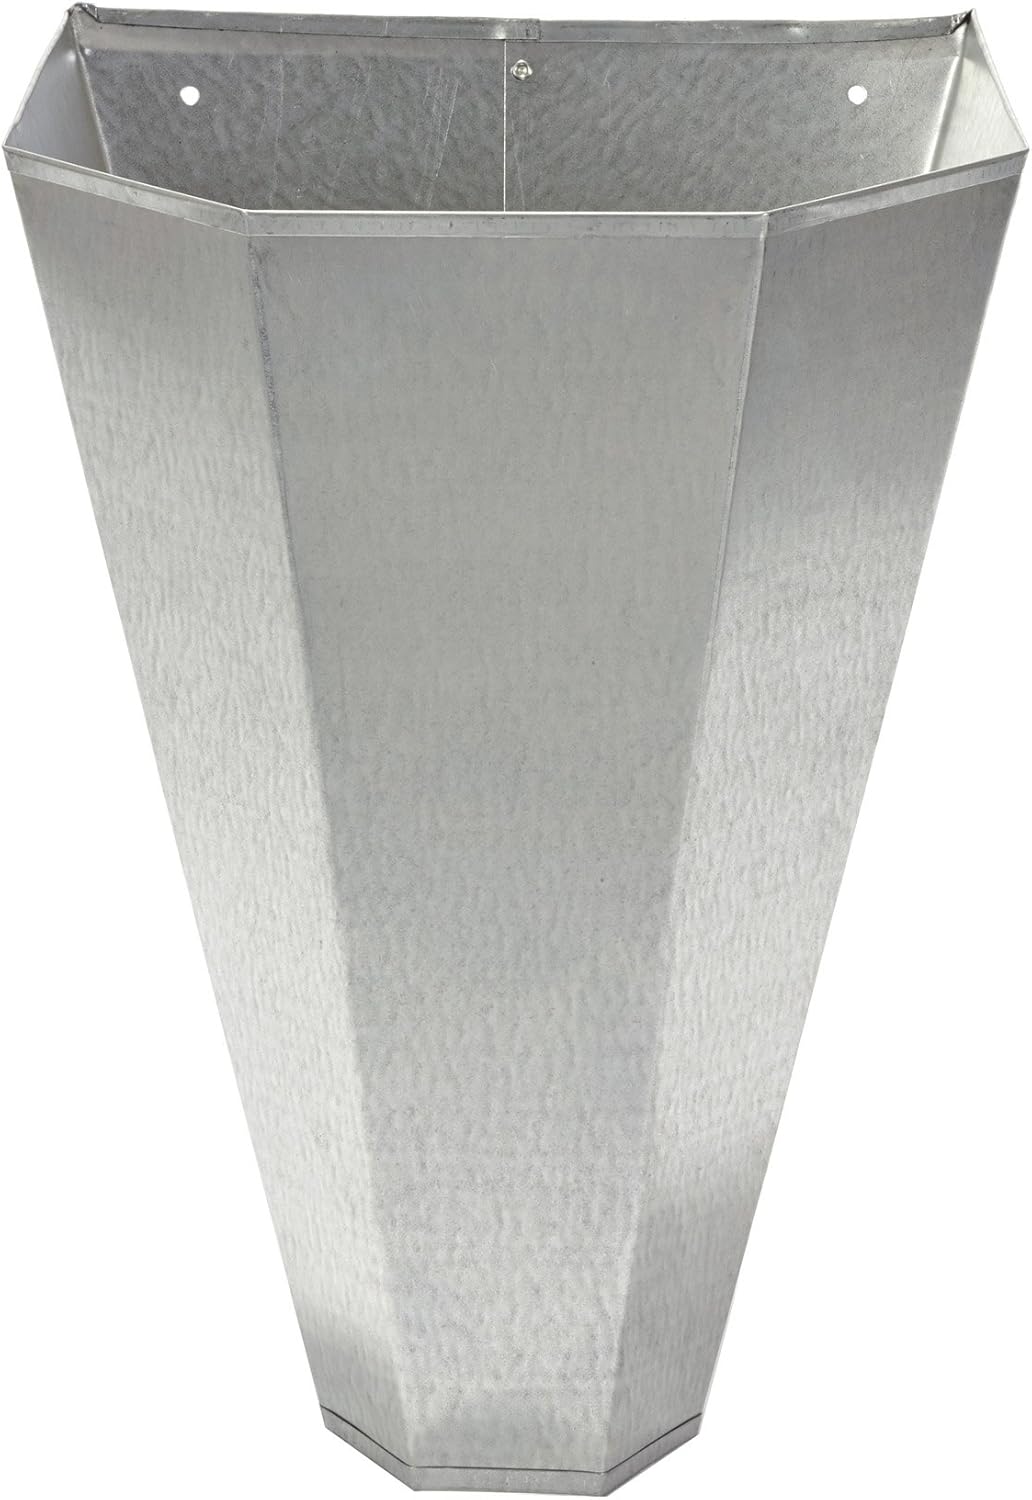 |
 |
 |
| Best For | Best Feed Control | Best Processing Cone | Best Storage Bags | Best Freezer Seal |
| Why Best | Reduces waste and keeps feed off the ground. | Ensures a swift, humane butchering process. | Shrinks to remove air and prevent freezer burn. | Provides the tightest air seal for long-term preservation. |
| Check Price | Check Price | Check Price | Check Price | Check Price |
Is Raising Chickens for Meat Worth It in 2026?
Yes, but only if you are comparing apples to apples.
If your goal is to beat the $1.99/lb factory-farmed chicken at the big-box grocery store, raising your own meat birds will never pencil out. You simply cannot out-compete industrial economies of scale.
However, if you’re comparing your homegrown birds to premium, organic, pasture-raised chicken at the grocery store, which currently hovers between $6.00 and $8.00 per pound, homesteading your meat is a highly effective budget hedge. By doing the work yourself, you are cutting your premium protein costs in half while guaranteeing a safer, higher-quality food supply for your family.
FAQs
Is raising chickens for meat actually worth the time and money?
Yes, but only if you manage your feed costs and process the birds yourself. If you are comparing your harvest to premium, organic, pasture-raised poultry, raising chickens for meat is a highly effective budget hedge. Paying a facility to butcher them will immediately eat your profit margin, so learning the DIY processing skill is essential.
How long does it take to grow a broiler to butcher weight? A standard commercial hybrid like the Cornish Cross reaches butcher weight in just 6 to 8 weeks. If you choose an old-fashioned heavy or dual-purpose breed, expect it to take about another month, while utility breeds can take up to two months.
Should I start raising meat birds and layers at the same time?
No. The biggest mistake beginners make is trying to do everything at once, leading to burnout. Following the One-Skill-At-A-Time Protocol, master a small flock of 3 to 6 egg-laying hens first. Once you have your daily management and predator-proof infrastructure dialed in, then introduce meat birds to your system.
How much space is required when raising chickens for meat indoors versus on pasture? For indoor confinement, chicks (0-2 weeks) need half a square foot each, expanding to 3 square feet by eight weeks. However, pasture confinement is often better for homesteads. It decreases food expenses by allowing birds to forage, and the exercise creates firmer, flavorful meat.
How do I safely handle the butchering process to avoid contaminating the meat? Confine the birds the night before with plenty of water but no feed to empty their intestines, which significantly reduces the risk of contamination. Set up an easy-to-clean station away from your other animals. Always use swift, humane methods to prevent blood from traveling to the lungs and spoiling the meat.
That concludes our Raising Backyard Chickens series.
