![pink rag rug with balls of tshirt wool.,cosy weekend | Rag Rug | How To Make a Rug [Rag Rugs Infographics]](https://homesteading.com/wp-content/uploads/2025/12/pink-rag-rug-with-balls-of-tshirt-wool.cosy-weekend-Rag-Rug-How-To-Make-a-Rug-Rag-Rugs-Infographics.jpg)

Last Updated: February 2026
At a Glance: How to Make a Rag Rug
- Rag rugs are an eco-friendly, creative way to repurpose textiles while adding handmade décor to your home.
- The article teaches you how to make a rag rug using old fabric scraps or clothing, turning waste materials into a useful home item.
- It covers basic steps like tearing fabric into strips, sewing or braiding them, and then weaving or coiling them into a rug using simple tools.
Related: 9 Chemical-Free Spring Cleaning Hacks + Recipes
Rag Rug Tutorial | How To Make a Rug
Making a rag rug is a classic homesteading skill that turns old clothing and fabric scraps into a durable, handmade rug. This traditional craft has been used for generations as a practical way to reduce waste while creating something useful for the home. With simple tools and basic techniques like braiding or weaving, anyone can learn how to make a rag rug, even as a beginner.
Step 1: Tear the Strips
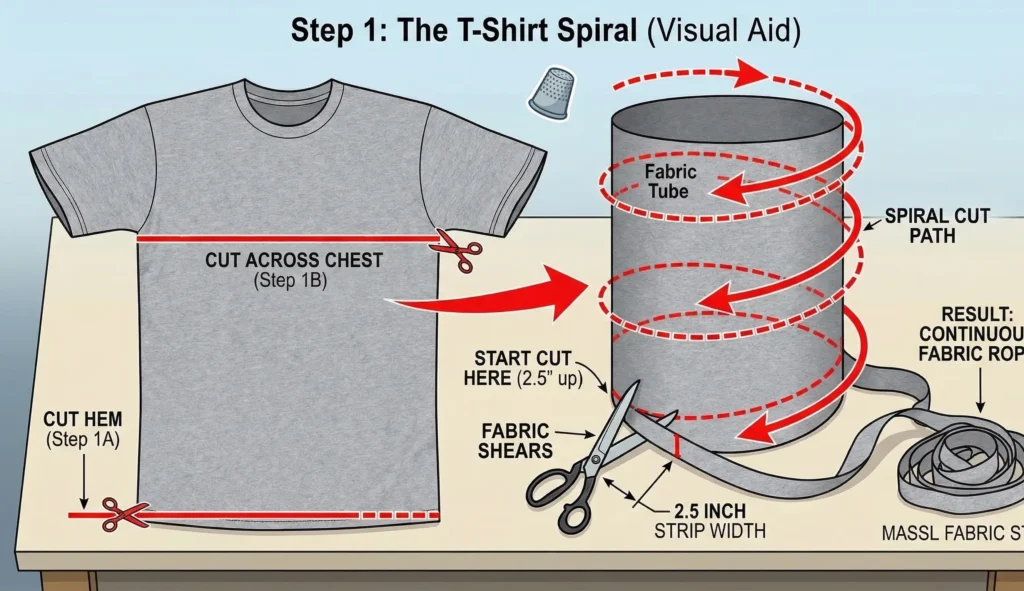
- Preparation: Take an adult T-shirt. Cut off the bottom hem stitch and the top section across the chest (from armpit to armpit). You are left with a simple tube of fabric.
- The Continuous Strip: Refer to the image above. We will cut in a spiral around this tube. Start at the bottom, snipping 2.5 inches up. Do not tear this; use sharp shears for a cleaner edge that holds its shape. Continue cutting around the tube, spiraling upwards.
- Result: When you reach the top, one large T-shirt torso will have transformed into a single, massively long fabric rope.

(As an Amazon Associate, we earn from qualifying purchases.)
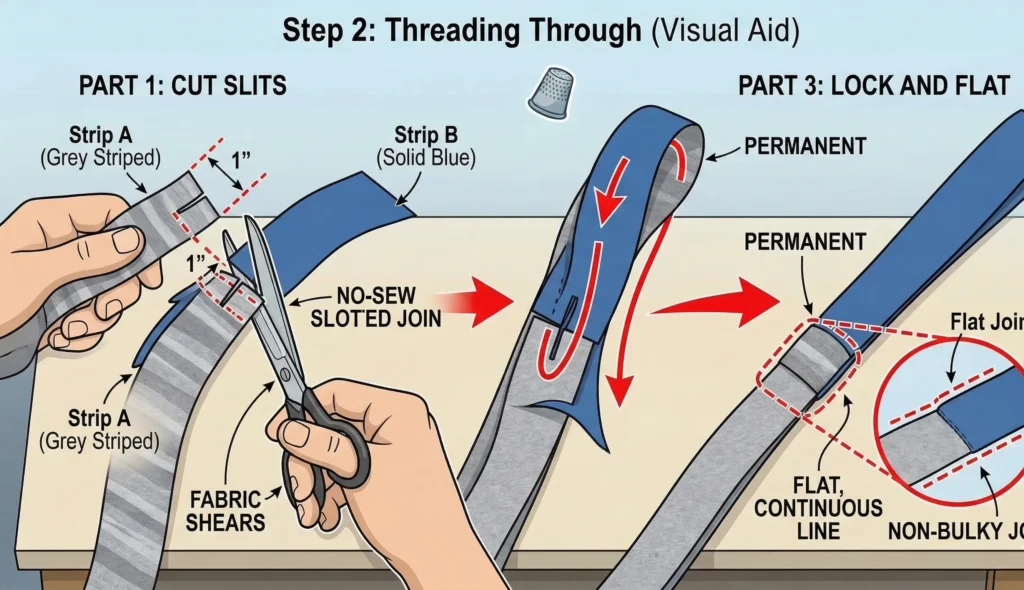
Step 2: Connect the Strips (The No-Sew Method)
Check out this video from @PaintingOnTheCeiling
- Preparation: Snip a tiny 1-inch vertical slit in the end of both your new strips (Strip A and Strip B). Do this with your sharp shears.
- Threading: Stack the ends. Position the slit in Strip B over the slit in Strip A.
- The Lock: Lift the tail of Strip B and thread it down through both slits. Pull Strip B completely through until the joint is tight. When you lay it flat, there is no lump, just one continuous, flat line. This connection is permanent.
Step 3: Roll the Cloth Into Balls
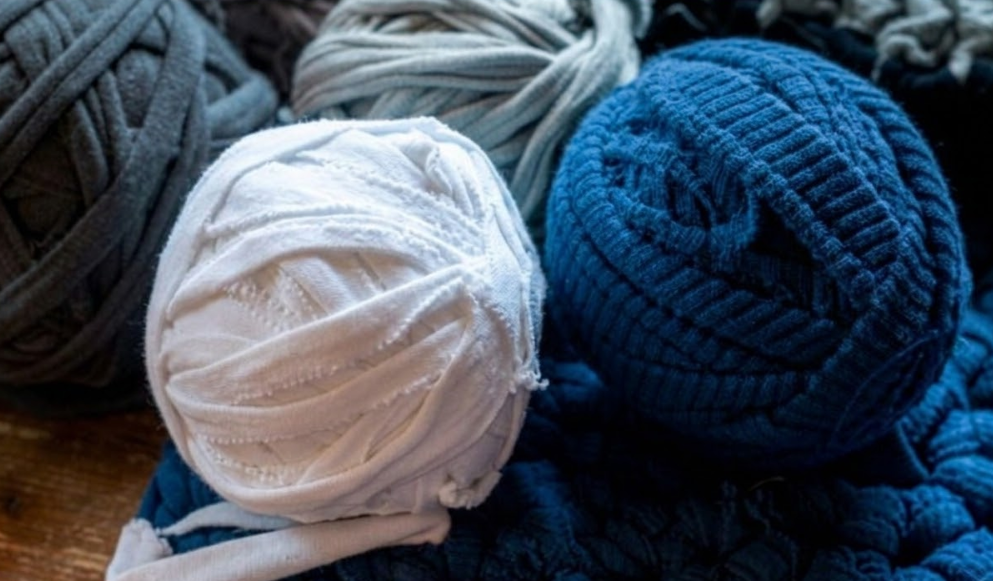
- Why? If you have a tangled pile of 50 feet of fabric, you will lose your mind. Rolling them into balls (like a grapefruit size) makes the braiding easy. You just let the ball roll on the floor while you work.
- Color Mixing: Use a large ball for each color. For a classic rug, you might have one black, one white, and one grey ball.
Step 4: Make the Rug
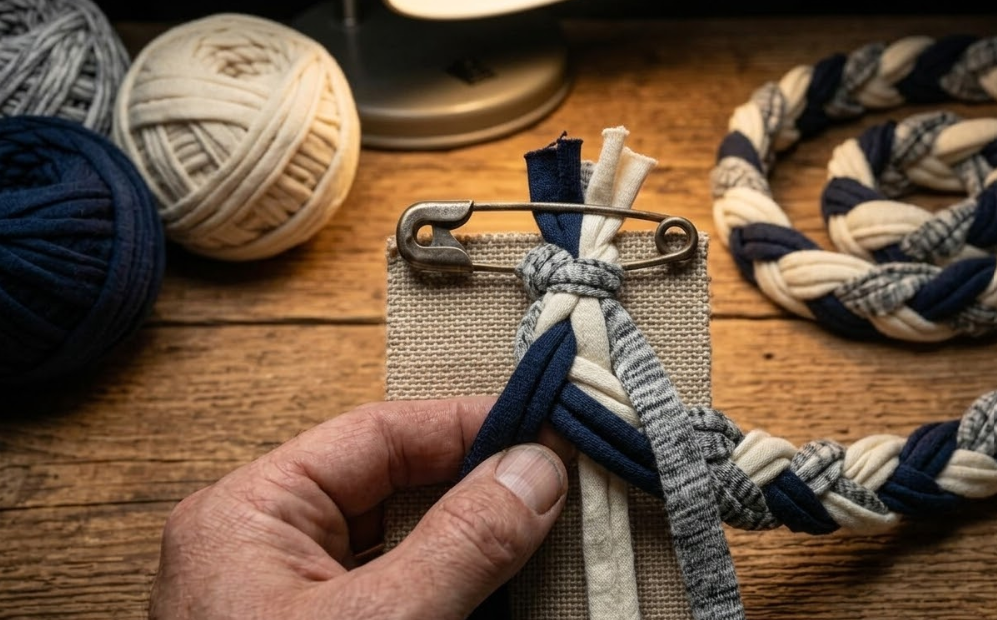
The Braid: Braid your three colors together for 10 feet or so. Keep the tension consistent. Avoid making it too tight or too loose. Don’t braid everything at once; just a good section to start.
Video Credit: Youtube/Siena Calabro
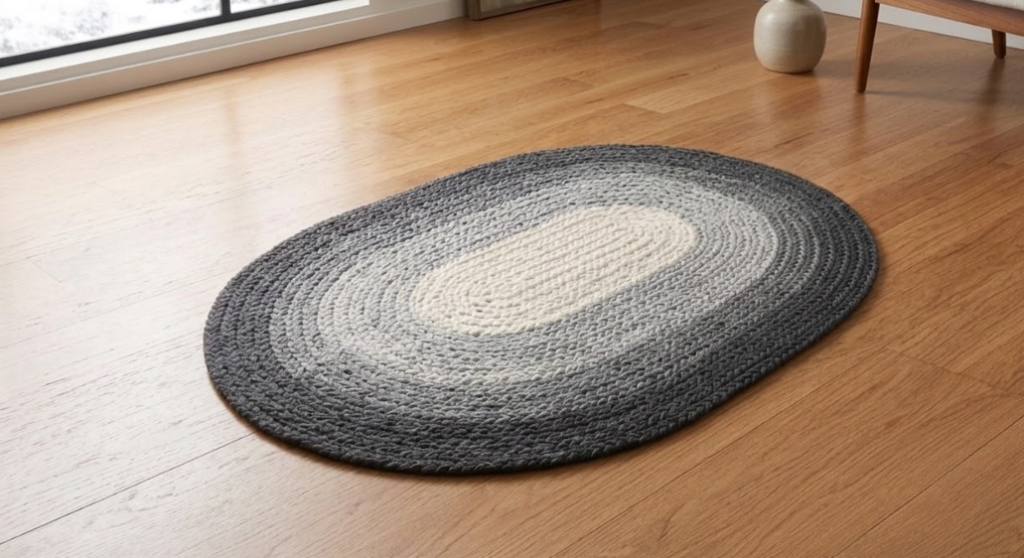
The Center: Start coiling. For a beginner oval rug, start with a 10-inch straight section of braid laid flat. Coil the braid back alongside that center strip.
Handling Curves (The Curve-Bow Warning): On the ends of the oval (the curves), you must add a small amount of slack to the outer braid. If you pull it tight, the rug will instantly turn into a bowl. Add a little extra outer loop, press it flat, and then sew it down. This prevents the rug from warping!
The Golden Rule: ALWAYS KEEP THE RUG FLAT ON THE FLOOR. If you pick it up to sew in your lap, it will curl up. Keep it on a hard table or the floor, and press it flat with your hand every 3 inches of sewing.
The Lacing Stitch: Use your heavy-duty thread and tapestry needle. Instead of wrapping thread over the top, use a Blind Lacing Stitch. Pass the needle horizontally through the inner edge of one braid loop, then through the edge of the other braid. When you pull it tight, the thread hides between the braids for a clean, professional finish.
Video Credit: Youtube/ Funky Crunchy Mama
Why Rag Rugs Are a Homesteading Staple
Rag rugs combine practicality, creativity, and sustainability in one simple project. By reusing old fabric, you not only reduce waste but also create a functional piece for your home that reflects traditional homesteading values. Each rug tells a story through its materials and craftsmanship, making it both useful and meaningful.
Start Your Rag Rug Today
Gather your old clothes or fabric scraps and try making your own rag rug using this tutorial. Start small, experiment with colors and patterns, and enjoy the satisfaction of turning everyday leftovers into something beautiful and useful for your home.
If you want a budget-friendly rag rug, I recommend recycling your fabrics and making your own rather than purchasing one. If you must purchase one, get it from a sustainable source and ensure the fabric is from repurposed cloth strips.
Frequently Asked Questions
What is a rag rug?
A rag rug is a handmade rug created from strips of fabric, often recycled clothing or linens. The fabric is braided, woven, or hooked together to form a sturdy floor covering.
What fabric works best for rag rugs?
Cotton fabrics work best because they are durable, flexible, and easy to tear into strips. Old T-shirts, sheets, and worn clothing are common choices for rag rug making.
Do I need special tools to make a rag rug?
No. Most rag rugs can be made with basic tools like scissors, a needle and thread, or a simple loom, depending on the method you choose.
Are rag rugs durable enough for everyday use?
Yes. When made tightly, rag rugs are strong and long-lasting. They work well in entryways, kitchens, and other high-traffic areas.
Can beginners make a rag rug?
Absolutely. Rag rugs are beginner-friendly and forgiving. The process is simple, and imperfections add to the handmade character of the rug.
How long does it take to make a rag rug?
The time varies based on size and method, but small rag rugs can be completed in a few hours, while larger rugs may take several days of casual work.

Leave a Comment