
Learning how to make a solar oven will come in handy if you like baked goodies. What’s more, with a solar oven, you get delicious bakes with the least resources possible.
Moreover, it a skill that can make a difference when you are in a survival situation.
RELATED: 12 Best DIY Solar Panel Tutorials For The Frugal Homesteader
How to Make a Solar Oven and Bake in It in Four Simple Steps
Things You’ll Need for the Solar Oven
- Windshield shade
- Large paper clips
- Cello tape
- Black bucket
- Black metal plate
- Non-glossy black crockpot with a lid
- Baking rack or mason jar rims
Things You’ll Need for the Cake
- Butter
- Baking tin
- Parchment paper
- Glass bowl
- Hand mixer
- Store-bought cake mix
- Milk
- Oven mittens
- Wooden skewers
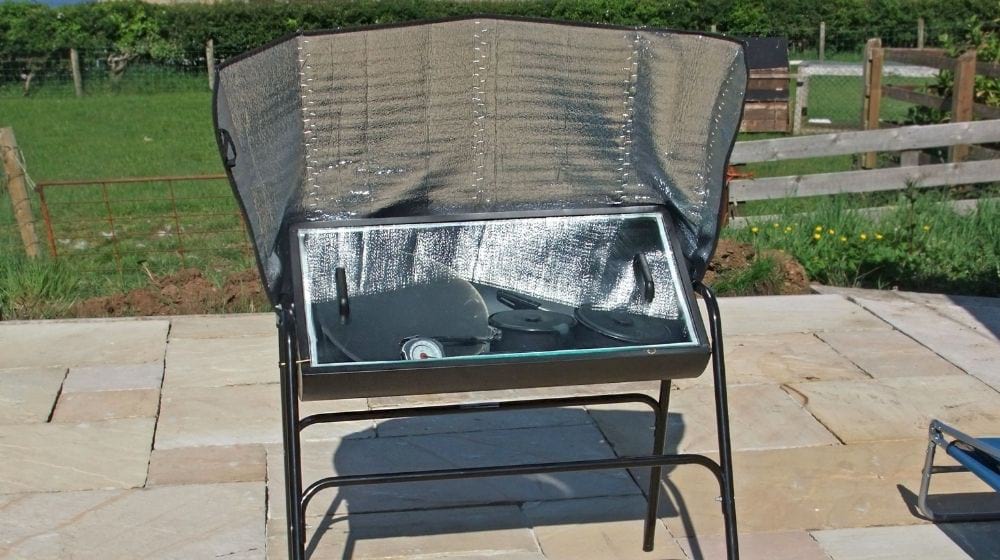
Step 1: Set up the Bucket and the Windshield Shade
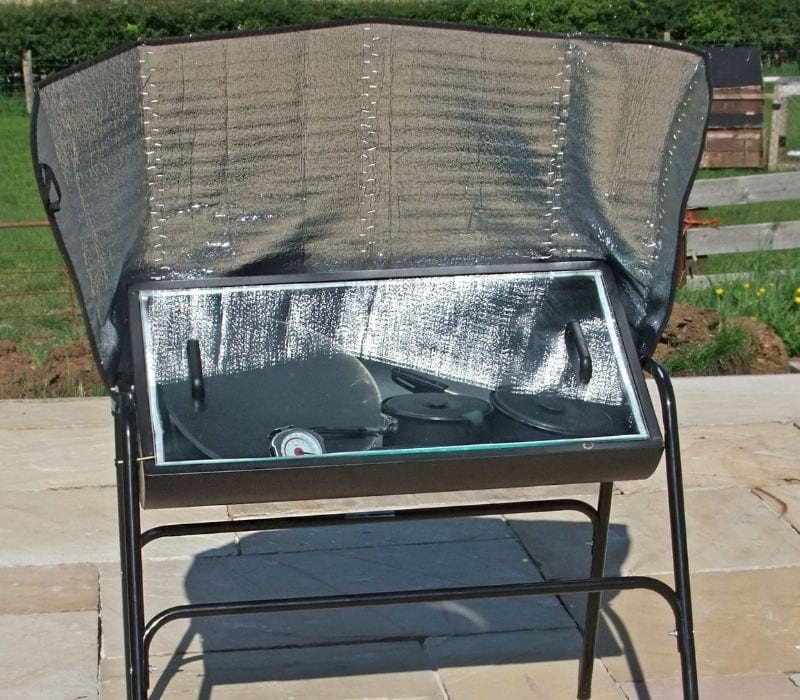
Firstly, find the sunniest spot in your backyard and position your bucket. While the bucket’s color is not as crucial, using a black one with a preferably matte finish will absorb and trap heat better hence increasing the temperatures in your solar oven.
Next, fold your windshield shade into a cone or funnel shape. Note that the windshield will not form a proper cone shape as it is large. However, the u-shaped part on the sunshade that accommodates the rear-view mirror will guide you in making the funnel shape.
Now, with your eyes on the U-shaped center, gather the windshield flaps on their sides over each other and hold them in place with paper clips silver side up. Alternatively, you could use a black electrician’s cello tape to secure the edges in place and place it on top of the bucket.
Step 2: Clip the Loose Windshield Shade Flaps and Put the Metal Plate in Place

Windshield shades are usually large. Therefore, after shaping it into a funnel, you will have loose flaps. To prevent your solar oven setup from being blown over by the wind, tuck the loose flaps backward and secure them with more paper clips.
Once secured, place your metal plate at the center of the cone-shaped sunshade. The idea is that all the sunlight reflected off the silver sunshade surface will bounce back onto the metal plate.
Lastly, leave your solar oven to preheat. To ensure you align it to get the maximum sunlight possible, the setup’s shadow should fall directly behind it.
Tips
- Be keen not to undo the funnel shape you have already achieved when clipping the loose flaps.
- The less glossy your black metal plate, the more heat it will trap.
RELATED: DIY Solar Panel Installation
Step 3: Preparing Your Recipe
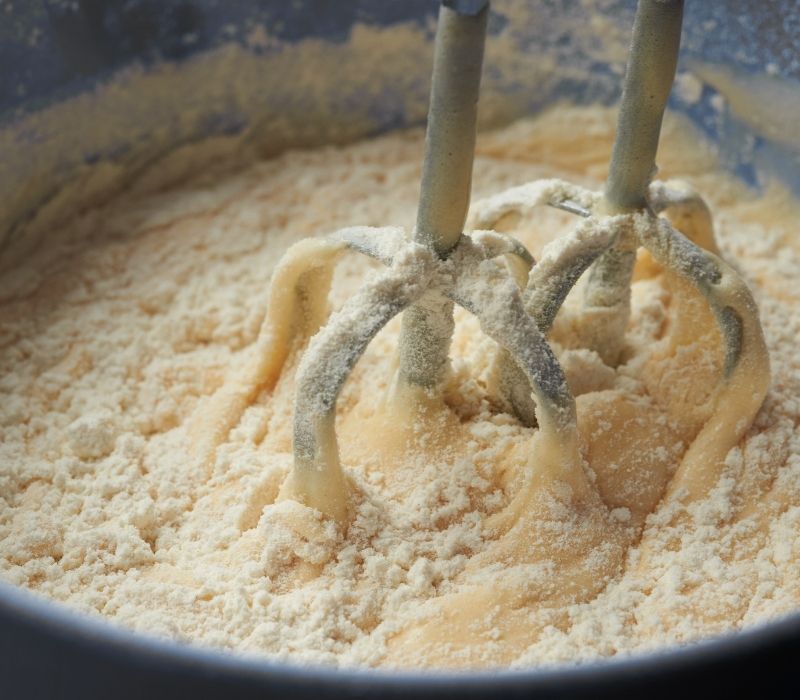
You can bake anything in your DIY solar oven as long as it is the right size to accommodate your needs. Here, pour your cake mix into a glass bowl, add milk and use your mixer to make your cake batter. Feel free to amp with other additives to adjust the cake to your liking.
Next, grease and line your baking tin with parchment paper before pouring in the cake batter. Go for a baking tin that will fit inside your crockpot but not too small that the cake batter pours over as it bakes. Once done, tap the batter-filled tin onto a hard surface to disperse air bubbles.
Tips
- You can use a whisk or regular spoon if you do not have an electric mixer.
- Besides milk, you can also use water or almond milk.
Step 4: Bake the Cake in the Solar Oven
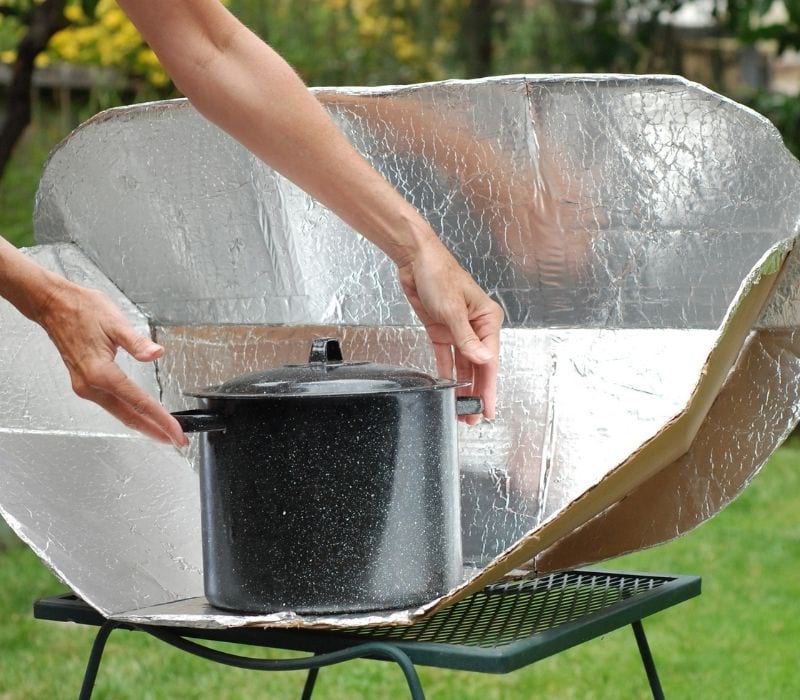
After transferring your cake batter into a baking tin, place your mason jar rims at the bottom of the pot. Next, place the filled baking tin into the crockpot on top of the rims. The goal is to ensure that the baking tin is not in direct contact with the pot.
Once in place, cover with a black lid and place the pot on the black metal plate already on the oven setup. Give it around 40 minutes to one hour before opening the lid to check for doneness.
While your cake will most likely be done by the one-hour mark, you can leave it to continue baking for as long as you want. This is because you cannot burn anything in the solar oven.
After an hour, insert a toothpick or skewer in the middle of the cake to check for doneness. It should come out clean or with crumbs. Remember to wear oven mittens when removing the pot’s lid to check your cake as it will be equally hot as in an actual oven.
Pro Tips
- Adjust the solar oven’s position throughout the baking process to ensure it is exposed to maximum sunlight.
- Tinfoil or shopping bags with a silver surface will also work the same way as a windshield shade.
- For maximum functionality, go for black utensils. You can also choose to paint them to give the surfaces a more matte finish.
- Similarly, you can consider putting your crockpot in a baking bag to trap even more heat.
- For perfectly baked meals, place them in the oven as earliest in the day as possible.
- If you are using a larger crockpot, swap the rims with a metal rack.
Do you want to learn other cool ways to make a solar oven? Check out this video by Science Buddies:
There you go, homesteader. With this detailed guide on how to make a solar oven, you can now bake and cook as much as you want for free. All you need is the brightest sunlight possible, and you are set. Happy baking!
What do you like cooking or baking in your DIY solar oven? Let us know in the comment section below!
Up Next:
- Solar Powered Tent Roundup (The Best of Both Worlds)
- How to Make Solar Panels for Your Small Electronics
- How To Make Perfume
Fellow homesteaders, do you want to help others learn from your journey by becoming one of our original contributors? Write for us!
