Want to learn how to build a fire pit? The colder season may be closing in, but I'm sure you still want to extend your outdoor hangouts. Learn how to build a fire pit easily on a budget, and enjoy your time outdoors!
How To Build A Fire Pit For Cozy Outdoor Times
It's no surprise that the latest trend in garden design gives emphasis on a cozy outdoor stay. My own family loves the outdoors; our home has both a front porch and a backyard patio. With the colder seasons just around the corner, a fire pit should be perfect to keep us warm. I find this guide on how to build a fire pit feasible, even I can DIY it. It's easy to follow, plus it's got cooking grates for grilling and cooking outdoor meals. You too can check this guide out and get to building your own fire pit soon.
Let's Start Building!
Materials:
- Curved precast concrete blocks
- Fire pit ring with grills
- A cotton cloth
- Adhesive for concrete blocks
Tools
- Wheelbarrow
- Pointed shovel
- Square shovel
- Hand tamper
- Rubber mallet
- Torpedo level
- Caulk gun
How To Build A Fire Pit
Step 1. Start With The Base
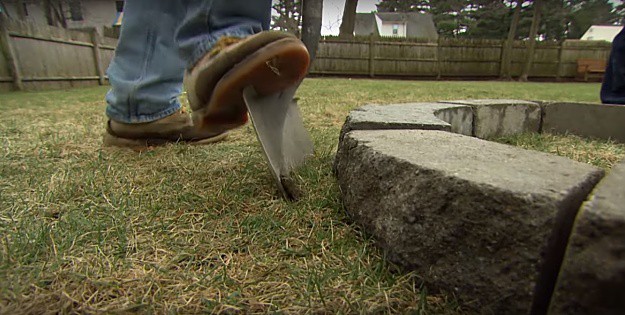
First is to identify the perfect location for your fire pit where you and your family can conveniently gather. We will be using curved precast concrete blocks designed for circular outdoor structures. These custom designed blocks will allow for an easy and quick building, like for our fire pit here.
Now, lay down the curved blocks on the ground and piece together to make a circle. Mark three inches from the concrete base or outline with a pointed shovel. Hold the shovel down and dig all the way around the ring to make an outline.
Step 2. Dig A Hole
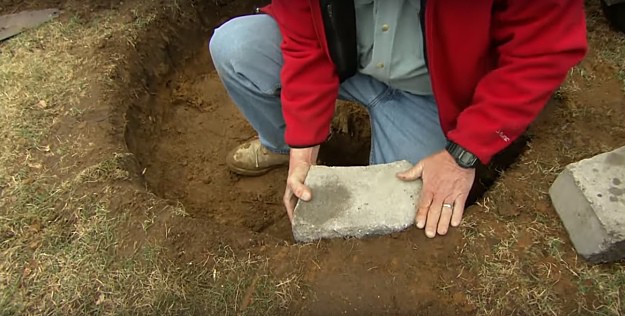
Next is to get the blocks out of the way so we can dig a hole in the outline. If you are building your fire pit over your grass lawn, you might want to save it so you can patch the area around the fire pit. Using a square shovel, slide it underneath the grass and save as much as you can of it.
Now dig a hole a foot deep into the ground and tamp it up a bit. If your soil is a hard clay, you can dig another hole in the center so rainwater can drain through. Fill it with crushed stones for drainage.
Step 3. Form Foundation
Pour over the crushed stones in the hole and spread it evenly to about an inch or two thick. Take the hand tamper to pack and level it down. Lay another layer of crushed rocks of the same thickness and repeat the process. This will allow you to properly tamp and level the crushed rocks.
Repeat the process until you've reached the level of about four inches to the surface. Take in mind that the first layer of blocks is going to sit in level with the grass.
Make s'mores to munch on, while bonding around the campfire! More tips here, homesteader 🔥 #HomesteadActivities https://t.co/rgoxLdXwyA
— Homesteading (@HomesteadingUSA) July 18, 2017
Step 4. Stack Blocks
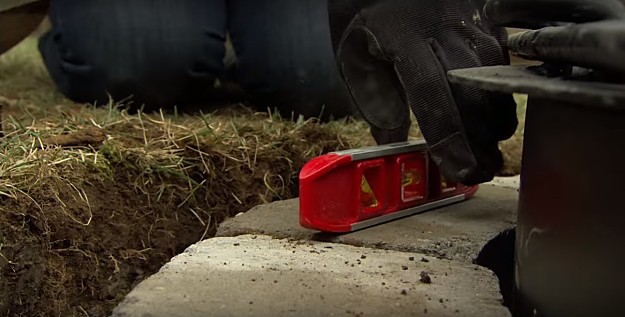
Take your steel fire-pit ring with cooking grates and place it in the middle of the foundation as a guide to set the blocks around. Take the precast blocks and start leveling them out around the ring. Lay your first block and set it tight against the ring. Use the rubber mallet and tap the block down to set. Use a leveling tool to make sure the structure will be leveled. Set the other blocks tight around the ring following the same steps.
Step 5. Add Layers
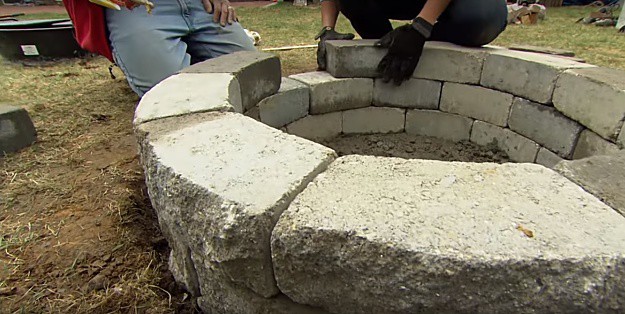
With the first level of blocks set, take out the ring so you can work on the rest of the levels. Take out your caulk gun and concrete adhesive and apply a small amount of it on either side of block's joint. Set another brick on top of the first layer making sure it sits centered on the joint. Continue with the rest of the blocks and add two more layers.
Step 6. Add The Fire Pit Ring
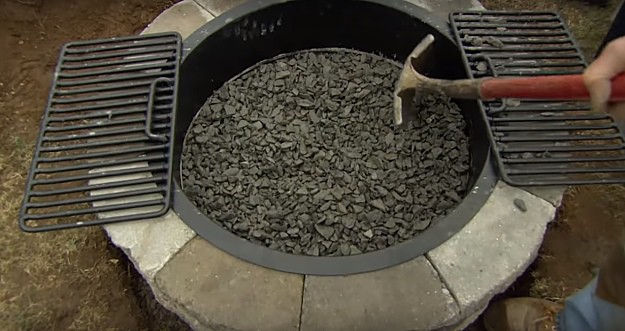
Get the steel fire pit ring and place it over the fire pit. Pour crushed rocks over the pit, filling it up to the baseline of the steel ring. The rocks will protect the base blocks from the heat of the fire. Use your shovel to rake the rocks to the sides so that it has a low spot in the center for making fire.
Lastly, take some of the soil you've dug from the pit and fill the sides around the pit. You can also take the grass strips and replace it around the firepit.
Fire Pit In Action!
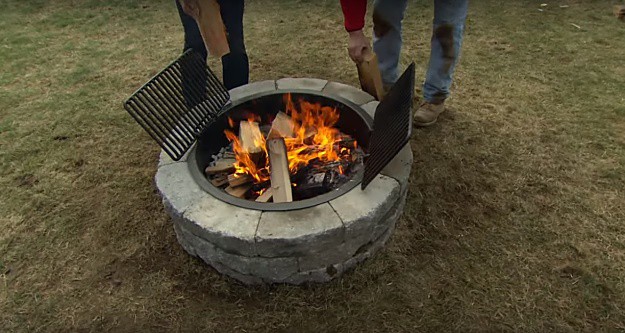
There you have it, homesteaders! An easy and budget-friendly fire pit your family can spend time around. Waste no time testing your finished fire pit and plan a cookout under the stars!
Follow the step-by-step guide on how to build a fire pit in this video:
Now you can spend more time outdoors even in this chilly season with a fire pit. You won't have to go far also to get a campfire going and you can get your camping fix in the safety and comfort of your backyard. Learn how to build a fire pit and get to building this added feature for your home for fun family outdoor activities this chilly season!
How did you find this guide on how to build a firepit? Share your thoughts about it in the comments section below!
Up Next: How To Make A Fire Starter At Home | Homesteading Skills
Follow us on Instagram, Twitter, Pinterest, and Facebook!
Editor's Note: This post was originally published on October 2014 and has been updated for quality and relevancy.

… real nice pit. Explain the need for a concrete base, it’s on dirt, dirt doesn’t burn and concrete doesn’t really last that long w/o breaking up over time due to heat, cold and even root growth. I just don’t see the need, it looks like extra work and expense. I would like to know your reasoning for doing it. I’m no kind of expert on concrete or construction and it may depend on where you live for the type you’ll need. Thanks
Thanks for your comment! We live in an area that has a lot of moisture in the ground, so it can be difficult to start a fire when it rains a lot. So we poured concrete! Hope that answers your question!
Hi,
I like the fire pit. Can I bake my breads after the fire dies down and the bricks so hot? Please sent me an email reply thanks
almas
I was planning to do something like this and trying to get ready mix concrete.Thanks for sharing this article
[url=https://www.levitrasvizzera.nu]levitra svizzera[/url]
30 mil is definitely a big variety for one nation, but there is however a brilliant side to these kinds of a large number. A variety this large implies that you’re far from on your own. The information you’ve read here were collected by those who determine what it’s enjoy having diabetes mellitus. You are able to take their advice and learn how to thrive with this particular condition.Jewellery Suggestions You Need To Understand About
[url=https://www.kamagrajellyemportugal.nu]Kamagra Portugal[/url]
Pay attention to the climate. Wait around two or three days after a hurricane or possibly a frosty front side. In case the water is frosty, fishes will continue to be at the end and not seek out meals. Normally, the water starts off warming up yet again two days following a cold entrance has passed via an place.
[url=https://www.viagrakaufenrezeptfrei.de]viagra kaufen rezeptfrei[/url]
If you wish to juices leafy green vegetables, roll them jointly in a soccer ball well before setting them inside the juice machine chute. Follow with fresh vegetables that are far more firm. You should alternate involving the leafy and business fresh vegetables when you are creating a large quantity.
[url=https://www.kamagrageneve.nu]kamagra suisse[/url]