
Quick Look at Home Composting
- Composting reduces waste, improves soil health, and benefits the environment by recycling organic matter into nutrient-rich compost.
- Start composting by choosing a method (backyard pile, bin, or tumbler) and gathering green (nitrogen-rich) and brown (carbon-rich) materials like food scraps and dry leaves.
- Balance moisture levels and turn the pile regularly to speed up decomposition, with compost ready in 3–12 months depending on conditions.
- Avoid common mistakes, such as adding too much green material or not turning the pile often enough, which can slow down the process.
- Composting FAQs cover questions like composting in winter, handling odors, and the best materials to add, including eggshells and grass clippings.
Related: A Homesteader’s Guide to Composting
Home Composting Made Easy: Step-by-Step Guide for Beginners
Starting your own composting system at home is one of the best ways to reduce waste, enrich your garden, and contribute to a healthier environment. Whether you’re new to composting or looking to refine your method, this guide will help you get started with easy-to-follow steps and helpful tips to create your own nutrient-rich compost.
What is Home Composting?
Composting is a natural process that breaks down organic matter, like food scraps, yard waste, and paper, into rich, dark humus that can be used to fertilize your garden. It’s nature’s way of recycling nutrients, and when done properly, it can significantly reduce waste in landfills while improving your soil health.
Why Should You Compost?
1. Reduce Waste
Composting is a sustainable practice that diverts food scraps and yard waste from the landfill. This helps reduce the burden on waste management systems and lowers your carbon footprint.
2. Enrich Your Garden Soil
Compost is a natural fertilizer that improves soil structure, boosts water retention, and provides essential nutrients for your plants. It’s a cost-effective, organic way to ensure your garden thrives.
3. Help the Environment
By composting, you’re reducing the need for chemical fertilizers, minimizing pollution, and promoting biodiversity in your garden. It’s an easy way to contribute to a healthier planet.
How to Start Home Composting: Step-by-Step Guide
Starting your compost pile doesn’t have to be complicated. Follow these simple steps to create your own composting system at home.
Step 1: Choose Your Composting Method
Before you get started, decide on the best composting system for your needs. There are several methods, including:
- Backyard Compost Pile: Ideal for larger spaces, this method involves creating a simple pile or heap in your yard. It’s perfect for those with space and a lot of organic material.
- Compost Bin: If you prefer a more organized setup, consider using a compost bin. These can be purchased or made from materials like wood, wire, or plastic.
- Tumbler Compost: A compost tumbler is a sealed container that you rotate to speed up the composting process. It’s ideal for smaller spaces or when you want to compost quickly.
Step 2: Gather Your Materials
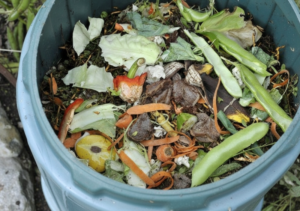
To create high-quality compost, you’ll need a good balance of green materials (rich in nitrogen) and brown materials (rich in carbon). Here’s what you can compost:
Green Materials (Nitrogen-Rich)
- Fruit and vegetable scraps
- Coffee grounds and filters
- Grass clippings
- Plant trimmings
- Eggshells
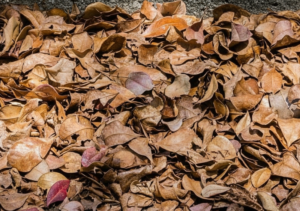
Brown Materials (Carbon-Rich)
- Dry leaves
- Straw or hay
- Shredded newspaper or cardboard
- Wood chips
- Pine needles
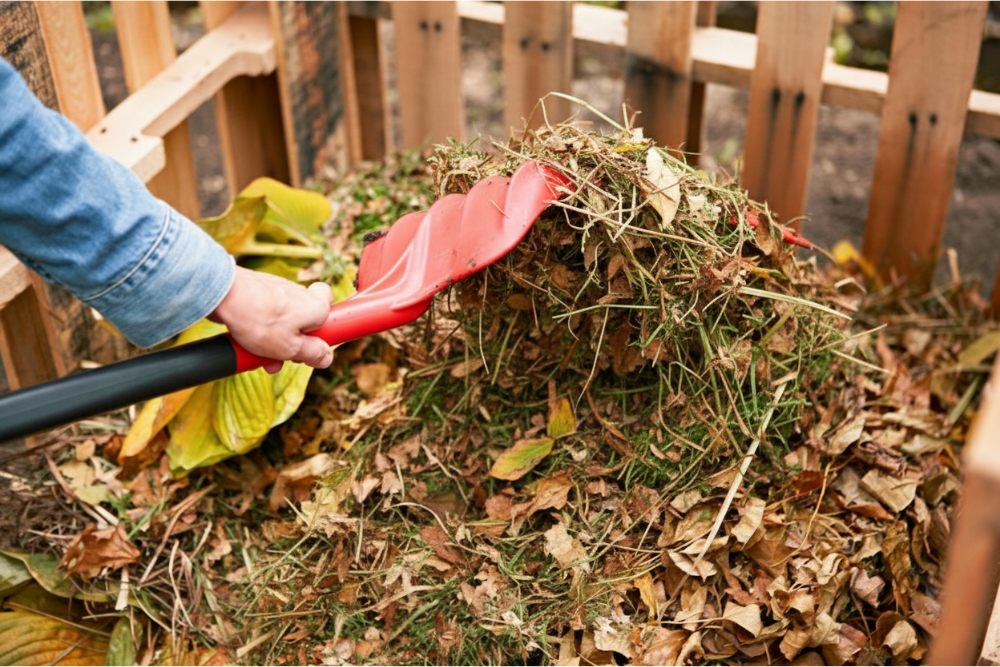
Step 3: Layer Your Compost Pile
Begin by layering your compost pile with rough brown materials at the bottom. These allow air to circulate and help with drainage. Then, alternate between green and brown materials, ensuring that each layer is about 3-4 inches deep. For every layer of green material, add a layer of brown material. This balance is crucial for successful composting.
Step 4: Maintain the Pile
To keep your compost pile healthy, you’ll need to turn it regularly. If you’re using a compost bin or tumbler, rotate it once or twice a week. This helps introduce air into the pile and accelerates the decomposition process. If you’re using a compost pile, use a pitchfork or shovel to turn it about every 2-3 weeks.
Step 5: Monitor the Moisture
Your compost should be moist but not soaking wet. Think of the moisture level as that of a wrung-out sponge. If your compost feels dry, sprinkle it with water. If it’s too wet, add more brown materials to soak up the excess moisture.
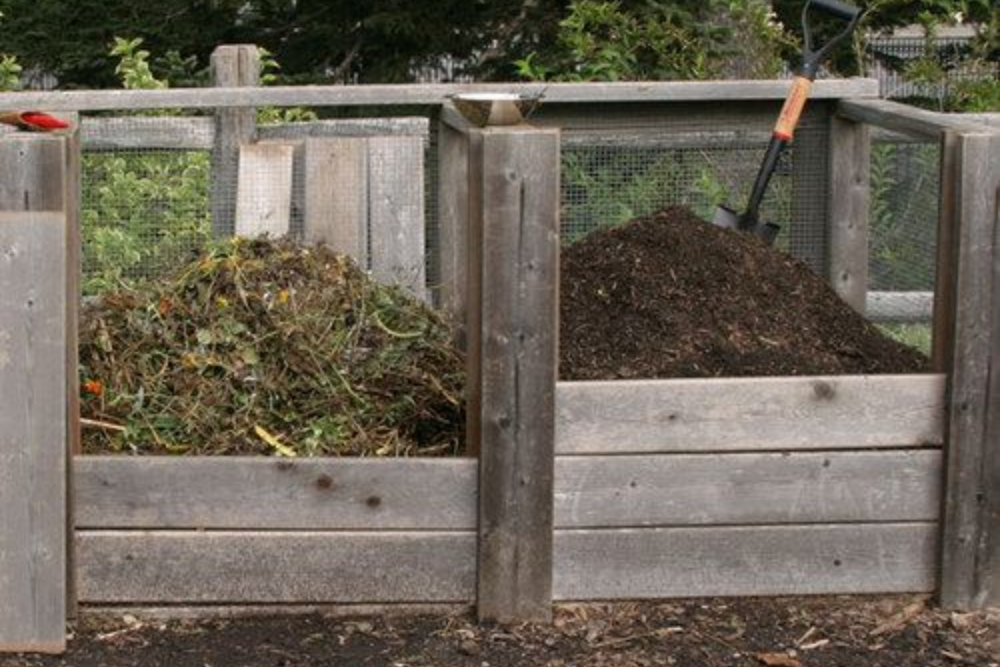
How to Build and Care for a Compost Pile
Finding a good place for composting often means choosing a quiet corner that does not stay soggy after rain. Once you have your spot, building the pile is straightforward and can fit into most routines.
To get your compost started, follow these simple steps:
- Put a layer of browns, like dry leaves or shredded newspaper, on the ground first. This helps air reach the bottom of the pile.
- Add a layer of greens, such as vegetable scraps or grass clippings, over the browns.
- Keep adding to the pile by alternating browns and greens as you have more material. If you notice a smell or the pile seems wet, sprinkle on extra browns. If it looks dry or is not breaking down, add greens and a bit of water.
- Check that the pile feels damp, about like a wrung-out sponge. Water it if needed, or cover it with a tarp if heavy rain is expected.
- Turn the pile with a shovel or fork about once a week. Mixing brings air into the center and keeps the compost breaking down evenly.
Both open piles and bins can work well for home composting. What matters most is keeping up the balance of greens and browns and making small adjustments as needed.
Common Home Composting Problems and How to Fix Them
Even with the right materials and care, compost piles can hit a few bumps. Knowing how to spot trouble and fix it will save you time and keep your compost healthy.
Smelly Compost
A bad smell usually means the pile is too wet or has too many nitrogen-rich greens. To clear up odors:
- Add dry browns like fallen leaves, straw, or shredded paper
- Turn the pile to increase air flow and dry it out
Slow Breakdown or Dry Pile
If your compost seems stuck and isn’t breaking down:
- Check the moisture level. Compost should feel like a wrung-out sponge—if it’s dry, sprinkle some water
- Add more greens, such as fresh vegetable scraps or grass clippings, to supply nitrogen
Pests and Animals
Unwanted visitors can show up when the pile contains food that attracts them. To keep critters away:
- Always bury food scraps beneath a layer of browns
- Avoid adding meat, dairy, or oily leftovers
- Use a closed bin or cover your pile with a lid or tarp if animals persist
Addressing these issues early will keep your compost working smoothly and producing that valuable black gold your garden needs. For more detailed tips on common compost problems and solutions, the University of Minnesota Extension offers a helpful guide here.
How Long Does it Take to Compost?
Home Composting is a slow but steady process, and patience is key. Generally, it takes anywhere from 3 months to 1 year for compost to fully break down, depending on several factors, including the size of your pile, the types of materials used, and how often you turn it.
Here’s a quick guide to the timeline:
- 3-6 months: In warmer climates, with regular turning and proper moisture levels, compost can be ready within 3 to 6 months.
- 6-12 months: In cooler climates or if the pile isn’t turned regularly, it may take closer to 12 months for the compost to be fully decomposed.
Bringing It All Together: Start Making Your Own Black Gold
Home Composting is a simple way to turn everyday scraps into something that makes your garden better. It helps cut down on trash and adds nutrients to your soil without extra cost. It takes some patience, but the results are worth it.
If you haven’t tried composting yet, find a quiet spot outside and start saving your kitchen scraps. Keep a good balance of materials, give the pile a turn now and then, and watch how your scraps slowly become rich, dark compost.
If you have questions or want to share how it’s going, leave a comment. We’d love to hear from you.
Related Articles:
15 Inspiring Homestead Farm Design Ideas
DIY Compost Bins To Make For Your Homestead
Frequently Asked Questions
Can I compost in the winter?
Yes! While composting slows down in colder temperatures, you can still compost in the winter. To speed up the process, keep your compost pile insulated by covering it with a tarp or straw. You can also use a compost bin to retain heat.
What should I do if my compost pile smells?
If your compost pile smells, it’s likely too wet or has too much green material. Turn the pile to introduce air, and add more brown materials like dry leaves or straw to balance the moisture.
How can I speed up the composting process?
To speed up composting, make sure your pile has the right balance of green and brown materials, turn it regularly, and maintain the right moisture level. You can also shred larger materials to help them break down faster.
Can I compost eggshells?
Yes! Eggshells are a great addition to your compost pile because they provide calcium, which is beneficial for plant growth. Just crush them before adding them to the pile to help them break down faster.
Can I compost grass clippings?
Yes, you can compost grass clippings, but be sure not to add too many at once. They are rich in nitrogen and can create a dense, wet layer if overused. Mix them with other materials to balance the compost.
