Fodder Systems for growing your own livestock feed are ideal.
Why would I want to grow my own feed? There are several reasons, here’s a run-down on the benefits of feeding live sprouts. Let the team behind Fodder Works tell you why…
How to Grow Your Own Livestock Feed with a Fodder System
Feed Savings
Sprouts (also known as “fodder” when used for animals) are economical to produce. Typical cost of production is less than 6 cents per lb. This includes seed, water, and electricity. Although sprouts cannot replace 100% of an animal’s diet, they have been scientifically proven to increase the digestibility of other feeds in the gut. That means your hay or grain will become more valuable to the animals you feed.
Animal Health
Living sprouts are extremely high in nutrients. The chlorophyll, enzymes and essential amino acids are all higher when the plant is alive and well. You lose these benefits in dry feed. Most notably we see improvements in hoof and coat condition. In dairy rations, sprouts generally show an increase in milk fats and other components. When mother cows are fed sprouts, the health of newborn calves is greatly improved. We've seen weights of weaned calves improve drastically when sprouts are incorporated.
There’s a video clip on that here: Sue Hoek – Feeding Trial with fodder and calves
Moisture Content
Due to the high moisture content (80 – 85%) sprouts can improve hydration in your animals. Whether it’s dusty and dry or cold and frozen, they will get the hydration they need. Whereas dry feeds tend to lead animals to drink more water, sprouts will significantly decrease water consumption.
Environment
Growing sprouts uses less than 3% of the amount of water required for standard forage production. Even in times of severe drought you can have fresh green feed. There’s no fertilizer used, no pesticides and no soil. The most commonly used grain is barley, which is primarily a NON-GMO crop.
Human Health
Sprouts in animal diets have proven to increase Omega-3 levels. This applies to meat, milk and eggs. When the animals are healthier the benefits are passed along to us. Thompson Rivers University in British Columbia is currently undergoing trials on this subject. In particular, they are studying the effects of using sprouts in grass-fed animal diets.
Farm Land
Vast savings can be had when it comes to farmland. How precious is your grazing? A system that takes up just 200 square feet can replace 30 to 40 acres of farmland. When you think of the cost per acre for good farm land, it’s not difficult to see the value of a sprouting system.
How do I grow it? | The Fodder System
If you’ve never seen hydroponically grown sprouts before, it’s a good idea to watch this video. Shayn Bowler of Utah Natural Meat shows his daily sprouting routine. Seeing is believing.
Green Grub – From Utah Natural Meat
Seed Sprouting – Step 1
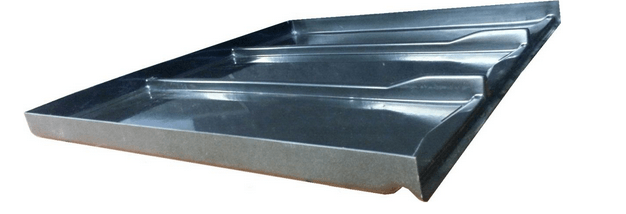
You’ll need something to sprout in. Commercial turn-key systems are available that produce anywhere from 110lbs, to many tons per day. (Here’s a video of a system that can produce 10,000lbs per day) If you need less than 110lbs, don’t fret! Many people are building small DIY systems and sprouting in places such as their kitchen sink or spare bathroom. It’s a little more work, but can be done. For a small system, you can purchase specific fodder sprouting trays such as these or you can make your own. Many people will find dollar store containers and drill holes in them for drainage. You have to start somewhere! Make sure your trays do not hold any water. Good drainage is a key to happy sprouting.

Seed Sprouting – Step 2
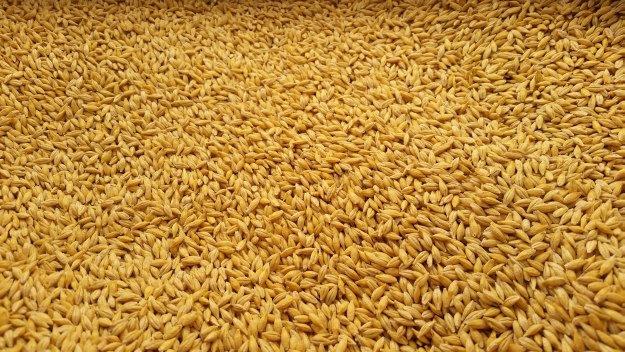
You’re going to need some seed. Barley seed is most commonly used and recommended. The nutrition level of barley is extremely high and it’s commonly called a “super food”. It’s generally a NON-GMO crop and can be purchased organic. In case you’re worried about supply, just keep in mind the size of the brewing industry. Barley isn’t going anywhere. The most important fact to remember is that you want seed grade barley with a high germination rate. It must be “whole” barley, NOT “hulled”. This can be confusing on the phone if you call a local grain supplier, make sure you get the right one. Certified seed has been cleaned to a specific standard and is ideal.

Seed Sprouting – Step 3 – Fodder System
If you have a commercial sprouting system, roll the dice and move forward one step. (Dice rolling not really required, you can just skip ahead to Step 4.) Pre-soaking seed is often a necessary step for DIY systems. You’ll want to place the barley seed into a bucket that holds water. People soak for varying times, anywhere from 2 hours to 24 hours. I recommend a 12 hour soak, but this can depend on how you water in step 5. When soaking, you can use a 10% bleach solution, or vinegar to help kill mold and bacteria on the seed. Mold is naturally on all seed and some sanitizing will be required.
Seed Sprouting – Step 4 – Fodder System
Place seed into your sprouting trays. With a commercial system and dry seed, simply pour in the recommended amount and give the tray a small shake. This will level things out and make it a quick process. With a DIY system we’ll assume you’re pre-soaking seed. Take your pre-soaked seed and place it into your trays. They’ll be somewhat wet and sticky, so spread them evenly as best as you can.
Seed Sprouting – Step 5 – Fodder System
Keep your sprouts wet. With a commercial system, this is done automatically. Watering is done each hour for less than 20 seconds using overhead sprayers. With a DIY system, I do not expect you to be up all hours watering your sprouts. Just keep them wet as often as reasonable. Over watering can effectively drown the seeds and they won’t sprout well. If your seeds are wet and swollen but not sprouting, you may have overwatered. After a day or two they can start to ferment. This will confirm things if you’re not sure. If your seeds are dry to the touch, water some more. Overhead sprayers are proven to improve sprouting rate, but filling your trays with a hand waterer can still produce good sprouts.
Seed Sprouting – Step 6 – Fodder System
This step is extremely crucial. Barley is a cool crop and requires good climate control, especially during summer months. Wherever you’re growing, keep your air temperature between 68 and 70 degrees. Once again, commercial systems already take care of this, but you should still check the temperature now and then. Below 68 degrees you’ll find that the sprouts still grow, but slowly. Above 70 degrees your sprouts will grow fast! But you can allow mold to grow as well at higher temperatures. Keep an eye on your water temperature too. For best results, keep a fan on your sprouts and provide some fresh air. Stale, stagnant air is great for mold, bad for fodder.
Seed Sprouting – Step 7 – Fodder System
Lighting is actually not as critical as one would think. Light is important for chlorophyll to turn the sprouts green and does have some nutritional benefit. However, this only requires a very small amount. A daylight spectrum 6500k bulb is more than sufficient for good chlorophyll levels. If your sprouts appear yellow, a little more light will help. Too much light won’t hurt anything but your electricity bill.
Seed Sprouting – Step 8 – Fodder System
Grow sprouts, not grass. Although pictures of tall green barley grass are impressive to look at, it’s important to understand that you want to feed sprouts. Sprouts have not yet reached the photosynthesis stage. Once this stage is reached, the sprouts begin to use up nutrients for more growth, increase in fiber and lose digestibility. Just before the blade of grass starts to open is the ideal time for harvest. With a commercial Fodder Works system this will be in 6 days. With a DIY or other system, it may take 7-8 days.
Seed Sprouting – Step 9 – Fodder System
If all goes well, you have sprouts to feed! Pull the sprouts from your trays. You should have a nice thick root mat that holds everything together. The underside should be white, with no holes or discoloration. This is an extremely nutritious meal that your animals will love!
Seed Sprouting – Step 10 – Fodder System
Sanitation is also a key to consistent growth. Once you’ve fed your sprouts, thoroughly clean your trays. It’s not required, but soapy water or a light bleach solution can help. You will notice a thin slime on the surface of your tray. This is perfectly normal and is a surfactant that washes off of the seed. It’s part of nature that protects the seed prior to germination. Make sure to wash off the surfactant before reseeding your trays. A Fodder Works sprouting system contains enough trays to grow on a rotation so you can have fresh sprouts every day of the year. Once you know how many days your DIY system takes, purchase enough trays to produce feed every day.
If you have any other questions about sprouting, or Fodder Works feel free to visit their website www.fodderworks.net or contact them directly (530) 615-0565

Thanks for posting this article on fodder!
Very informative and interesting! I would’ve enjoyed it much more with a lot less pop ups though!