
Fall is the perfect time for outdoor crafting, and building a DIY scarecrow is an exciting way to add character to your garden. Whether you’re a DIY enthusiast or just looking for a fun weekend project with family, this activity is simple, affordable, and unique to your outdoor space. You can use old clothes and household items, and a DIY scarecrow can also help keep unwanted critters away from your garden. Let’s walk through how you can make your very own scarecrow step by step.
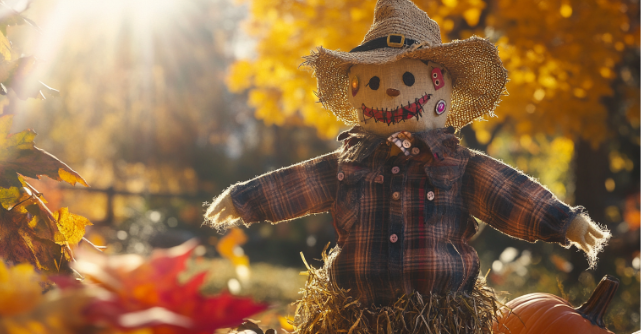
A rustic DIY scarecrow standing tall in a garden, wearing old flannel clothes, a straw hat, and stuffed with straw. The scarecrow has a cheerful smile made of buttons and fabric patches. Surrounded by vibrant autumn leaves and pumpkins, soft sunlight filters through the trees, warm autumn colors
Why Create a DIY Scarecrow?
Building a DIY scarecrow isn’t just a fun project—it’s practical, too. For centuries, farmers and homeowners utilized scarecrows to protect crops by scaring off birds and other pests. Now, you can do the same as well!
Additionally, creating your own scarecrow allows you to express your creativity as you can easily customize it with accessories that reflect your personality. Whether you prefer a traditional scarecrow or something with a modern twist, your finished product will literally and figuratively stand out in your garden.
For more ideas on creating imaginative scarecrows, check out the Old Farmer’s Almanac’s guide to creative scarecrow designs.
Step-by-Step Guide to Building Your DIY Scarecrow
Creating a DIY scarecrow is a simple, fun way to add some personality to your garden. Whether you’re looking for a practical way to keep pests away or just want to complete a creative weekend project, building your own scarecrow is the perfect solution. Even better you won’t need to buy expensive materials. Your DIY scarecrow will only require things you already have at home. You’ll be able to craft a unique garden decoration in no time. Ready to start? Here’s a quick guide on how to build your own scarecrow!
Step 1: Gather Your Materials
Before you begin building your DIY scarecrow, gathering all the materials you’ll need is important. Fortunately, you can find most of these items are in your home. Here’s what you’ll need:
- Old Clothes: A flannel shirt and old jeans are ideal for that classic scarecrow look.
- Stuffing Material: Use straw, old newspapers, fabric scraps, or even plastic bags.
- Supporting Frame: Wooden stakes or poles to help support your scarecrow.
- Accessories: Hats, scarves, gloves—anything that adds personal flair.
- Twine or String: To securely fasten everything together.
Once you have these items ready, you can start crafting your scarecrow.
Step 2: Build the Body
Now that you have your materials, it’s time to start building the scarecrow’s body. Begin by constructing the frame. First, use wooden stakes or poles to build a cross-shaped structure supporting the scarecrow’s body. Then, secure a shorter pole horizontally for the arms. Afterward, slide the shirt over the frame to create the torso. Next, stuff the pants with your chosen filling material to shape the lower half of your scarecrow. Be sure to tie the bottoms of the pants to keep the stuffing secure.
You’ll have the basic body structure in place by following these steps.
Step 3: Add Stuffing for Shape
It’s time to bring your scarecrow to life by adding stuffing. Carefully fill the shirt and pants with straw, fabric scraps, or any other materials you’ve chosen. Make sure not to overstuff, as you want your scarecrow to look relaxed. Once stuffed, tie off the sleeves and pant legs to prevent the filling from escaping. Afterward, attach the legs securely to the frame to keep your scarecrow stable even in windy weather.
With the stuffing in place, your scarecrow is starting to take shape!
Step 4: Create the Head and Face
Now comes the fun part—crafting the scarecrow’s head and face! You can use a pillowcase or burlap sack as the head. Then, add features like buttons for eyes or use markers and fabric scraps to create the rest of the face. After completing the head, securely attach it to the body frame.
Step 5: Accessorize Your Scarecrow
Another enjoyable part of making a DIY scarecrow is adding accessories and giving it a personality. Adorn it with gloves, boots, scarves, or even sunglasses. If you’re feeling extra creative, consider dressing your scarecrow according to a seasonal theme, like a Halloween costume or a holiday outfit. Let your imagination truly shine by transforming your scarecrow into something unique.
Step 6: Place Your Scarecrow in the Garden
Finally, it’s time to display your scarecrow proudly in your garden. Select a visible spot where your scarecrow can stand tall. Then, firmly securely the base of the frame into the ground to anchor it. For extra stability, consider tying the scarecrow to a nearby post or fence to keep it standing through windy conditions.
If you’re looking for tips on garden structures that can support your scarecrow, explore this guide on garden frames from Gardener’s Supply Company here.
Bring Your Garden to Life with a DIY Scarecrow
Building a DIY scarecrow is more than just a seasonal project—it’s a way to add your own creative touch to your garden. Whether you opt for a traditional scarecrow or a quirky twist, this project is flexible enough to suit any style. In addition to keeping pests away, your scarecrow will reflect your personality and bring charm to your outdoor space.
We’d Love to See Your DIY Scarecrow Creations!
Have you created your own DIY scarecrow? We’d love to see it! Share your scarecrow photos with us, and let’s celebrate your creativity. Send us your pictures, and we’ll feature some of the best creations!
