• Home
  • Recipes
    • Appetizers
    • Breakfast
    • Quick and Easy Meals
    • Salad and Veggies
    • Side Dishes
    • Main Courses
    • Breads
    • Beverages
    • Desserts
    • Canning and Preserving
  • Skills
    • Craftmanship
      • Blacksmithing
      • Woodworking
      • Welding
    • Brewing & Distilling
      • Homebrewing
      • Distilling
    • Cooking & Food
      • Cheese & Dairy
      • Drying & Smoking
      • Canning
      • Fermentation & Pickling
    • Homemaking Skills
      • Candle Making
      • Soap Making
      • Spinning & Weaving
  • Projects
    • Workshop
      • Homes & Buildings
      • Sheds & Coops
      • Appliances & Equipment
    • Garden & Outdoor
    • Homemade Products
      • Home Remedies
      • Natural Beauty
      • Cleaning and Home
    • Textiles & Fabric Arts
      • Sewing
      • Knit and Crochet
      • Quilting Skills
      • Weaving
    • Crafts
      • Home Decor
      • Pottery
      • Upcycling
      • Gifts
      • Kids
      • Holiday
  • Gardening
    • Growing Vegetables
    • Growing Fruit
    • Growing Herbs
    • Growing Grain
    • Soil Improvement
      • Composting
      • Worm Farming
      • Fertilizers
    • Aquaculture
  • Animals
    • Raising Poultry
    • Raising Goats
    • Raising Cattle
    • Raising Pigs
    • Raising Horses
    • Raising Rabbits
    • Raising Bees
    • Raising Cats & Dogs
  • Self Sufficiency
    • Emergency Prep
      • Planning
      • How To
      • Skills & Tips
    • Defense & Protection
      • Guns
      • Knives
      • Archery
      • Tools & Weapons
    • Energy & Power
      • Solar Power
      • Fuels
      • Water
    • Home Remedies
Logo
  • Workshop
  • Garden & Outdoor
  • Homemade Products
  • Textiles & Fabric Arts
  • Crafts
You are here: Home / Projects / Workshop / Appliances & Equipment / DIY Blacksmithing Anvil

DIY Blacksmithing Anvil

Reading Time: 3 minutes

December 16, 2022 By Joanna Medalla 11 Comments

blacksmith tools, blacksmithing tools, blacksmiths tools, blacksmith tool, blacksmith tools and supplies blacksmithing tools list

DIY Blacksmithing Anvil

Blacksmithing is a useful trade on a homestead and can be a very stress-relieving hobby. Buying blacksmithing equipment, however, is expensive and the proper supplies can be hard to find. Especially a good anvil. Which is exactly why we've created a DIY anvil tutorial to fulfill your blacksmithing dreams without emptying your bank account.

Follow the instructions below to make your own homemade blacksmithing anvil

This post is an adaptation of Instructables' Railroad Track Anvil

Materials Needed

  • 18 inch section of a railroad track
  • 18 inches  truck leaf spring
  • Torch
  • Crowbar
  • Tongs
  • Clamps
  • Gloves
  • Water and water hose
  • Drill
  • Bolts and nuts


Step 1. Find a good piece of railroad track scrap

|


Step 2. Shape the railroad track roughly into an anvil shape.

how to make an anvil, blacksmith anvil, blacksmith anvils, anvil blacksmith

Basically, an anvil shape amounts to a horn on one end and a square on the other end. Soften the metal with fire for easy cutting and shaping. A torch would be most ideal – it is easy to manipulate and saves a lot of time.


Step 3. Make a flat surface on the top of the anvil.

|

This is where the section of truck leaf spring comes in. Remove the temper from the steel to make it flat and stay that way – this process is called annealing. The simplest way to do it is to cook it in a forge until it gets red hot (literally), then take it from the heat and bury it in a big pile of ashes. This annealing process will remove the stress from the molecules of steel, allowing it to be easily bent and not spring back.

Once your spring section is cool enough to handle, weld the square, forward end to the base of the horn – the point where the triangular horn becomes the same width as the rest of the track. Weld it solidly. Because of the curve, the rest of the spring will be higher than the top of the track.

Flatten the spring section to the top of the track using clamps. Spot weld it in several places, then remove your clamps and weld the two pieces together. This will take a few rods and a lot of heat!

After welding,  cut the end of the spring section off about 4″ from the rear (away from the horn) end of the track.


Step 4. Drill holes

how to make an anvil, blacksmith anvil, blacksmith anvils, anvil blacksmith, blacksmiths anvil, blacksmithing anvils, anvil

A real anvil has two holes – a square one, called a hardy hole, and a round one, known as the pritchel hole. Drill a hole about 5/16″ in size – this will be your anvil's pritchel hole,


Step 5. Create a hardy hole

how to make an anvil, blacksmith anvil, blacksmith anvils, anvil blacksmith, blacksmiths anvil, blacksmithing anvils, anvil

It's impossible to drill a square hole, so instead drill a 'round' hardy hole measuring approximately 5/8″. Tighten a bolt and nut through the overhang with the bolt on top, and weld the nut in place on the underside. To use, weld your hardy tools to the head of different bolts.


Step 6. The finishing touches

|

Fill a large metal bin (or trash can) with water until almost to the top and keep a hose nearby. Build a big pile of leaves, twigs, sticks, and larger pieces of wood near the can full of water. Light it and put your new anvil in it. Let it sit and cook for 30 minutes.

Wearing gloves and using a crowbar or large tongs, lift the anvil off the fire and drop it in the water. Then run!

The water will immediately begin to boil once you drop the anvil inside the can. Using the nearby hose, keep adding water to the can especially if it boils over. You want to cool the anvil quickly to reintroduce the stresses inside of the steel. Only this time, the anvil face will be hardened (not tempered) flat, instead of curved, as it originally was.

Step 7. Begin your blacksmithing projects!

blacksmithinganvil

That's it! The end result will be a perfectly usable anvil that will suffice  general blacksmithing around the house or farm.

More posts about blacksmithing here.

blacksmithing_hot_chisel2

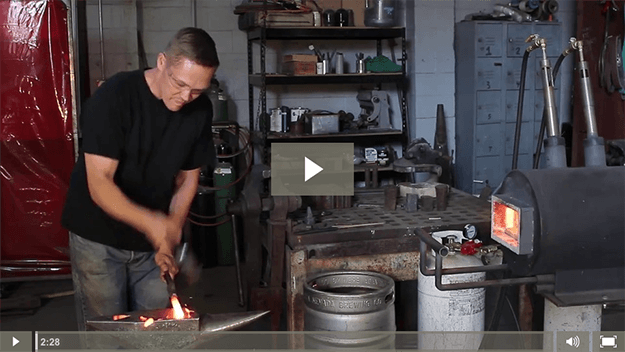
That’s all, fellow homesteaders! Did you enjoy our DIY blacksmithing anvil tutorial? Let us know in the comments section below what troubles you had or what you did differently when making your homemade anvil. Do you have a blacksmithing project that's a staple on your homestead? Share it with us and we’ll give it a shot. 

Do you have Instagram? Don’t forget to join us @HomesteadingUSA.

Click here to Like Us on Facebook.

Click here to Follow Homesteading on Pinterest.

This post is an adaptation of the instructable's' Railroad Track Anvil.

Filed Under: Appliances & Equipment, Blacksmithing, Craftsmanship, Projects, Upcycle, Upcycling, Workshop Tagged With: homesteading projects, homesteading skills, how to make an anvil

Comments

  1. David says

    October 27, 2014 at 10:22 PM

    Being a retired welder, I would suggest that a bevel be ground on the lower edge of the spring before welding on the track section. This will give you a better weld sequence, 1 bead inside with 2 on the outside. All slag to be cleaned off after each pass, to minimize occlusions (pinholes) in the weld), While it would be hard to warp the track, the truck spring could warp if welded continuously. I would back step the welds, welding about 3 – 4 inches at a time. always starting a new weld 3 – 4 inches in front of the previous weld, alternating on opposite sides.
    USMC / USCG Damage Controlman (Ret.) Former Shipyard welder also, approx 45 years welding experience..

    Reply
    • Riley Carlson says

      November 14, 2014 at 10:06 PM

      Thanks for your suggestions and your service!

      Reply
  2. r. dalton says

    October 30, 2014 at 3:05 AM

    These instructions are not very clear at all! You never explain what a “truck leaf spring” is or where I’m supposed to get one. You talk about a torch being ideal for softening the metal – then you never use one. thanks for nothing.

    Reply
    • Brad Osborne says

      July 6, 2019 at 8:32 PM

      Truck springs are available at most scrap yards for pennies on the dollar or at a truck repair for a small sum.

      Reply
  3. Charles Stevens says

    November 24, 2014 at 4:53 AM

    I’m a farrier and blacksmith. As track is 90 point carbon steel, don’t bother welding 60 point spring steel to it, your going backwards. Many beginning smiths start with rail, if you actually upturn it, you have a very solid 1 1/2″ x 3″ face to work on, the web can be ground to make a hot cut,wile the foot can be notched and ground to form a double horned bick. Lot less work and a better tool. If you want a bigger face use the face on a sledge hammer or flip the rail back over, you have it, use the whole thing.

    Reply
  4. Abigail Olsen says

    December 10, 2014 at 7:25 PM

    Does anyone have any ideas on where to find a piece of railroad track scrap? I don’t seem to be able to find them “just lying around”…

    Reply
    • Riley Carlson says

      January 2, 2015 at 10:29 PM

      Try looking on Craiglist in areas surrounding yours or visiting local antique stores.

      Reply
    • Gary Rudolph Ronan says

      June 18, 2019 at 10:05 PM

      I know this is an old post but just fyi, you might find old railroad tracks in A local scrap yard. The only problem is you might have to buy the whole track as they wouldn’t have the time or wherewithal to cut one to the size you need!
      That is the only place that I know you might find one other than the one your local Amtrak rides on and they really frown on such antics!!

      Reply
  5. mark lehto says

    June 17, 2019 at 6:53 PM

    great article, it should be easy to build

    Reply

Trackbacks

  1. (DIY) Build Your Own Blacksmith's Anvil says:
    January 23, 2016 at 11:47 AM

    […] There are many DIY-style projects for this, but we’d like to recommend the one over at Pioneer Settler, and have laid out the steps below (for a fuller overview of the project, including a list of materials needed, visit the original project page here). […]

    Reply
  2. Just How To Make An Anvil In Minecraft – 123gite.com says:
    February 12, 2021 at 4:19 AM

    […] more about how to use a anvil in minecraft here. The anvil has a limitation of 39 levels; beyond that, repairs are declined. Furthermore, the […]

    Reply

Leave a Reply Cancel reply

Your email address will not be published. Required fields are marked *

REGISTER TO Get Our FREE Homesteading magazine.

DIY Projects And Get This FREE GIFT

Subscribe To Our Newsletter:

  • Facebook
  • Instagram
  • Pinterest
  • Tumblr
  • Twitter
  • YouTube

Popular Articles

Top 15 Ways To Make Money On Your Homestead

Kickstart Spring By Starting Your Own Straw Bale Garden

The Best Egg Laying Chickens For Your Homestead

50 Gardening Tips And Tricks To Become A Successful Homesteader

ShadowBirds

Important Pages

  • About Homesteading
  • Contact Us
  • Privacy Policy
  • Returns
  • Terms & Conditions
  • Write For Us
  • Advertise With Us
  • Information Disclaimer

Other Great Sites

  • DIY Projects
  • Survival Life
  • Garden Season
  • Outdoor Warrior
  • Sewing.com

Resources

  • Hey Riley
  • Winter Survival
  • Raising Backyard Chickens
  • Canning & Preserving
  • Join Our Newsletter
  • Returns Policy
Homesteading
Email Support: [email protected]
Phone: 512-806-7603

Product returns go to:
1889 E Maule Ave, Ste G
Las Vegas 89119

Copyright © 2023 · Homesteading


This copyrighted material may not be republished without express permission. The information presented here is for general educational purposes only.

MATERIAL CONNECTION DISCLOSURE: You should assume that this website has an affiliate relationship and/or another material connection to the persons or businesses mentioned in or linked to from this page and may receive commissions from purchases you make on subsequent web sites. You should not rely solely on information contained in this email to evaluate the product or service being endorsed. Always exercise due diligence before purchasing any product or service. This website contains advertisements.