One of the things I like about being a homesteader is you get to experiment, to create, and to do more with what you have. Especially during this time of COVID-19 pandemic and lockdown when we are all practicing social distancing and are in self-quarantine. For instance, if you get bored, you can actually spice up your life by canning chicken!
Yes, the chickens you have in your backyard can be more than just providing you with meat and eggs. They can, in fact, add more flavor to your pizza, bring a tasty zest to your pasta, and even give you a crunch when you bite that taco. Chickens are also ideal if you plan to dish out on your homemade soup or casserole.
However, bear in mind that canning chickens is not just about putting, stuffing, and storing your chickens in a jar, and that's it. Canning chickens — when done properly — destroys microorganisms that could cause the food to spoil, leaving it to last for about 2 years.
So let us start!
RELATED: 26 Canning Ideas And Recipes For The Homestead | Homesteading
In this article:
- Why Is Canning Chicken Important?
- What Do You Need to Know Before You Start?
- Step-By-Step Guide to Canning Chicken
- Q and A in Canning Chickens
Everything You Need to Know to Safely Can Chicken at Home
Why Is Canning Chicken Important?

1. It Is Convenient
If you are always on the go or just too tired to whip up something “extravagant”, canned chickens can help you save time. Just pop the jar out of the freezer and mix this with your other meals. Your food is ready to go, and so are you.
2. It Saves You Freezer Space
It frees up space in your freezer. Instead of stuffing whole chickens inside, you just get to put in these cute, little jars stuffed with your chicken chunks.
3. It Lasts Longer
Of course, when you put a chicken in the freezer, it also lasts long — but how long? It is proven that canning chicken can last for up to 18 months! I believe that even if this pandemic ends — not really sure when that will be — you can still consume your canned chickens.
Important Note: If you plan on canning meat, chickens included, you must use a pressure canner because chicken is a low-acid food.
What is low-acid food? This means that chicken reaches a much higher temperature than high-acid foods and when you use a pressure canner. This preserves food without the added “insurance” of the acid.
What Do You Need to Know Before You Start?
If you decide to butcher your own chickens, you need to dress them first and let them chill for six to 12 hours before canning them. If you use chickens bought from the store, these are already dressed, and so they are ready to go.
Make sure that your chickens are thawed before you start canning them.
1. Raw Pack or Hot Pack?
There are two ways to can chickens.
- The raw pack – You can just stuff them directly in the jar.
- The hot pack – Cook your chickens for a short period of time, and then stuff them in a jar.
You can do either one but some say that using a hot pack lasts longer. It still depends upon you, though.
2. Bones in or Bones Out?
You can choose to can chickens with their bones or without. It just really depends on your preference.
3. Which Chicken Part?
If you use chicken with bones, make sure you cut the chicken into pieces before you can them. Make sure too that these bones fit into the jar, or else you will have wasted room in the jar.
When using boneless chicken breasts or thighs you bought from the store, you can make uniformed chicken cubes to put inside your jar.
Step-By-Step Guide to Canning Chicken

Materials and Ingredients You Need:
- Pressure Canner
- Canning jars, lids, and rings (either quarts or pints)
- Canning utensils
- Salt, garlic powder, and pepper
- Boneless or bone-in chickens, whole chicken or specific parts
- Skillet
Step 1: Clean Your Kitchen & Prepare Your Pressure Canner
Before you start, it is important to keep your kitchen clean. Prepare the area with your equipment and materials. Then, fill your pressure canner with several inches of water and then turn the burner on so that it will begin to heat.
RELATED: How To Use Your Canning Supplies
Step 2: Prepare Your Chicken

If choosing to keep the bones, separate the meat at the joints then stuff it into the jar. Make sure the pieces fit in the jar.
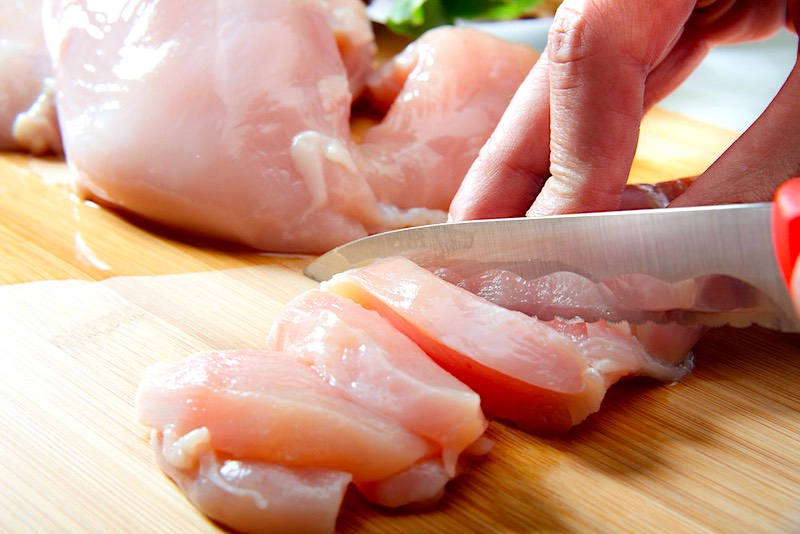
For boneless chicken, cut this into pieces. You have the option to remove the skin from your chicken as well.
Step 3: Pack Into Jars
For the raw pack method:
- You can sprinkle raw chicken pieces with garlic powder, salt, and pepper.
For pint jars:
- You can add 1/2 teaspoon fine sea salt and for quart jars, 1 teaspoon.
- Lightly brown them in a skillet before you stuff them in the jars.
- This is still technically “raw” but some want to add more flavor and color to their finished product.
- Fill the jar with water, leaving at least 1-inch space at the top.
For the hot pack method:
- Bake, boil or steam until the chicken is about 2/3 done.
- Stuff the almost cooked chicken into the jars, and then add salt.
- Fill the jar with water, leaving at least 1-inch space at the top.
Step 4: Remove Air Bubbles & Affix Lids
|
Remove air bubbles with a plastic knife, canning utensils, or even a butter knife.
Next, remove any residue by wiping the rim of the jar. Using your finger, adjust the lids and then process in the pressure canner as follows.
For jars without bones (either hot or raw method): Process pints for 75 minutes and quarts for 90 minutes.
For jars with bones (either hot or raw method): Process for 65 minutes and quarts for 75 minutes.
If you are using a dial-gauge pressure canner, process jars at 11 pounds pressure (altitudes of 0 to 2,000 ft) or at 12 pounds pressure (altitudes of 2,001 to 4,000 ft).
If using a weighted gauge pressure canner, you can process jars at 10 pounds pressure (altitudes of 0 to 1,000 ft) or at 15 pounds pressure (altitudes above 1,000 ft).
Final Step: Store Your Jars!
You can now store your jars in the freezer, and pop every now and then. Mix your canned chickens with different meals.
Q and A in Canning Chickens

How Long Does Canned Chicken Last?
Canned chickens last for up to 18 months. But if stored properly in a cool and dark place and in normal temperature, and the seals in the jar are good, they can last even longer.
Should You Use a Water Bath Canner for Canning Chickens?
No, you should not. Since chicken is a low-acid food, it is unsafe when you use it in a water bath canner. You should only use a pressure canner in canning chickens.
How Can You Use Canned Chickens?
Canned chickens can be used in any meals such as soups, tacos and pasta, pizzas, enchiladas, and anything else where shredded chickens are needed. You just pop it — no need to cook again — and it's ready to go!
Don't own a pressure canner? Check out this old fashioned method of canning meat by Tim Farmer:
With so many people buying toilet paper and bottled water these days and in self-quarantine mode, I believe that this is the perfect time to preserve and store your food. Start by canning chickens, and you will surely go a long way, virus or no virus.
What do you think of this step-by-step guide to canning chickens? How do you use your canned chickens? Let us know in the comments below!
UP NEXT:
- Pickled Okra Recipe | Homesteading Canning Ideas
- Backyard Chickens Facts | 11 Chicken Facts For Homesteading
- Square Foot Gardening [Chapter 1] Homestead Handbook
Fellow homesteaders, do you want to help others learn from your journey by becoming one of our original contributors? Write for us!

I really like this guide! However, I have a question about storage. You specify putting our canned chicken in the freezer and the here at the end, you say as long as it is stored in a dark, cooled place and the lid is properly sealed, it will last longer. So, specifically, if we store them out of the freezer properly, how long will it last?