
At a Glance: Fermented Vegetable Preservation Recipes
- Proper salt ratios make lactic fermentation self-regulating and incredibly safe for beginners.
- Start with ferments like sauerkraut and pickles to your build food preservation skill.
- Trust your senses: smell and taste are your most reliable verification tools.
Want to start food preservation but scared of doing it wrong?
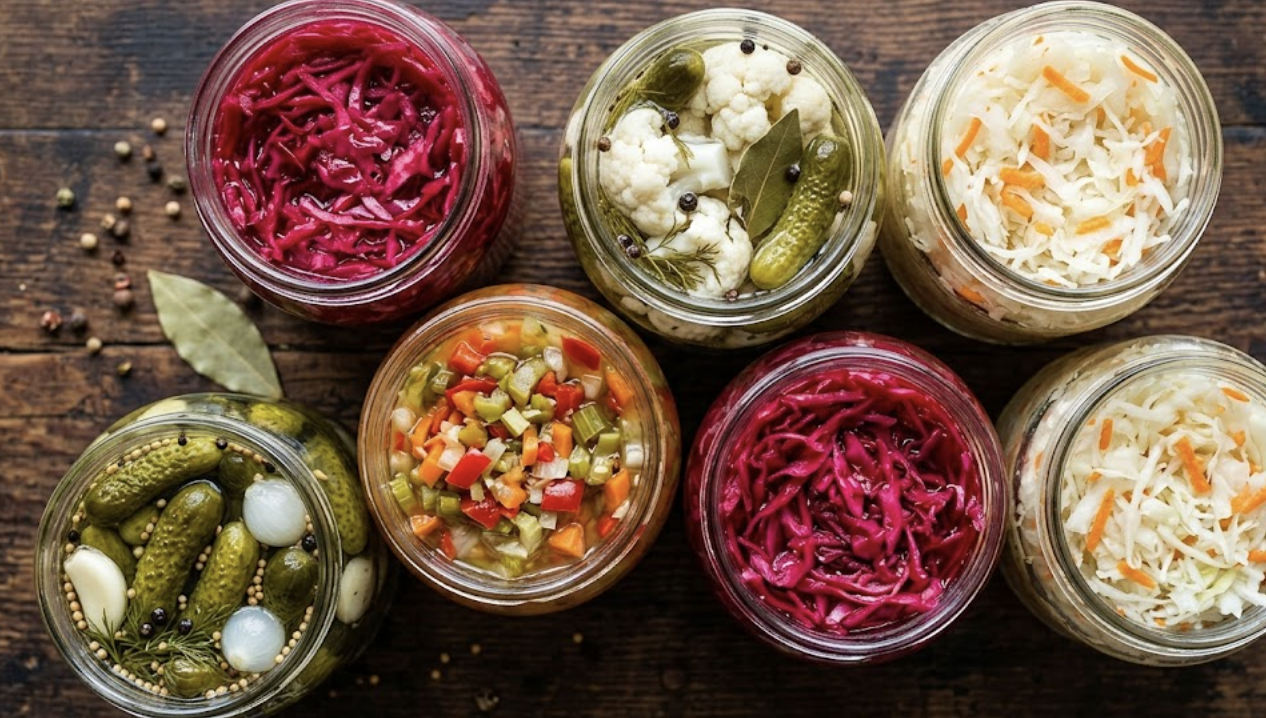
Today, we’ll start with simple fermented vegetable preservation recipes: a foundational cabbage kraut that builds your skills, a crunchy carrot stick that wins over skeptical kids, a classic dill pickle that replaces your supermarket habit, and two more essential classics to round out your homestead pantry. We’ll also talk about safety standards and verification tools to preserve safely at home.
RELATED: Fermenting Vegetables | Everything You Need To Know
Choosing Your Fermented Vegetable Preservation Recipe
Choosing your first fermented vegetable preservation recipe shouldn’t feel like a high-stakes chemistry exam. We are stepping away from the strict, lab-tested rules of canning and leaning into the wild, self-protecting world of lactic fermentation. The secret is, as long as the salt ratios are correct, the process regulates itself.
Recipe 1: Traditional Sauerkraut
Sauerkraut is fermented cabbage and one of the oldest preserved foods on earth. The fermentation process creates natural probiotics that support gut health and digestion. You can store it for months in the fridge and costs almost nothing to make.
Sauerkraut is the ultimate gateway ferment. It requires no water, just the cabbage’s own juices.
Ingredients: 1 medium head of green cabbage, 1 tablespoon of high-quality sea salt.
Step 1: Shred the cabbage thinly and place it in a large glass or stainless steel bowl.
Step 2: Sprinkle the salt over the cabbage. Massage it firmly with your hands for 5 to 10 minutes until it releases enough liquid to pool at the bottom.
Step 3: Pack the cabbage tightly into a clean glass mason jar and press down hard so the liquid rises above the vegetables.
Step 4: Weigh the cabbage down (using a glass weight or a smaller jelly jar) so it stays submerged under the brine. Cover loosely and let it sit at room temperature for 1 to 4 weeks. Taste it weekly until it reaches your preferred tartness.
Recipe 2: Salty Carrot Sticks
Fermented carrot sticks tastes mildly tangy and naturally sweet, making them a whole food snack your kids will actually eat. Carrots fermented in brine develop beneficial bacteria that aid digestion and boost nutrient absorption. Replace store-bought processed snacks with something you made yourself in under 10 minutes.
Ingredients: 4 to 5 large carrots (peeled and cut into sticks), 2 cups of filtered water, 1 tablespoon of sea salt.
Step 1: Dissolve the salt into the filtered water to create your brine.
Step 2: Pack the carrot sticks vertically into a clean mason jar, leaving about an inch of space at the top.
Step 3: Pour the salt brine over the carrots until they are completely covered.
Step 4: Place a weight on top to keep them submerged. Cover loosely and leave on the counter for 5 to 7 days. Once they taste deliciously tangy, move them to the fridge.
Recipe 3: Classic Garlic Dill Pickles
These traditional lacto-fermented pickles taste tangy, garlicky, and nothing like the vinegar pickles from the grocery store. Fermentation preserves the cucumber’s natural enzymes and adds live cultures that support a healthy gut. Pickles are also one of the most forgiving entry points for a beginner.
Ingredients: 5 to 6 pickling cucumbers, 2 cloves of smashed garlic, 1 head of fresh dill, 2 cups of filtered water, 1.5 tablespoons of sea salt.
Step 1: Dissolve the salt in the water to make the brine.
Step 2: Place the garlic and dill at the bottom of a clean jar.
Step 3: Pack the cucumbers tightly into the jar. You can leave them whole or slice them into spears.
Step 4: Pour the brine over the cucumbers, ensuring they are fully submerged. Weigh them down, cover, and let ferment for 1 to 2 weeks on the counter.
Recipe 4: Classic Dilly Beans
Dilly beans are fermented green beans seasoned with garlic and dill. They’re crisp and tangy. Fermenting dilly beans is the best solution when your summer garden produces more than your family can eat. These greens retain more vitamins than heat-processed versions and deliver the same probiotic benefits as sauerkraut.
Ingredients: 1 pound of fresh green beans (ends snapped off), 2 cloves of garlic, 1 head of fresh dill or 1 teaspoon dill seeds, 2 cups of filtered water, 1 tablespoon of sea salt.
Step 1: Dissolve the salt into the filtered water to make your brine.
Step 2: Drop the garlic and dill into the bottom of a tall mason jar.
Step 3: Pack the green beans into the jar vertically. You want them packed tight enough that they hold each other down.
Step 4: Pour the brine over the beans until completely covered. Weigh them down, cover loosely, and let ferment for 7 to 14 days before moving to cold storage.
Recipe 5: Fermented Red Onions
Fermented red onions are thinly sliced onions transformed by brine into something sweet, tangy, and pink. The fermentation process mellows the sharp bite of raw onion while adding gut-friendly live cultures to an everyday condiment. A single jar upgrades eggs, tacos, grain bowls, and sandwiches for the entire week.
Ingredients: 2 large red onions (thinly sliced), 2 cups of filtered water, 1 tablespoon of sea salt.
Step 1: Mix the salt and filtered water to create the brine.
Step 2: Pack the sliced red onions tightly into a mason jar.
Step 3: Pour the brine over the onions, ensuring every slice is trapped beneath the liquid.
Step 4: Add a weight, cover loosely, and leave on the counter. These ferment quickly. Start tasting after just 3 to 5 days.
The Universal Brine Method
For any chunky or whole vegetable, you can rely on the universal brine method. Simply mix 1 to 3 tablespoons of sea salt per quart of filtered water. This creates the perfect environment where bad bacteria cannot survive and where good bacteria can thrive. Pour this over radishes, green beans, or cauliflower, always ensuring the vegetables stay trapped under the liquid.
Verification, Senses, and Storage
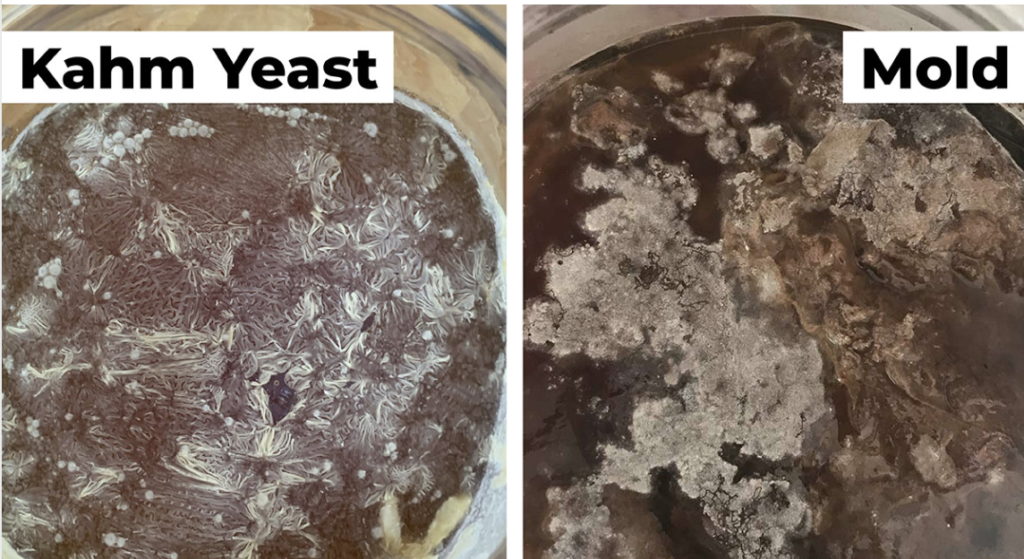
The biggest hurdle for beginners is learning to trust your own senses. Use the sensory test: look, smell, and taste in tiny amounts. If the ferment smells bright, sour, and tangy, it’s safe to eat. If it smells like rotting garbage, your senses will physically reject it. That’s when you throw it out. If you see a thin, white, powdery layer on top of the liquid that’s just Kahm yeast (harmless, just skim it off), but fuzzy, colorful mold means the batch belongs in the compost.
Final Thoughts
You do not need to turn your whole kitchen into a factory on day one. Master one skill at a time. By starting a simple jar of sauerkraut today, you are stepping out of the role of a helpless consumer and reclaiming a legacy of competence for your family. Keep a continuous cycle going. Always have something alive and working on your counter.
Check out this Youtube video by @Happy Bellyfish:
FAQs Fermented Vegetable Preservation Recipes
What is the easiest fermented vegetable preservation recipe for a beginner? Sauerkraut is the absolute best entry point. It requires only cabbage and salt, makes its own natural brine, and is incredibly forgiving for first-timers learning to trust the preservation process.
Can a fermented vegetable preservation recipe cause botulism? No. Lactic fermentation is naturally self-regulating. The acidic environment created by the correct salt ratio prevents botulism spores from surviving. This is entirely different from the risks associated with improper low-acid pressure canning.
Do I need special equipment to start fermenting? You don’t need expensive gear to be self-sufficient. Clean glass jars, basic sea salt, and a smaller jelly jar to use as a weight are all you need to get started safely and effectively.
Why did my fermented vegetables get mushy? Mushy vegetables usually happen if the environment was too warm, causing the ferment to process too rapidly, or if the vegetable wasn’t fresh to begin with. Always use firm produce and keep jars out of direct sunlight.
How do I know if my ferment has gone bad? Trust your senses. If it smells bright and sour, it’s good. If it smells putrid or has fuzzy, colorful mold growing above the brine line, discard it immediately.
