

Learn how to milk a goat the right way here in our homestead handbook.

 You are reading Chapter 8 of our Homestead Handbook:
Raising Backyard Goats
Chapter 8:
All About Milking
As a new goat owner who is interested in milking, you should also have knowledge in bucks and breeding, raising the kids, and the nutrition and feed you give them. People normally milk their goats at twelve-hour intervals and make it a normal routine. If you decide to milk during much longer gaps, you will wind up seeing less milk production. The saying that says “if you don’t use it, you will lose it” holds very true here. Try to set a time schedule that works for you and adhere to it within the recommended twelve-hour intervals. If you decide you want to milk starting at six in the morning and six at night or ten in the morning and ten at night is all up to you. You can also follow the intervals of eight and sixteen hours apart or ten and fourteen hours apart as well if you do not think the twelve-hour intervals will work for you. You don’t want to milk any less than sixteen hours as your milk production will not be the same. The best routine you pick would be one that you set with your goat in mind in nothing else. You also want to ensure good sanitation so the milk you get if safe and drinkable.
8.1 – Prepare To Milk Your Goat
Just like in a kitchen where you should have your ingredients ready before you start, you want to do the same with milking. Before you start anything, you always want to gather your equipment first. Here is what you will need:
- Milk Stand: This is one of the most important things you’ll want to get started. The most comfortable way to milk you goat is while you are sitting down while they are propped up at a higher level hair. You are at eye level of their teats which makes working easier, and they get used to ‘the chair’ being the milking area. Once they are trained and accustomed to it, you will even see them jumping on it, ready before you are when you are setting up. You do not need anything fancy. You can buy one made of metal or wood or make it yourself. Many people like metal mesh stand because of the easier clean up involved when there are spills, and there is no way to avoid this from happening. They are slip resistant whereas wooden stands are slippery when it is wet. The main difference of the two is price, metal made stands can cost you a few hundreds whereas wooden stands can be made much cheaper, or free.
- Milking Pail: You will want to get one that is stainless steel for easy cleaning. Inspect it when you get it to see if there any openings or cracks; you do not want this because it will make an easy home for bacteria. Even if you were to buy a milking machine, it still would not be able to empty the udder completely so you will want to keep this handy
- Strip Cup: Find a material of stainless steel and a wire mesh filter that rests on the surface. It is used to alert you if the milk is chunky before you even begin to milk. If the milk is chunky, it is often a symptom of mastitis that needs to be treated. You can alternatively use a coffee cup you no longer use or a tin can. You will use the strip cup as your tester; it collects the first few squirts of milk you receive from the goats’ teats. The first few squirts of milk have also be shown to contain the highest amount of bacteria
- Milk Filter: Anything can fly around and enter your milk in the open air, so you want to have some barrier on over your milk. These are also disposable. Or you can use cheesecloth and stretch it above the surface of your pail to substitute as one. The only thing you should make sure you do is wash and boil it clean between each milking session so that it stays sanitary.
- Teat Dip: Organic dairies make their teat dips out of iodine, but there is also spray and chemical teat versions available. Should you use a dip, you will need to find something that can hold it and any old canister or bottle should do just fine. You will not need to use the dip if you have baby goats that you allow to be with the goat after you are done milking them. It is made to sanitize the tip of the teat as you are about fifteen to twenty minutes away from wrapping up the milking session.
- Udder Supplies: When you are ready to clean the udder, you can purchase disposable baby or udder wipes. Other people may prefer to clean their goats’ udder with good old-fashioned soap and warm water along with a washcloth.
Storage Containers:
This is probably something you already have lying somewhere inside your home. You can choose to use just about anything from pitchers, canning jars or old milk bottles. Whatever you use, make sure it has a container, you don’t want to leave milk uncovered. It will eventually develop a strange taste and have a dry film resting on the surface.
8.2 – How to Milk a Goat
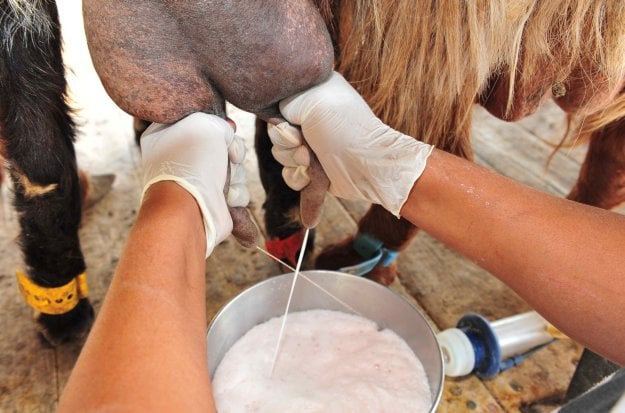
There are two methods you where you can decide how you want to milk you goat, one of which being by hand. If you have a couple of goats, you will have no problems milking by hand. When you do it for the first time though, it sure will feel as if you just finished a workout by how much your arms will burn. Now that I think about, milking by hand does serve as a pretty good form of exercise. If you have health issues, like carpel tunnel syndrome, I would not suggest you milk by hand and go for the machine. If you have a goat with long teats, you will want to use four fingers. If they have short tears, you probably will not be able to use your four fingers and should try massaging the udder and place a warm cloth on the udder to assist the milk to fall. Before you begin milking you will want to wash and dry your hands or put on a latex glove. Washing and putting on gloves will also help prevent the goat from getting mastitis.
PROCEDURE ON HOW TO MILK YOUR GOAT
- Close the top of the teat by using your thumb and pointer so that milk will be allowed to flow out the teat, and not backflow to the udder
- Have the next finger following your pointer also wrapped around the udder. You should begin to see milk squirting out
- Have your fourth finger out and close it around the teat, applying stable pressure
- The little finger can now join the rest of the gang, and you can begin to squeeze using your entire hand. You want to milk in a smooth, flowing fashion with no pulling involved; just squeeze gently.
- Remove your hand from the teat to allow it to inflate again with milk and continue doing this process with your opposite and on the other teat.
- When you start to notice the milk flow has halted, you can ‘bump’ the udder that will allow you to get a couple more squirts.
- Cover the teats using your teat dip to inhibit bacteria from going inside the orifice.
MILKING METHOD
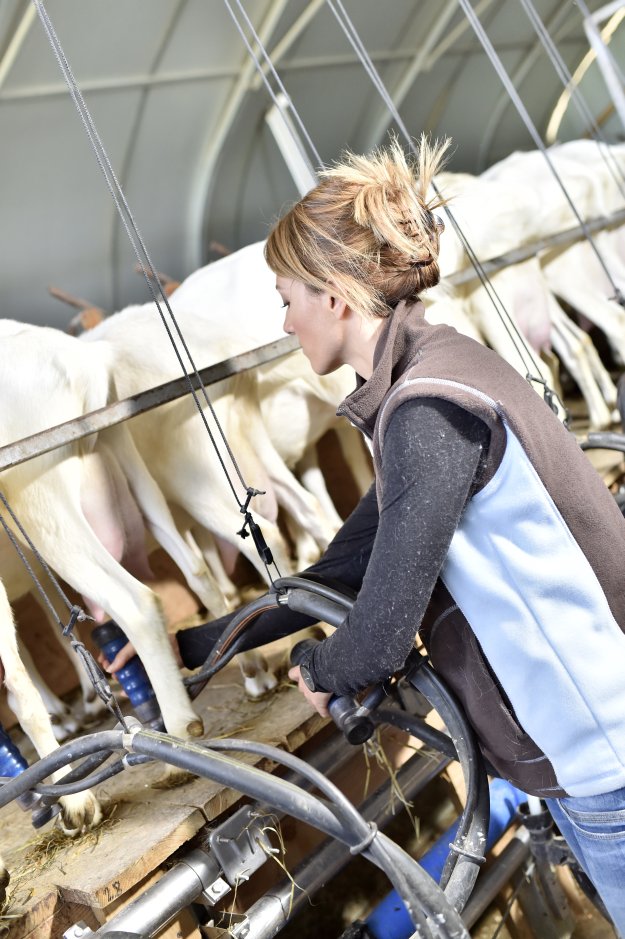
You can milk goats with a machine. I will not go too deeply into this method, but there is a wide variety of ways you can choose. The cost of these machines ranges anywhere from a few hundreds to a thousand and some. The machines that are the cheapest will be manually operated, and can only do a teat at a time. Milking that way will be time-consuming for anyone that has a lot of goats, but if you only have just a few, it would work nicely. The electric versions can do plenty more. It can milk both teats simultaneously, and you can operate on more than one goat at a time. You want to pay extra attention to sanitation when you are using a milk machine. All the pieces that you use on the goat should be cleaned up after each use. Sanitize tubing and inflations with a special brush that you can buy from most companies that sell this machinery. A milking machine will spend you less time milking your goat, and it puts less strain on your hands and wrists for people concerned about it.
That was Chapter 8: How to Milk A Goat from our Homestead Handbook: Raising Goats
