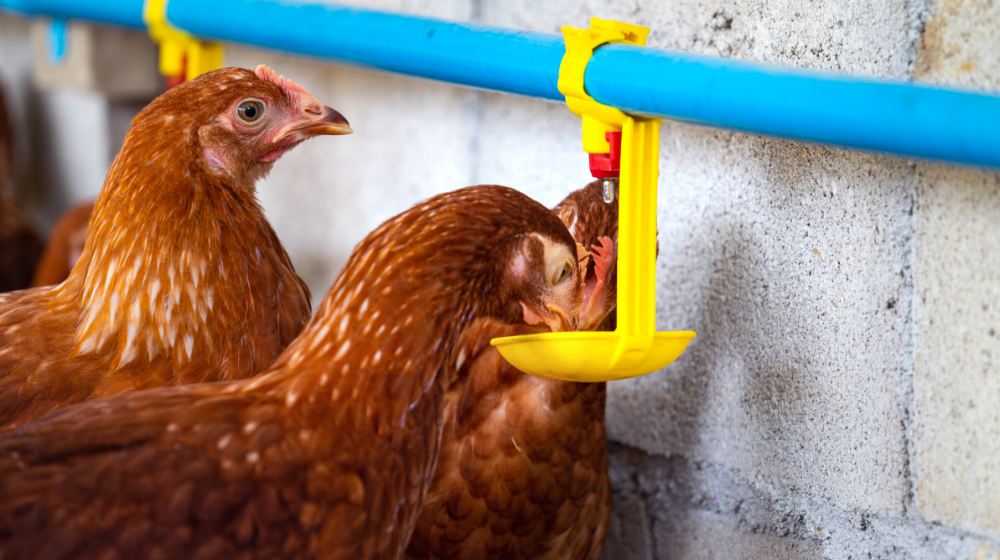

At a Glance
- A chicken watering station keeps water clean and up off the coop floor.
- Hens drink up to about a sixth of a gallon each on hot days.
- A 5-gallon bucket covers six hens for about five hot days.
If you’re looking for an easy-to-build and easy-to-maintain chicken watering system, here’s a list specifically created to keep your flock hydrated!
Here’s the short answer first. Put the water in a closed container, let the hens drink through cups or nipples, and raise it off the floor. That one change keeps dirt and droppings out of the water. A chicken watering station also cuts your daily chores, because you refill it every few days instead of every morning.
RELATED: Raising Chickens In Your Homestead | The Ultimate Guide
As an Amazon Associate, we earn from qualifying purchases.
How Much Water Does Your Flock Need?
Plan on about a sixth of a gallon per hen on a hot day. Utah State University Extension puts adult chickens at 0.05 to 0.08 gallon a day in cool weather and 0.08 to 0.16 gallon in hot weather. That’s the number that decides how big your container should be.
Here’s the math at the top of each range, so you’re never caught short:
| Hens | Cool day | Hot day | A 5-gallon bucket lasts (hot weather) |
|---|---|---|---|
| 4 | about 0.3 gallon | about 0.6 gallon | about 7 days |
| 6 | about 0.5 gallon | about 1 gallon | about 5 days |
| 10 | about 0.8 gallon | about 1.6 gallons | about 3 days |
Refill before the bucket runs low. Cups and nipples stop working well once the water drops below the fittings.
CHECKPOINT: Mark the water line with a marker each morning for a few days. The gap between marks is what your flock really drinks, so you’ll know exactly how often to refill.
Pick Your Path Before You Buy
As an Amazon Associate, we earn from qualifying purchases.
Most of these builds come down to one choice: cups or nipples on a closed container. Cups are the easiest for new hens, since they can see the water. Nipples keep water the cleanest but take a few days to learn.
If you’re going with cups on a bucket, a 6-pack of poultry water cups with tee fittings and a hole opener is the only part most hardware stores don’t carry.

- 【Chicken Water Feeder】Automatic chicken waterers are the perfect addition to your coop. Our chicken water cups provide a constant...
- 【Leakproof】Features an excellent leakproof design that ensure a steady water supply for your chicken. Each chicken feeder cups...
- 【Wide Applications】Our chicken waterer cups is the ideal solution for a variety of pets, including chicken, duck, geese, turkey...
If your winters freeze, a heated waterer with side nipples saves you from carrying buckets in the dark.

- Heated Water Dispenser for Poultry: Keep your chickens, turkey, and geese hydrated all winter long with this 2-gallon heated poultry...
- Temperature Controlled: 60-watt water warmer is thermostatically controlled and operates only when needed, saving you time and...
- Unique Container Design: Farm waterer bucket features a metal handle for hanging, or it can be placed on the ground; For easy...
What You Need for Most of These Builds
Supplies:
- A clean food-grade bucket with a lid, 5 gallons for most flocks
- A drill with a bit sized to your cup or nipple fittings
- Cup drinkers or horizontal nipples
- Plumber’s tape for threaded fittings
- Cinder blocks or a sturdy stand to lift the station
9 Chicken Watering Station Builds From Free to Fully Automatic
Each build below keeps water cleaner than an open dish. They run roughly from the cheapest and smallest to the most automatic, so start near the top if you’re new.
1. Homemade Can-and-Pan Chicken Waterer
If you’re just getting started and short of cash, this homemade waterer is your answer.
Grab a 9-inch cake pan and a #10 can, the big restaurant size, or any sturdy container. Put 2 holes in the can, one on each side, about an inch up from the open end. Make sure the holes sit lower than the lip of the pan.
CHECKPOINT: Run your finger around each hole. Punched metal leaves sharp edges, so file them smooth before the hens get near it.
Fill the can with water and set the pan on top like a lid. Holding the pan in place, flip the whole thing over. The water flows out of the holes into the pan and stops once it reaches the level of the holes. As your chickens drink, the can refills the pan.
It isn’t a long-term setup, but it’s simple and frugal enough to keep your flock well hydrated.
2. DIY Automatic 5-Gallon Chicken Watering System
This DIY automatic waterer is easy to put together with the right materials, and it’s hands-free once it’s filled. It’s made of plastic and rubber, so it’s also easy to take apart and scrub.
Use a clean food-grade 5-gallon bucket and basic fittings. Drill slowly with the bucket clamped or braced, and keep your free hand away from the bit.
CHECKPOINT: Fill it and leave it on a dry floor overnight. Any damp ring in the morning means a fitting needs more tape or a snugger hole.
3. PVC Pipe Chicken Nipple Waterer
This PVC pipe nipple waterer is a very simple way to keep water in front of your chickens without messy overturned containers.
4. DIY Soda Bottle Chicken Waterer
A simple and affordable DIY project! You’ll need a 1-liter plastic soda bottle, cutting tools and a soldering iron to make tiny holes.
STOP POINT: Melting plastic with a soldering iron gives off fumes. Work outside, rest the hot iron on its stand between holes, and keep kids back until it cools.
Once you’re done, fill the bottle with water, screw the cap on and turn it upside down. The water flows into the station, and your chickens can poke their heads into the open end to drink. Refill the bottle when it’s empty. Depending on the size of your flock, once or twice a day will be fine.
RELATED: Chicken Breeds [Chapter 1] Raising Backyard Chickens
5. DIY Rain-Collecting Chicken Water System
With a float valve and some basic plumbing supplies, you can build an automatic watering system for your chickens. Water collects in rain barrels and feeds the station through a regular garden hose. Keep the barrel lidded so leaves and bugs stay out.
6. DIY Mesh Chicken Watering System
You can also build a watering system from recycled materials around your homestead. It’s simple to make and won’t break the bank, and it works for a small or large number of chickens.
7. DIY Glass Chicken Waterer
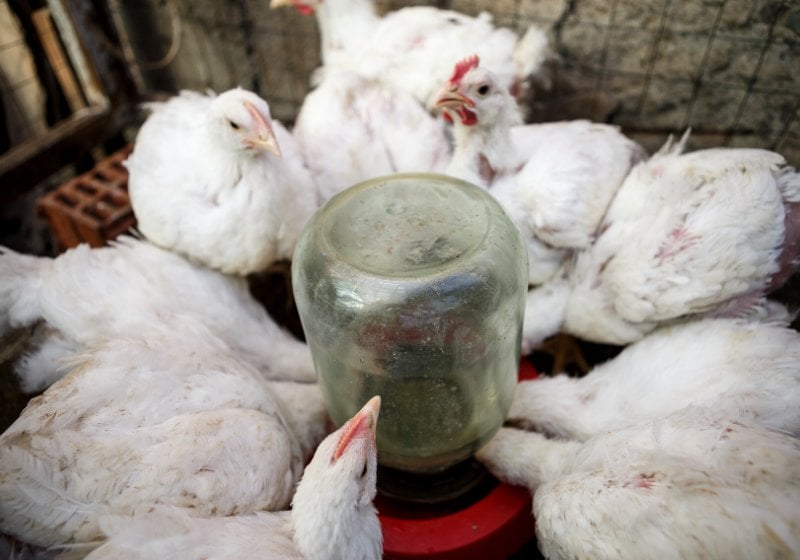
If you’re not a fan of plastic, this waterer made from a glass jar is a treat for you and your flock. It’s small, so it’s best for chicks.
8. No-Mess Watering Station
Besides the nipples, the other big factor in a mess-free coop is a simple tray under the waterer. It catches the drips every time the chickens drink.
9. DIY Chicken Nipple-Bucket Watering Station
This one pairs a bucket with drinking nipples. Watch the video for the exact fittings, then run the same overnight leak test from build 2.
Cups, Nipples or a Fountain?
Each style suits a different flock. Here’s how they compare, so you can match the chicken watering station to your birds.
| Style | Best for | Watch out for |
|---|---|---|
| Cups | Adult hens learning a new system | Grit and droppings collect, and cups get bumped when birds perch on the bucket |
| Nipples | The cleanest water | Hens need a few days to learn, and nipples can freeze |
| Fountain | Chicks and quick setups | Holds a set amount, so check it often so it never runs dry |
Getting Your Waterer Through Winter
Frozen water is the most common complaint once the weather turns. You have two easy fixes. Set a heated base or heated waterer on a stand and plug it into an outdoor-rated GFCI outlet, with the cord kept out of the bedding. Or swap a full bucket in each morning and bring the frozen one inside to thaw.
READ MORE: How To Keep Your Chickens Warm In Winter
Quick Fixes for Common Hiccups
Most first builds have a small hiccup or two. Find what you’re seeing below.
| What you see | Likely cause | Quick fix |
|---|---|---|
| Drips around a fitting | Hole too big or threads dry | Wrap the threads in plumber’s tape, or redrill a fresh hole one size smaller |
| Cups full of grit | Station set too low | Raise it on a block so the cups sit near the hens’ backs |
| Hens ignore the nipples | They haven’t learned yet | Tap a nipple so it drips, and leave the old waterer out for a few days |
| Birds standing on the bucket | Flat lid makes a perch | Hang the bucket or set a sloped board on top |
| Water frozen solid | Cold snap | Heated base on a GFCI outlet, or a morning bucket swap |
Shortcuts to Skip
A few shortcuts sound like time-savers but cause the exact problems people blame on the waterer.
- Any old bucket. Use food-grade plastic for water your hens drink every day.
- A big drill bit “to be safe.” An oversize hole is a common cause of leaks.
- Setting it on the floor. Bedding and droppings end up in the water within a day.
- One waterer for the whole flock. Utah State University Extension suggests keeping extra drinkers beyond your estimate, so a clog never leaves hens dry.
When to Call a Pro
Most of these builds never need help. If you want to run the station off your house water line, ask a plumber about a pressure regulator and backflow protection first. If there’s no outdoor outlet near the coop for a heated waterer, have an electrician add a GFCI outlet instead of running an extension cord through the run.
Buy Once
As an Amazon Associate, we earn from qualifying purchases.
- Best for freezing winters: a heated waterer with side nipples.
- Better for most flocks: a 6-pack of poultry water cups for the bucket build.
- Budget: the can-and-pan waterer, which costs nothing if you have the parts on hand.
Your First Station
Start with the flock you have. Do the water math, then build one bucket this weekend with cups or nipples. A chicken watering station that’s raised and leak tested means cleaner water for your hens and fewer trips across the yard for you.
Up Next:
- Raising Backyard Chickens
- What Do Chickens Eat? Chicken Feed. [Chapter 4] Raising Backyard Chicken | Homestead Handbook
Fellow homesteaders, do you want to help others learn from your journey by becoming one of our original contributors? Write for us!
Editor’s Note: This post was originally published in February 2017 and has been updated for quality and relevancy.
FAQs
How high should a chicken watering station be?
Set it so the cups or nipples sit about level with your hens’ backs. That’s high enough to keep their feet and bedding out of the water but low enough to drink comfortably. A cinder block or two under a bucket usually does it. Raise it as young birds grow.
How often should I clean a chicken waterer?
Check it every day and scrub it once or twice a week. Utah State University Extension says to change water often so bacteria don’t grow and it doesn’t get too warm in summer or freeze in winter. Rinse cups and nipples whenever you see grit or green film.
How many hens can one chicken watering station serve?
It depends on how much the station holds. Utah State University Extension says a standard 1-gallon fountain gives enough daily water for 12 to 15 adult chickens in cool weather and 6 to 12 in hot weather. A 5-gallon bucket holds five times that, so use the water table above to size yours. Keep a spare drinker out so one clog never leaves the flock without water.
Should beginners pick cups or nipples?
Cups, for most new flocks. Hens can see the water in a cup, so they figure it out fast. Nipples keep water cleaner, but birds need a few days to learn them. If you choose nipples, leave the old waterer out until every hen is drinking from the new one.
How do I keep chicken water from freezing?
Use a heated base or heated waterer plugged into an outdoor-rated GFCI outlet, and keep the cord out of the bedding. No outlet? Swap in a full bucket each morning and thaw the frozen one indoors. Skip running extension cords through the coop.
Cups, Nipples or a Classic Fountain?
Cups and nipples both keep water off the floor, but cups are easier to learn while nipples stay cleaner. A fountain trades that for a cheap setup you refill more often.
Tell us what’s in your chicken watering station right now and why it works for your flock.